
Installing and Configuring 2-Line HP LM920 Pole Display
Customer Display is a separate screen that can be used to display marketing material and Basket contents to the customer. In the following example you are shown how to set up HP LM920 Pole Display as the customer display.
HP LM920 Pole Display Configuration for OPOS
Configuration utility for PoleDisplay: sp113058.exe.
Downloads
https://support.hp.com/us-en/drivers/selfservice/hp-pos-pole-display/3790455
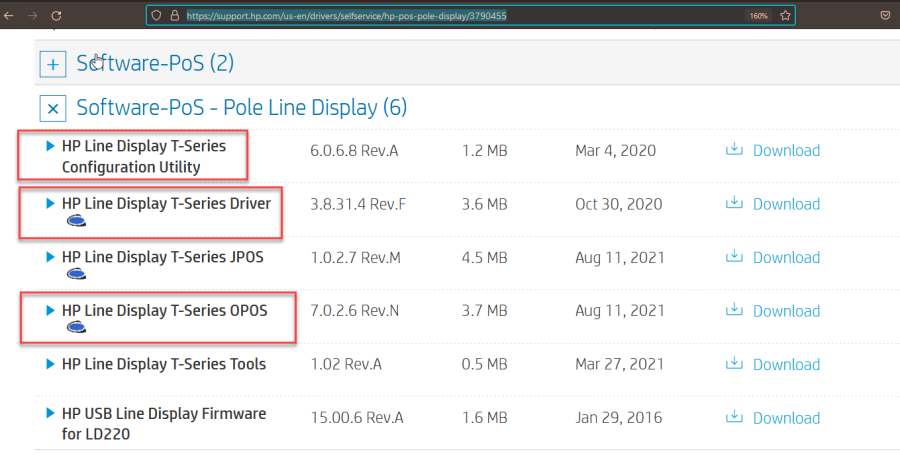
Required files to download
Install HP PoleDisplay Driver (SP110509)
After successful installation, the device is visible in Device Manager → Ports as HP LM920 Display.
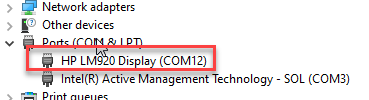
Device visible in Ports
Install OPOS Driver (SP132848)
In installer, uncheck the unwanted USB devices.
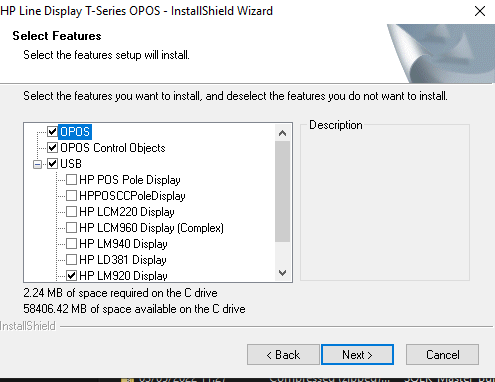
Features to select in installer
After successful installation, the installed OPOS devices are visible in Windows registry.
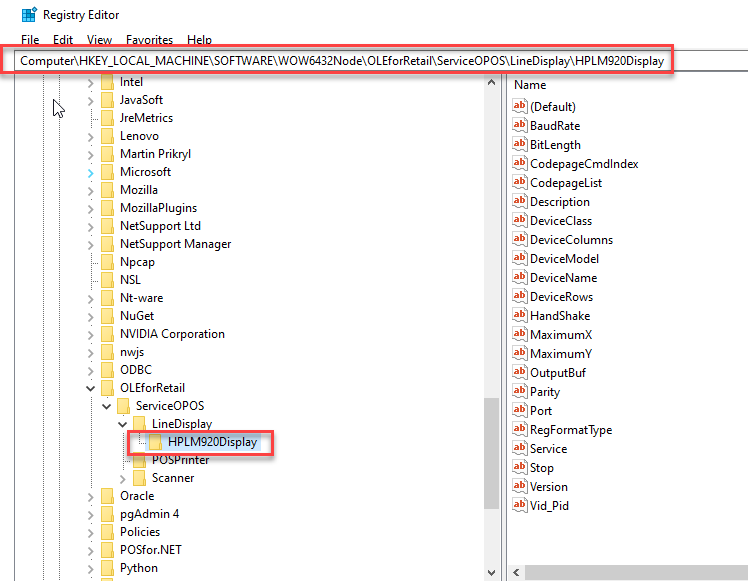
Installed OPOS device in Windows registry
Install and Run Configuration Utility (SP101457)
Reset display to default settings.
Set Codepage to 437 and International Char to Sweden.
Go to Advanced Settings.
Check that the Command setting is ULTIMATE.
Download setting to display.
Display will restart, and will display the settings during restart.
Close the Configuration utility before starting FastContractMeals app.
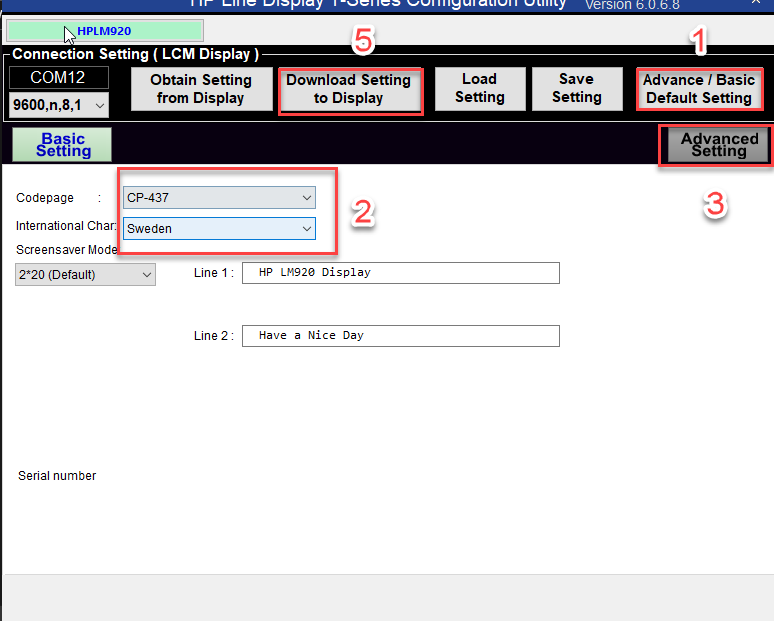
Configuration utility settings
Back Office Configurations
Interaction Service
In the Commerce Cloud Back Office menu click Configurations and select the workstation you want to use with the customer display.
In the Workstation Configurations, go to Interaction Service and click New.
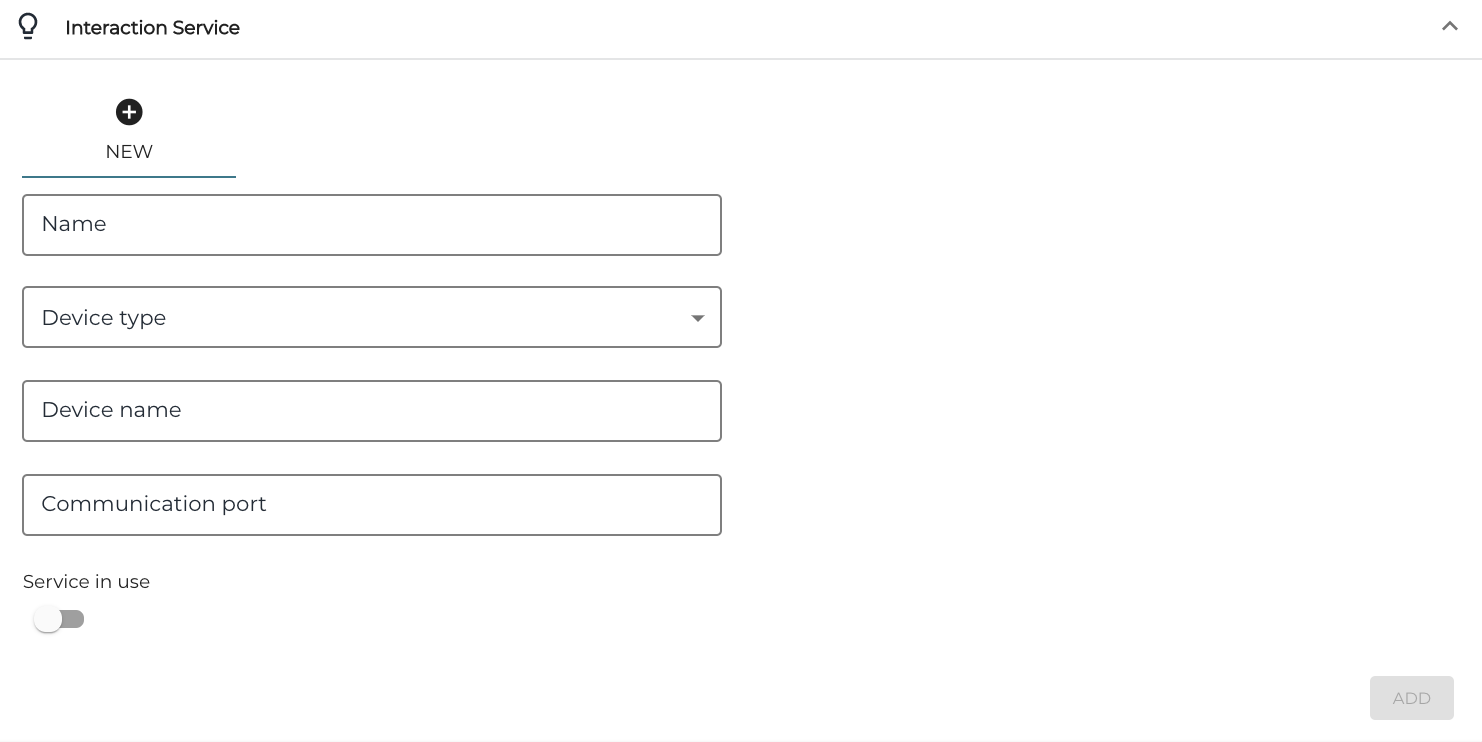
New interaction service
Enter the following information:
Name: Name of the display (for example, Customer Display)
Device type: OPOSdotNETLineDisplay
Device name: HPLM290Display
Communication Port: You can leave this empty.
Click the Service in use switch to ON position.
Click Add to add the new configuration to the workstation
Click Save to save your changes.
FastContractMeal Service
In the Commerce Cloud Back Office menu, click Configurations and select the workstation that is running the FastContractMeal application.
Go to the workstation’s Services list, select FastContractMeal service, and enter the value HPLM920Display to Customer Display OPOS Device Name field.

FastContractMeal Service settings
Click Save to save your changes.
FastContractMeal application needs to be restarted after OPOS device name is changed in the Back Office. It takes a few of minutes to replicate the new information to POS, unless Refresh is manually used on the POS.