
Netvisor
Visma Netvisor is a financial management software service that combines financial management and corporate business processes as a cloud service. With the Netvisor add-on, you can synchronize your accounting information and send invoices from Solteq Commerce Cloud to Netvisor.
Installation
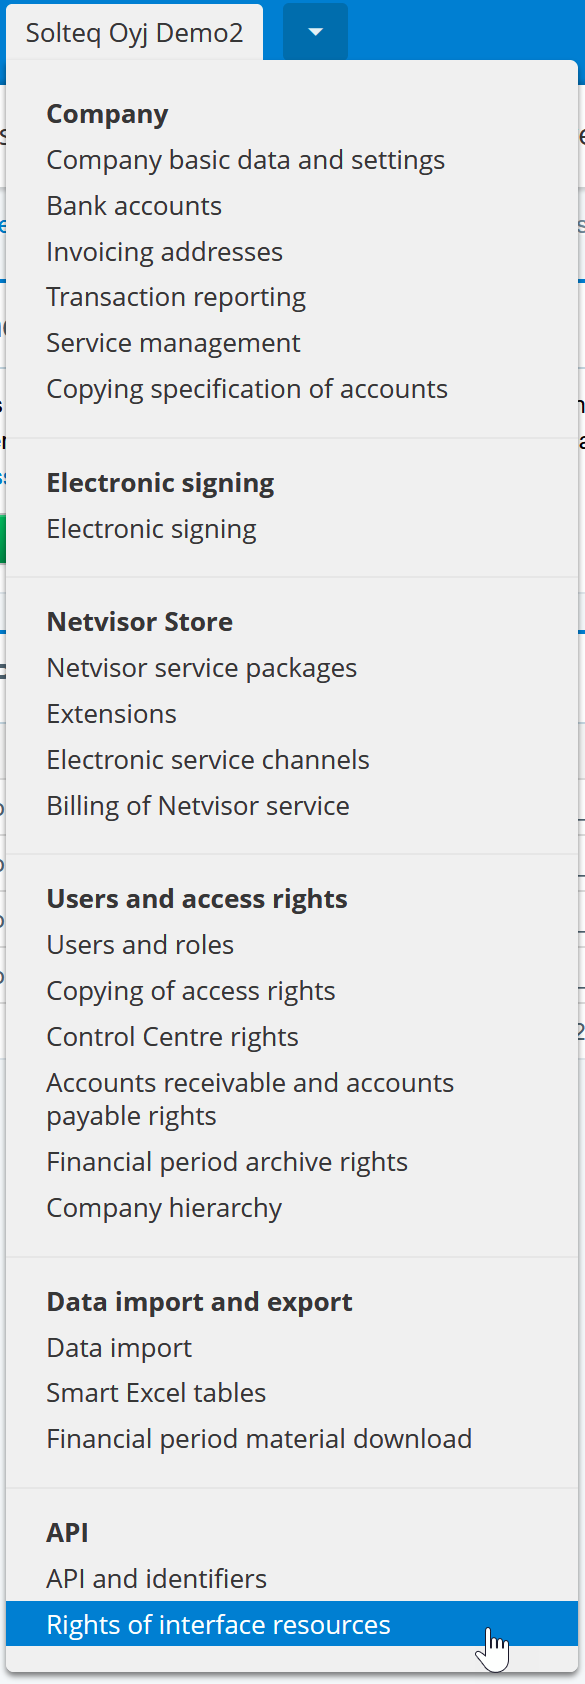
In Netvisor, open the main menu and click Rights of interface resources.
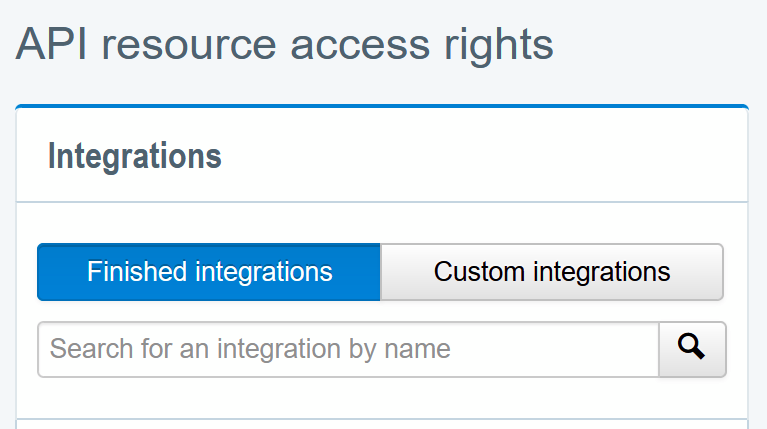
Click the Finished integrations button and search for Solteq Commerce Cloud. Add the found Finished integration as an integration for your company.
Select the added integration and allow it access the required resources; required resources depend on the features that you want to enable for your Netvisor add-on installation:
Send Vouchers to Netvisor
BOOKKEEPING MATERIAL:
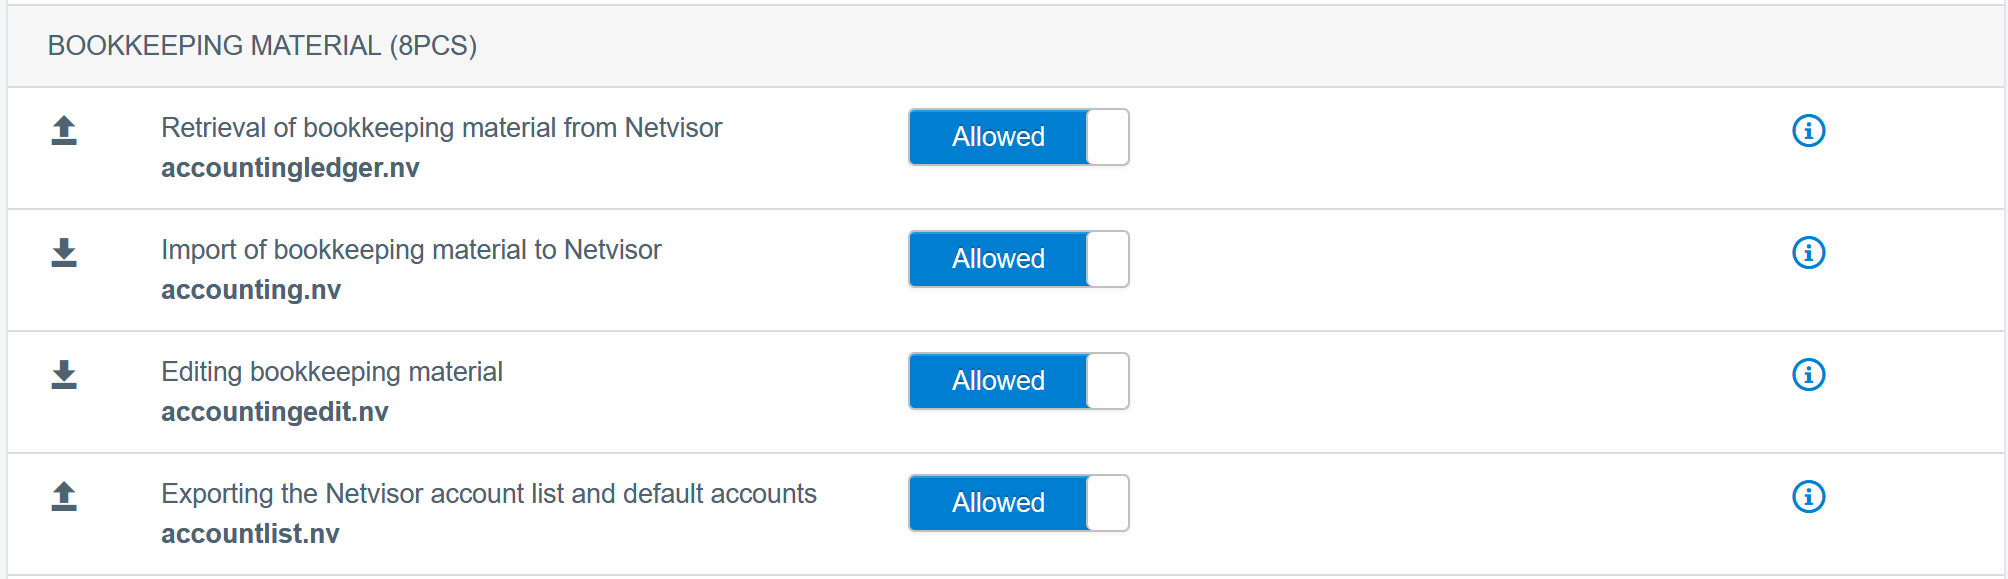
accountingledger.nv
accounting.nv
accountingedit.nv
accountlist.nv
Netvisor Invoicing
CUSTOMERS:
customerlist.nv
customer.nv
ORDERS AND INVOICES:
salesinvoicelist.nv
getsalesinvoice.nv
salesinvoice.nv
matchcreditnote.nv
PRODUCTS:
productlist.nv
product.nv
Next, open up the Netvisor main menu again and click API and identifiers.
In the displayed view, click the Create new API identifier button and copy the newly created Company API user’s User ID and Key from the Company API users list below.
In Commerce Cloud Back Office’s Integration view, click +Install a new add-on. The Marketplace window is displayed.
Click Install on Netvisor row. The Netvisor add-on installation page is displayed.
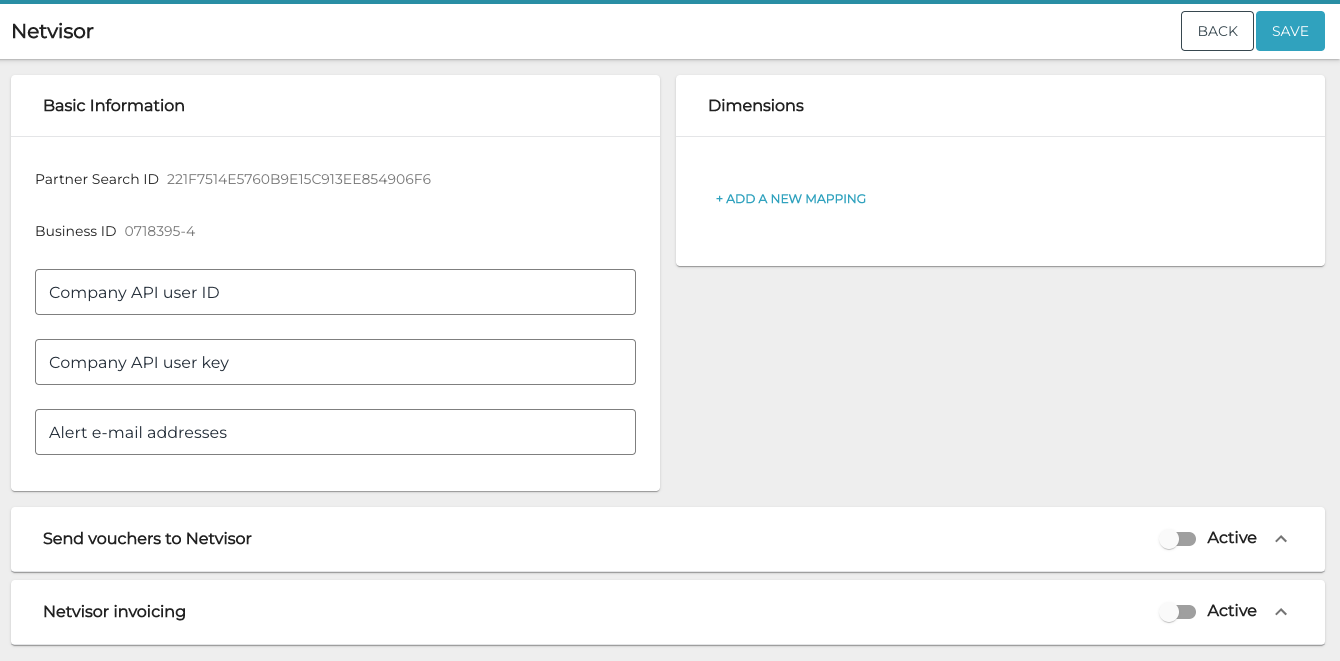
Paste the previously copied values to the Company API user id and Company API user key fields.
(optional) Enter Alert e-mail addresses as a comma-separated list (for example: alice@email.com,bob@email.com). If the integration fails, an alert e-mail is sent to these addresses.
(optional) In the Dimensions section, you may choose to map dimensions used in Solteq Commerce Cloud to Netvisor dimensions.
For example: you may choose to map the used cost unit value into a Netvisor dimension with the Cost center label.
Enable the Send vouchers to Netvisor and/or Netvisor invoicing feature by switching it to Active state.
For the Send vouchers to Netvisor feature you may also choose the summation type to be receipt or business date. This means that each voucher is generated either for each individual receipt, or as a sum for each business date.
Click Save to save your changes. The add-on installation is now complete.
When mapping dimensions, please note that each dimension value must be unique across all dimensions.
If, as an example, Cost center = webshop and Store name = webshop, then webshop will be actually shown only as the Cost center value in Netvisor, and Store name will be empty.
If you change the summation type to be business date, the change will take effect on the following day. The ongoing day’s vouchers will still be generated for each individual sale.
Sending Vouchers to Netvisor
When an order has been accounted in Solteq Commerce Cloud, it will be synchronized to Netvisor as a new voucher using the same account numbers as used in Commerce Cloud. Therefore, make sure that your account numbers in Commerce Cloud match to those in Netvisor.
If the selected summation type is receipt, then the synchronization will occur periodically every 5 minutes. If the summation type is business date, vouchers will be generated for each individual past business date, summing all paid orders within those dates.
In case the account lines of an order are adjusted in Commerce Cloud for example, due to them being incorrect), the same voucher is used in Netvisor, but the previous account lines are crossed over:
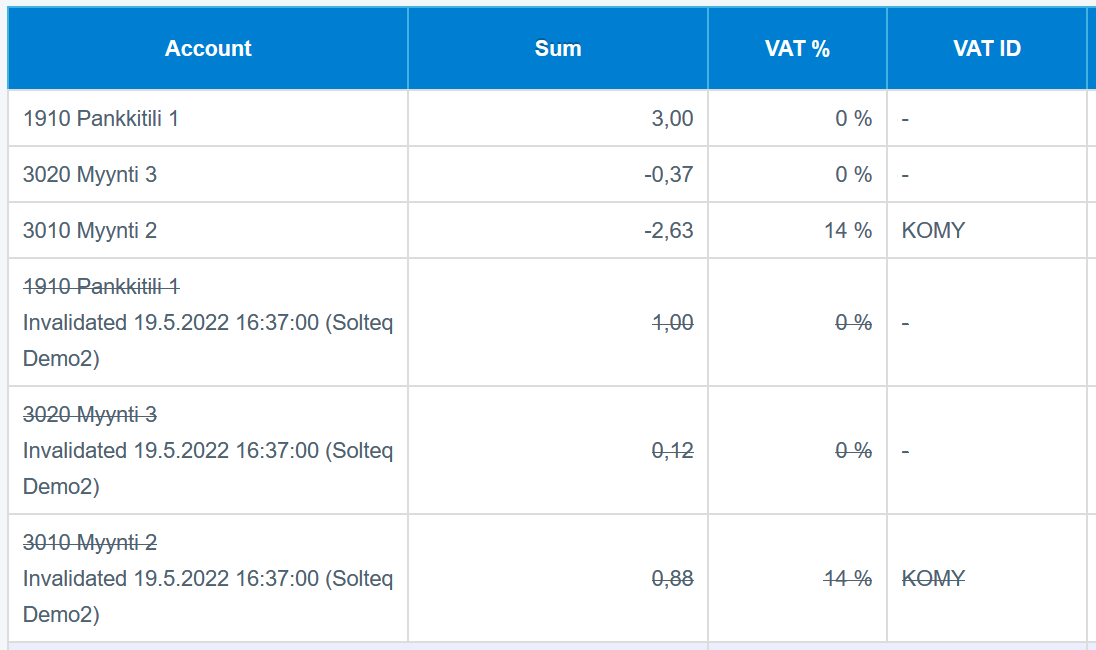
Voucher Creation Logic
Voucher class always uses the value Kassa.
In case the accounted line belongs to a sales account and the sold product has a tax percent defined, then the Netvisor’s accounted line uses the VAT code value KOMY and the product’s tax percent as the VAT %. Otherwise accounted lines use the VAT code value NONE.
Netvisor will always record VAT payables to the account number 2939. Therefore it is recommended that you use this same account for sales taxes in Commerce Cloud as well.
Rounding Differences Between the Systems
One thing to keep in mind is that Commerce Cloud and Netvisor have a slight difference in how they calculate total VAT amounts:
In Commerce Cloud, the total VAT amount = [the sum of gross totals rounded to 2 decimals] minus [the sum of net totals rounded to 2 decimals]
In Netvisor, the total VAT amount = [the sum of gross totals rounded to 2 decimals] minus [the sum of PRECISE net totals]
This difference may lead to additional rounding voucher lines being shown in Netvisor vouchers.
Netvisor Invoicing
When Invoice has been chosen as the payment method for a completed order in Commerce Cloud, the order rows will be added to the customer’s unsent invoice in Netvisor. If the unsent invoice does not exist for the customer, it will be created automatically.
Customer’s orders will be added to this consolidated invoice as long as it stays unsent. Once you send the invoice in Netvisor, then no more orders will be added to it.
The invoice payment terms will always be set to the default value of the customer. If the customer does not have a default payment terms set, then the company default value will be used.
Every time a new order is added to an unsent invoice, its sales invoice date will be updated, so that the due date will be pushed forwards. The due date is based on the selected payment terms, starting from sales invoice date.
Customer & Product Data Synchronization
The customer and all products that the invoiced order consists of are automatically created to Netvisor right before the order is added to the unsent invoice.
For private customers, the following data will be synchronized to Netvisor:
Name
Email
Phone number
Addresses (Home, Invoice, Delivery)
E-invoicing details (Email or E-invoice operator and address)
For company customers, the following data will be synchronized to Netvisor:
Name
VAT code
Email as contact detail
Phone number as contact detail
Addresses (Home, Invoice, Delivery)
E-invoicing details (Email or E-invoice operator and address)
When a customer has been created to Netvisor, its Netvisor ID will be updated to Commerce Cloud customer, after which it is visible in Commerce Cloud customer details page:
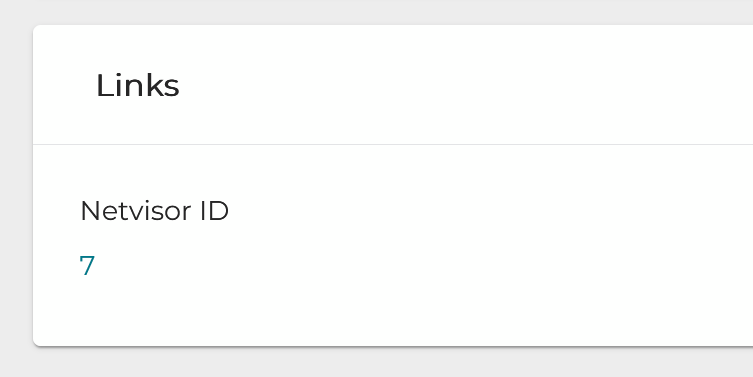
By clicking the Netvisor ID value, you are redirected to the customer details page in Netvisor.
In case you already have a customer base in Netvisor before starting to use Commerce Cloud Netvisor add-on, it is strongly recommended to import each customer’s Netvisor IDs from Netvisor to Commerce Cloud using customer Excel import. Those customers that do not have Netvisor ID set in Commerce Cloud will be created to Netvisor during invoice creation, which may otherwise lead to duplicates.
For each product, the following values are synchronized to Netvisor:
Commerce Cloud’s product ID to Netvisor’s product code
Commerce Cloud’s default category to Netvisor’s product group
Name
Description
Unit price
Tax percent.
In case you already have a product base in Netvisor before starting to use Commerce Cloud Netvisor add-on, you should bear in mind that Netvisor and Commerce Cloud products are matched by Commerce Cloud’s product ID. Therefore it may be wise to update your Netvisor products to have Commerce Cloud’s product IDs as product codes (or vice versa). Otherwise the product synchronization process may lead to product duplication in Netvisor.
Invoice Line Creation Logic
Order’s product rows are added to the invoice as invoice lines
Product note and the custom fields of the payment method will be set as free text on the invoice line
Receipt number is added as a comment line
Order’s free text rows are added as comment lines
In case a product row consists of more than one different VAT rates, for example due to being a Custom Product, then the prices associated with each VAT rate will create their own VAT rate specific invoice lines.
Voucher Creation Logic
The voucher is created otherwise the same way as in Send Vouchers to Netvisor feature, using receipt summation type, except that Voucher class always uses the value Myyntilasku. In addition, the invoice’s voucher will have lines for all of the consolidated invoice’s orders instead of just a single order.