
Release Notes 01/2021
Mobile stock tool
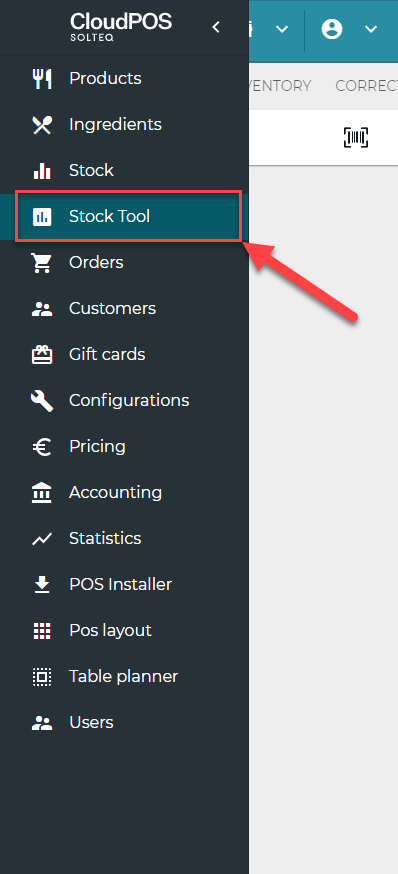
Backoffice has a new feature called Stock Tool. With this new tool users can find products on Stock, create Stock transactions – stock in as well as stock out – quickly, create an inventory, complete it, and make quick corrections to stock values. In the mobile version of Backoffice the device's camera can be used to scan barcodes. Also, for example a Bluetooth scanner can be used, if it is configured in Keyboard Wedge mode to enter <HOME>data<ENTER>. 
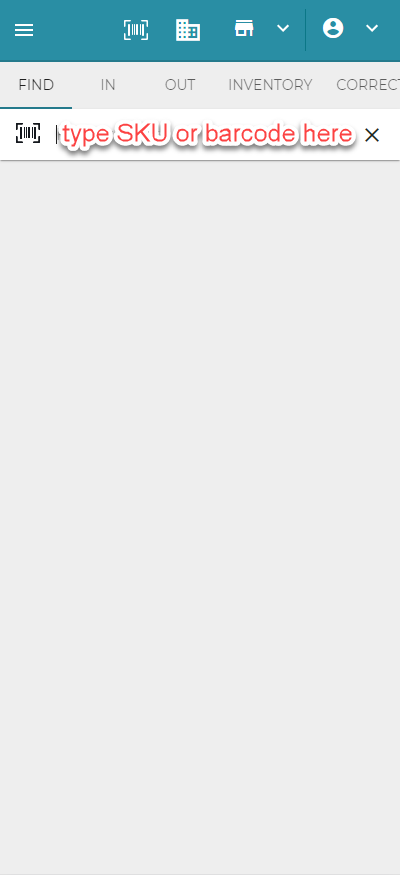
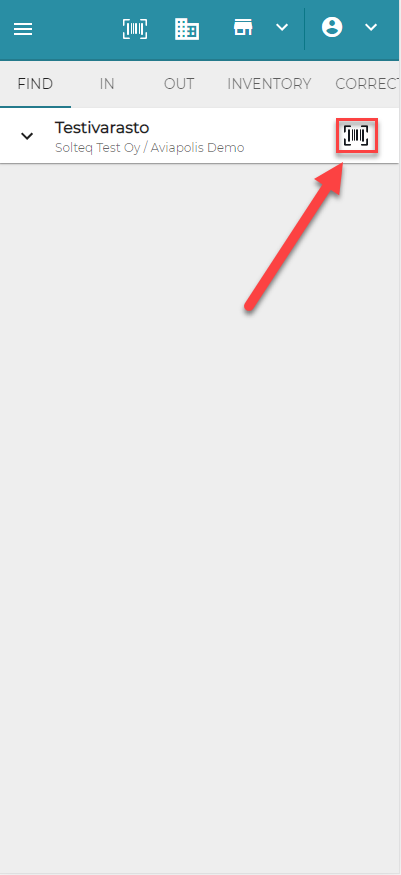
Stock transactions can be made by using the "IN" and "OUT" tabs. To make a stock in transaction first select the "IN" tab, then press the barcode button. After that, insert the SKU or barcode of the product you wish to find. The program completes the search automatically. If there is no product found with the given information, an error "Product not found" will appear.
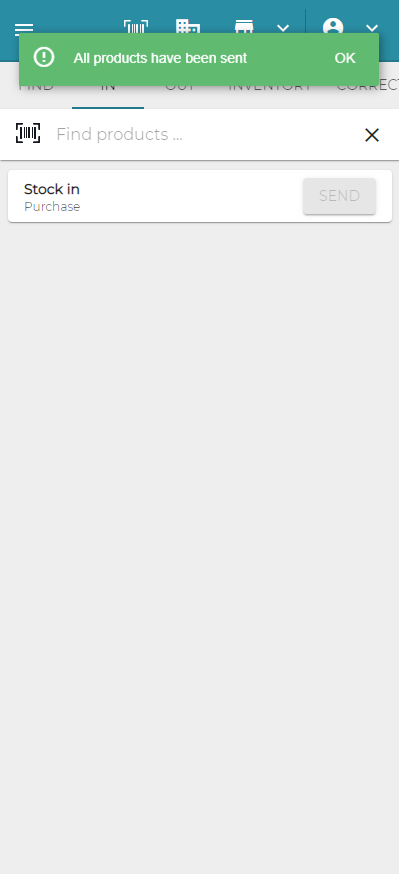
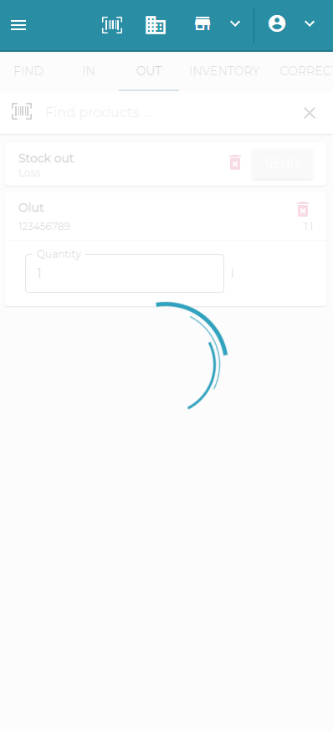
After finding the wanted products via search you may enter the quantities you wish to add to the stock. To finish the transaction, press "SEND". If the transaction is succesfully completed, you will get a notification "All products have been sent".
The stock out feature works the same way, but via the "OUT" tab. 

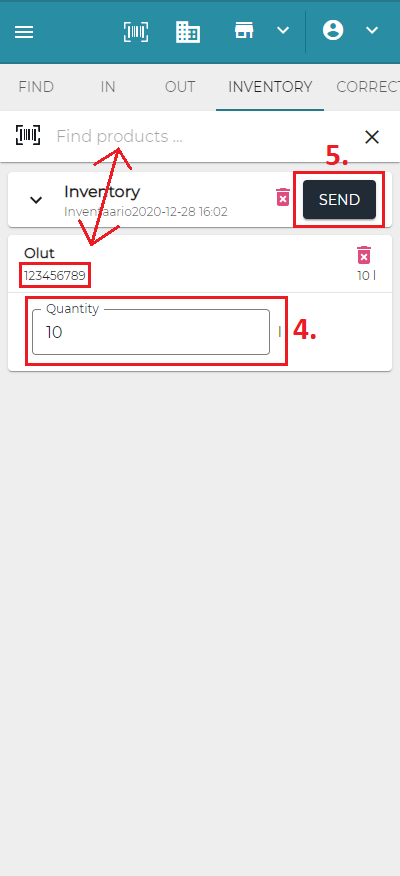
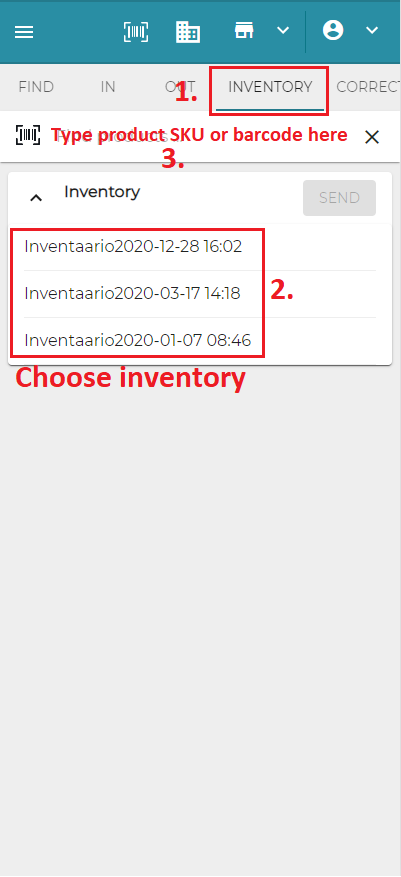
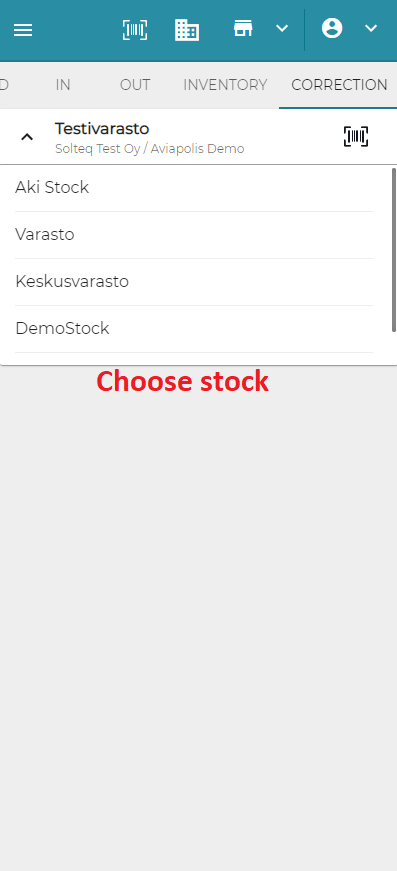
From the "INVENTORY" tab you can add products to open inventories. Select the open inventory you want to add products to, then insert the SKU or barcode of the products you wish to add. After that, insert the quantities for the products. Then press "SEND". If the operation is succesful, you will get a notification "All products have been sent".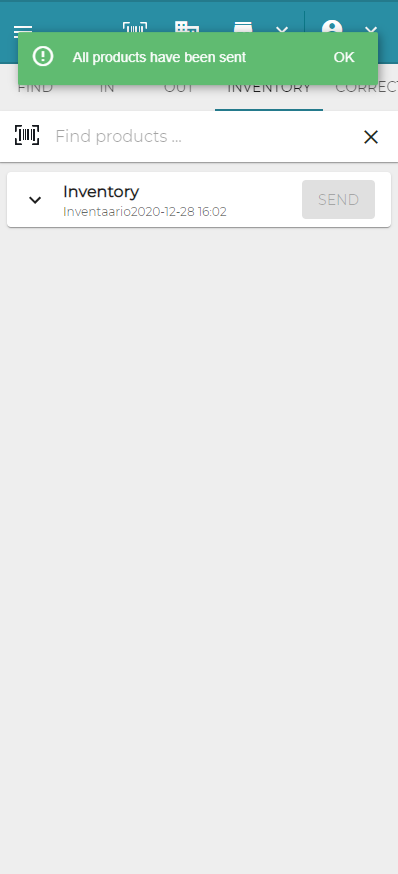
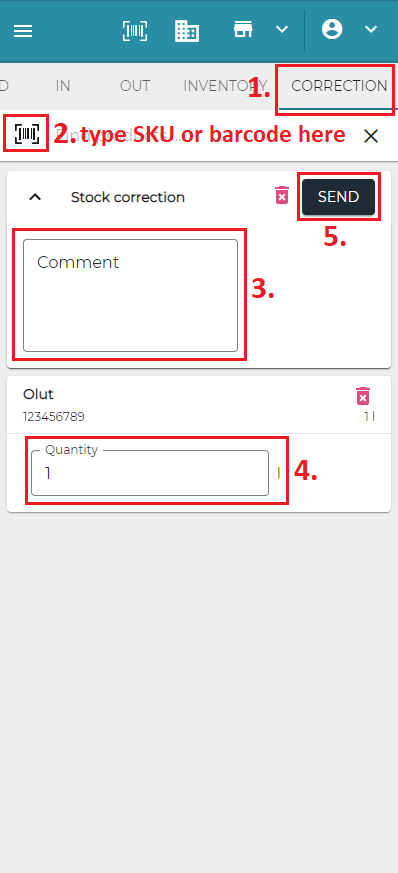
The "CORRECT" tab can be used to correct a value of a product. First you need to type the SKU or barcode to the search. Then you can leave a comment, a reason for the correction. This is not mandatory. After that you may enter the quantity. When making a correction, the given quantity will be new value of the product in the stock. 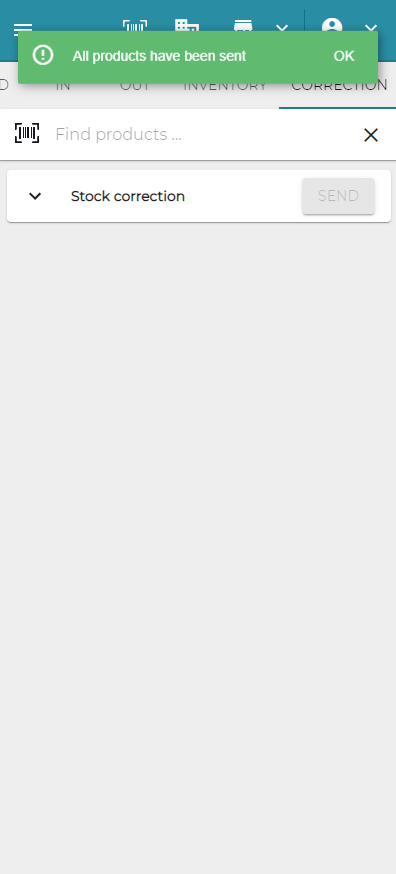
Improved Mobile view on Backoffice
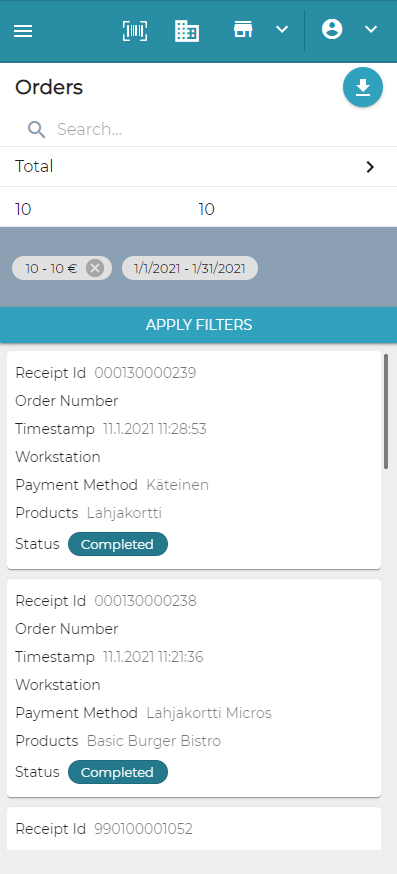
Viewing Backoffice with a mobile device is now more user friendly. The improvements have been deployed in product list, ingredient list, order list, stock handling and customers view. 

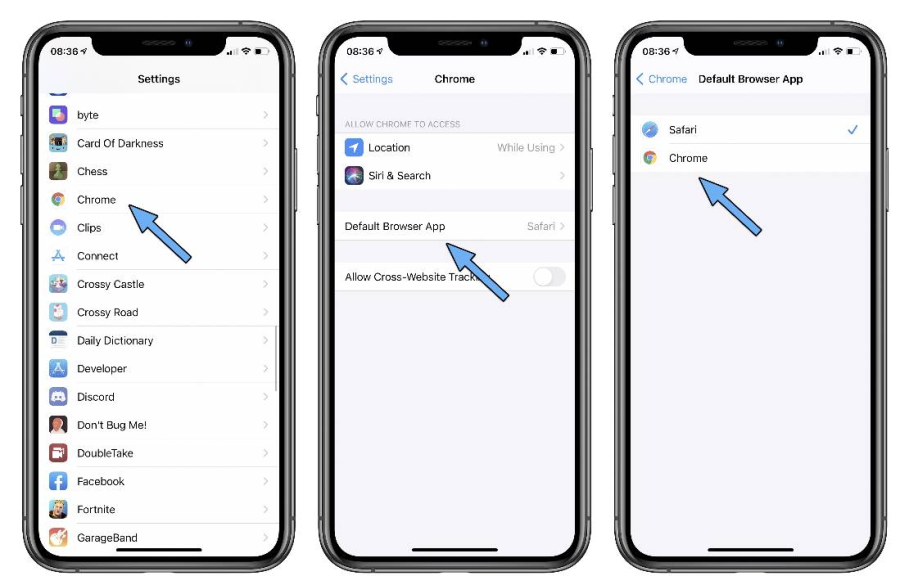
Safari is still not supported. Please use Google Chrome on mobile devices. On iOS, you need to turn on setting "Allow Cross-Website Tracking" in Google Chrome settings: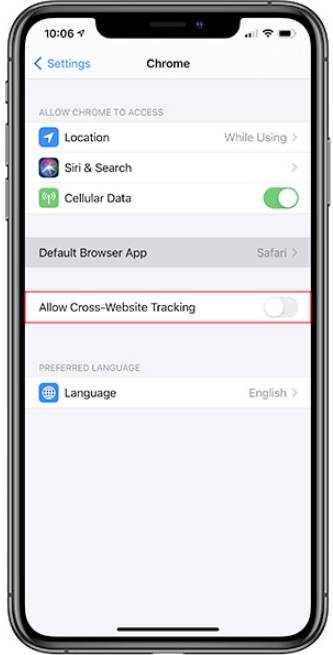
MobilePay Invoice
It is now possible to pay using MobilePay. Invoices to customer's MobilePay account can be sent from POS. MobilePay Invoice can be used instead of any other payment method. After the invoice is sent from the POS, customer will receive it to their MobilePay account.
At first MobilePay Invoice must be enabled in Backoffice by turning on the switch "Enable MobilePay". Turning on the switch will redirect you to MobilePay's web site. Additional instructions to complete the MobilePay registeration will be released later or can be found from MobilePay's web site.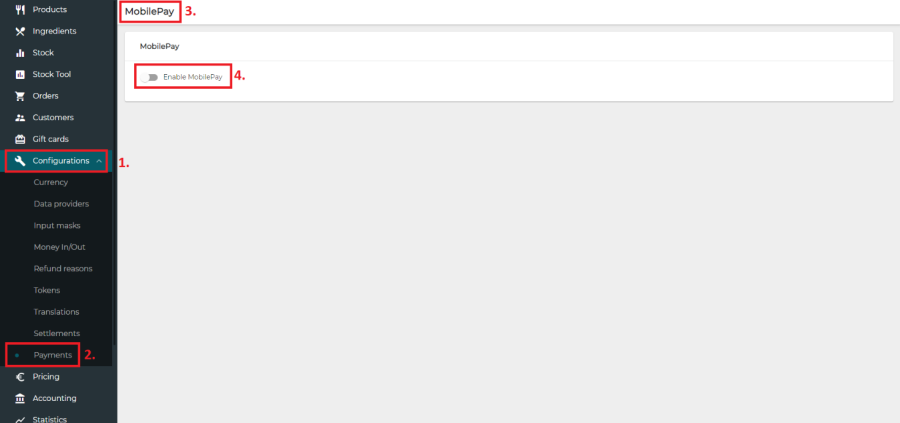
Before the MobilePay Invoice can be used on the POS, it must be configured as a payment method in the Backoffice. First select the workstation you wish to add the MobilePay invoice as a payment method to. Then open Payment Service and press "NEW".
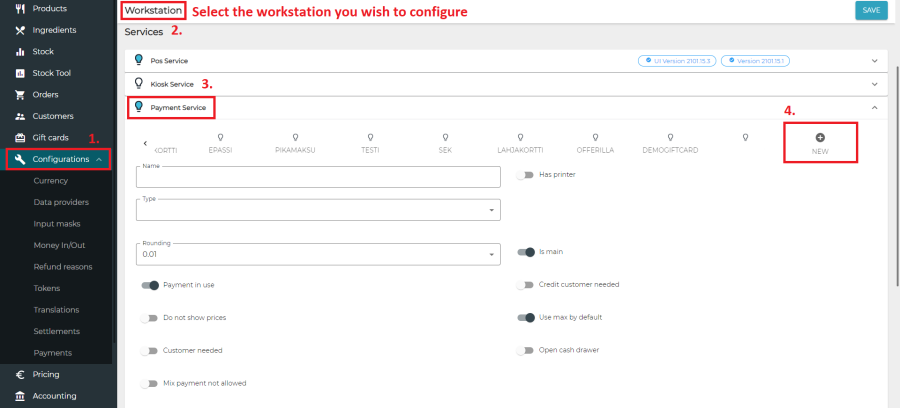
After that, select "WebPayment" as the Type of the new payment method. Then give a name to the payment method and press "ADD PAYMENT METHOD".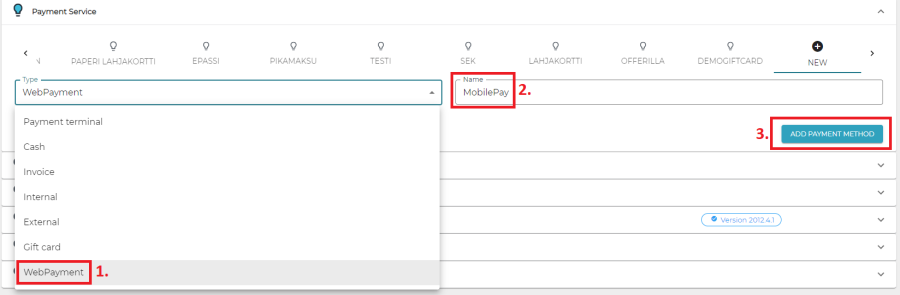
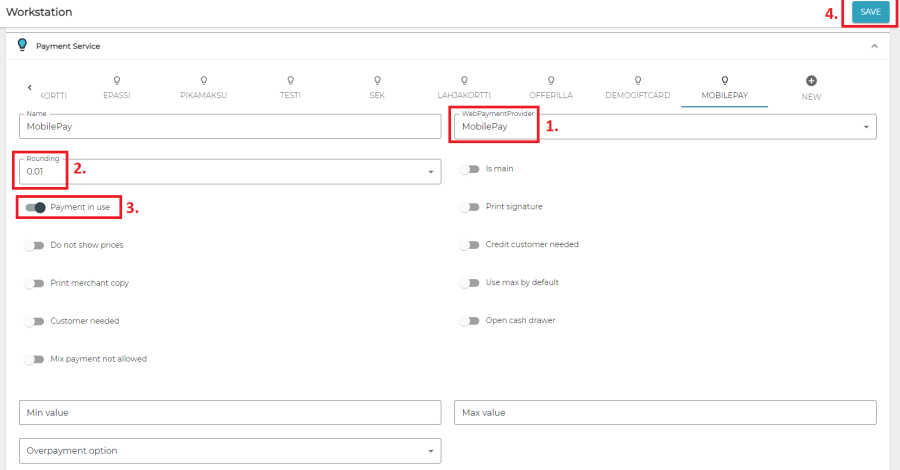
Next, you need to set "MobilePay" as WebPaymentProvider. Set rounding to 0.01. Also check "Payment in use" is turned on. Then press "SAVE".
On the POS, login and press "MENU" > "REFRESH". Then you can select MobilePay as a payment method like any other payment method. MobilePay Invoice can be sent to customer by email, MobilePay or SMS. For now, only MobilePay is implemented. The other features will be available soon.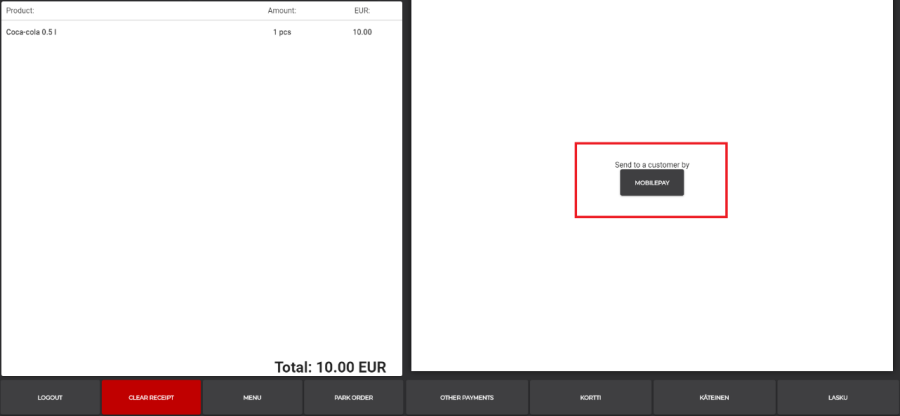
When sending the invoice by MobilePay, customer's phone number is needed. The number needs to be in international format. After accepting the payment on the POS, the system will send a notification for the customer to accept the payment. While waiting for the customer's acceptance or rejection, the order will be shown with "Pending" status in Backoffice. 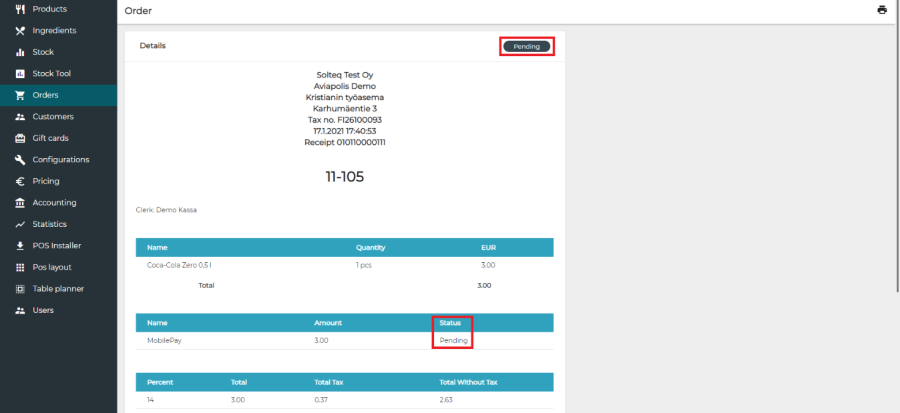
On POS a notification of a pending MobilePay Invoice will appear.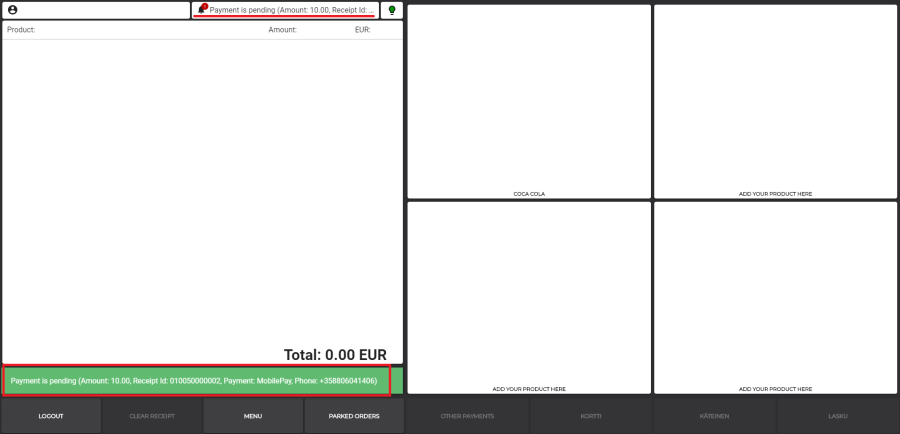
If the customer accepts the payment, the payment's status in Backoffice will change to "Accepted" and if after that the order is fully paid, the order's status will change to "Ready". On POS the user will get a notification that the payment has been accepted.
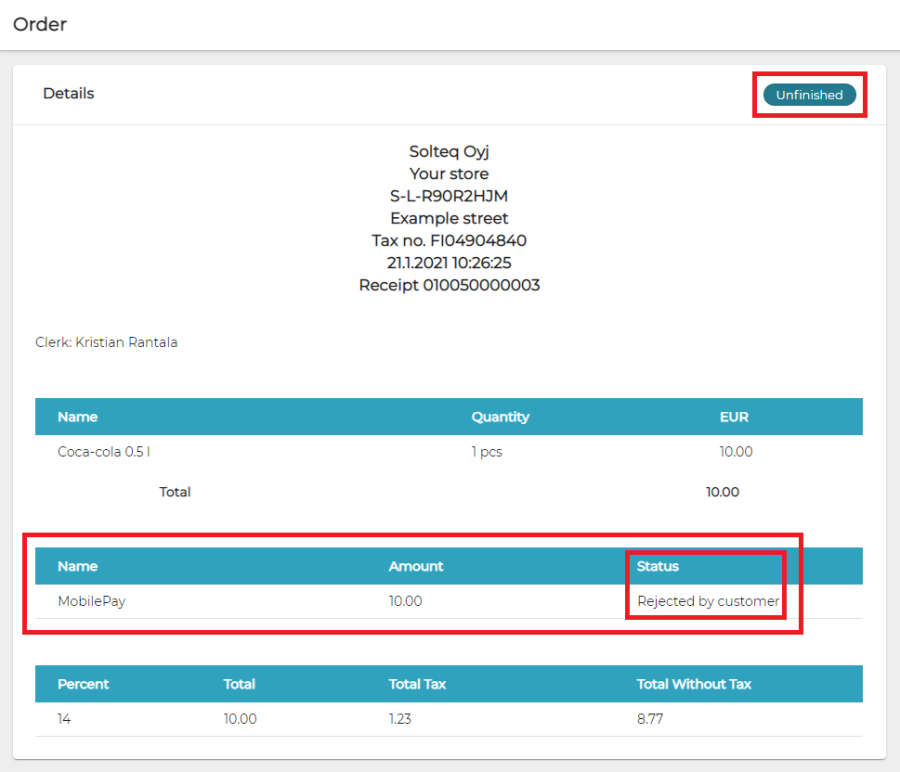
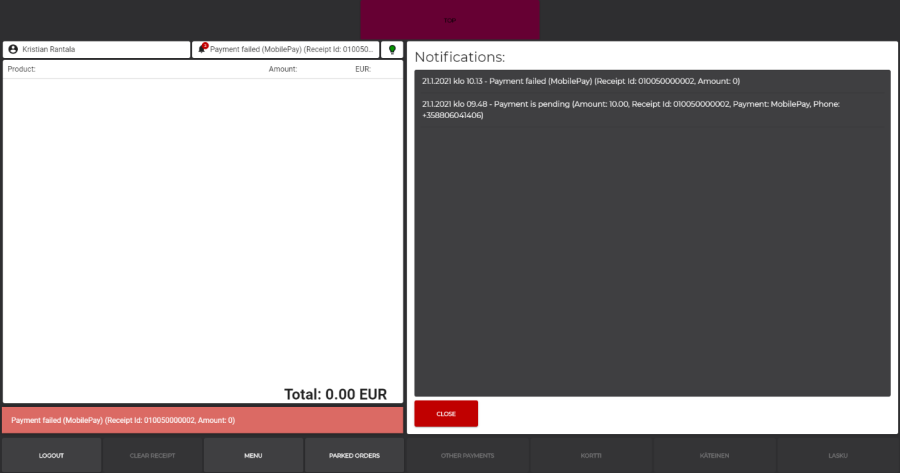
If the order is rejected, the order will have a status of "Unfinished" in Backoffice and user will get notifications about the rejection on POS.
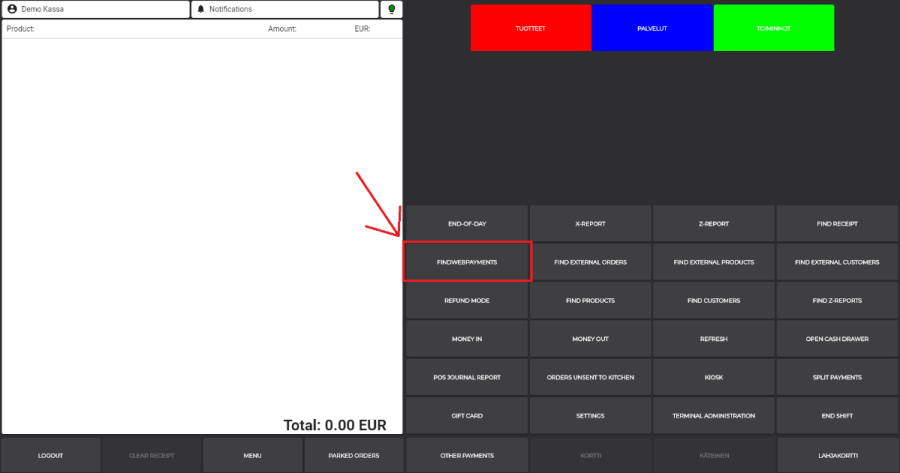
On POS, there is also a new button to check all MobilePay Invoice payments. There the you can check the status of all MobilePay Invoice payments: accepted, pending and rejected.
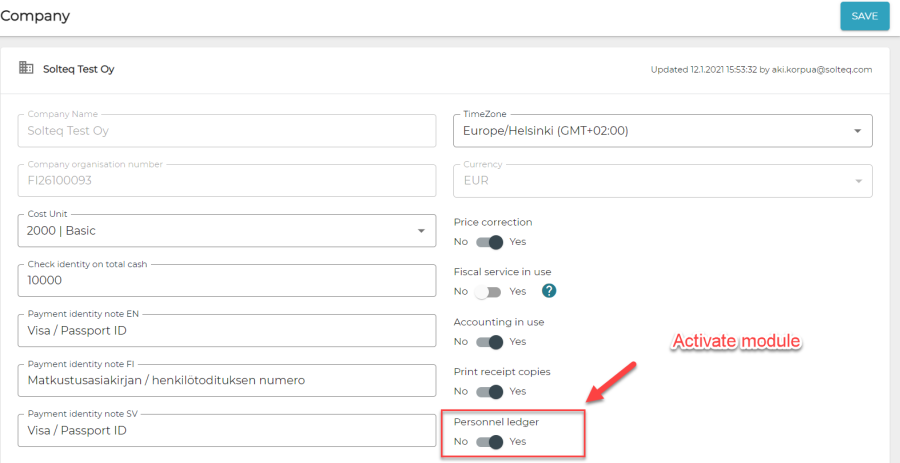
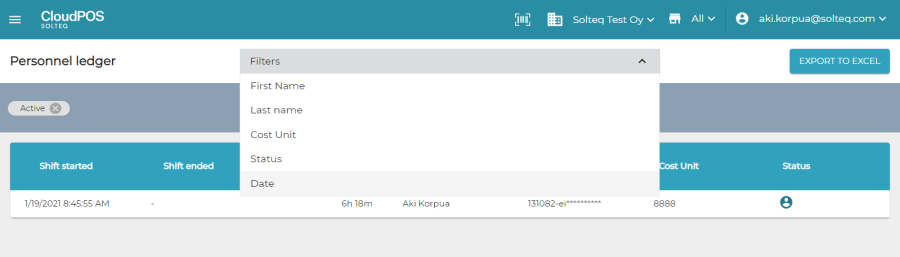
Personnel Ledger – working hours tool
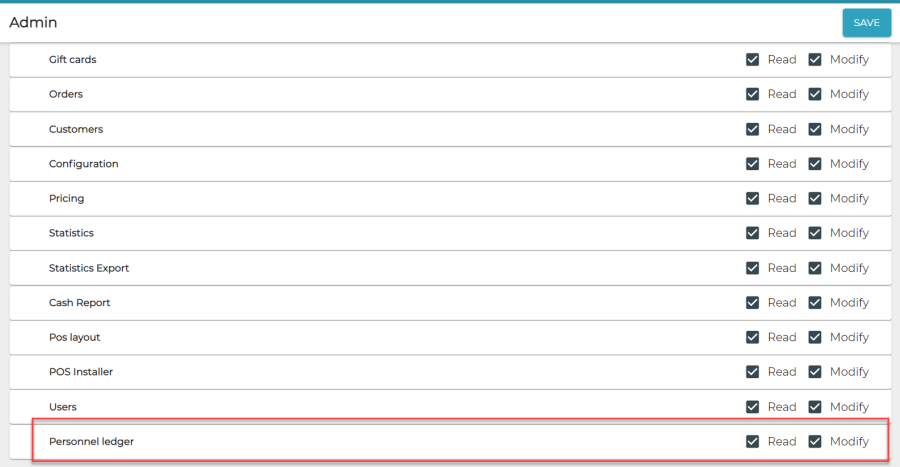
access in Users -> User groups to see the personnel ledger. Note that exporting a report requires Modify-rights.
There are also few new fields on Users, that can be added:
Social Security Number: This is for reporting needs. This will be treated as GDPR data and therefore Audit logs are also added for accessing any user data. But this field can hold also for example a person number on your HR system.
Cost Unit: Optional field to configure, which cost units person can log working hours to.
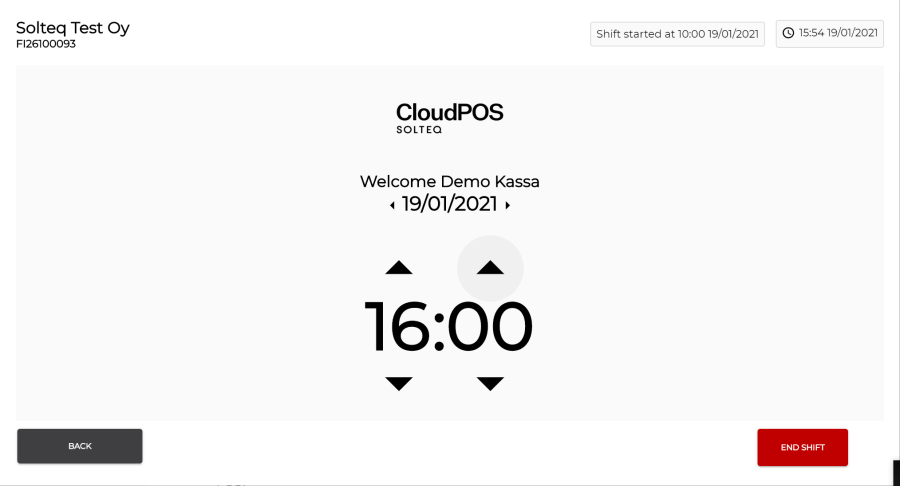
There is also a new option to have a user group without access to POS. They can still log hours using POS. This person cannot do any sales. To create such user group, disable "POS action" from Users -> User groups: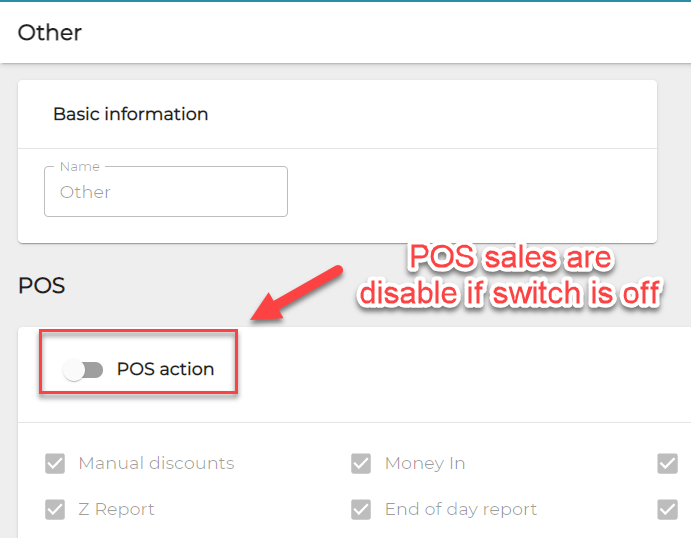
Quick Access / Barcode reader support on Backoffice
There is now possibility to use Barcode reader also on Backoffice. This will ease up finding Products, Receipts and Customers.
To manually access quick find mode press HOME–key on keyboard or press barcode icon on top menu.
After that you can enter Barcode, SKU, CustomerCard number or Receipt ID to find a particular item. If no match is found, user gets the following information: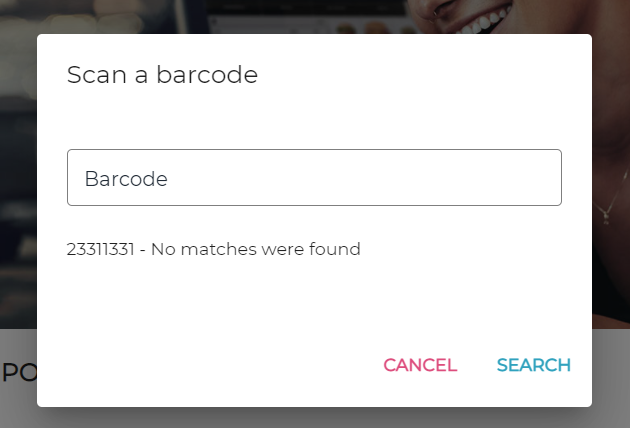
If a match is found, the found item is opened automatically. For example, after entering Receipt ID 010110000107 the receipt is opened.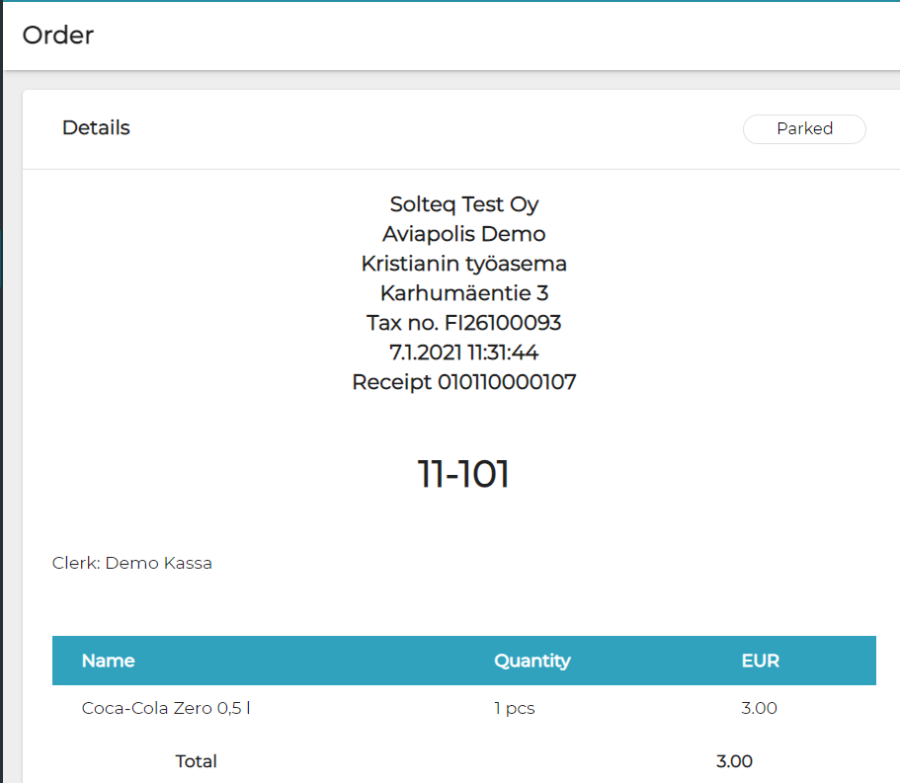
Note: When user is on Stock pages, system shall look only for SKU of a product and open the global stock unit page.
You can buy barcode reader from Solteq by sending request to your sales contact or contacting asiakastuki@solteq.com.
If you buy your own barcode reader, please configure it in following way, refer to programming manual for the barcode reader.
Use keyboard wedge mode with Standard Key encodings
Configure Global Prefix as HOME
Configure Global Suffix as ENTER
Option to configure bottom action buttons on POS Layout
In addition to configuring the POS Layout's tabs and main buttons, it is now possible to configure the Layout's bottom action buttons. With this new feature the POS Layout becomes almost entirely configurable.
To activate this new feature, login to Backoffice, select POS Layout > select the POS Layout you wish to configure. Then enable the feature by turning on "Custom footer".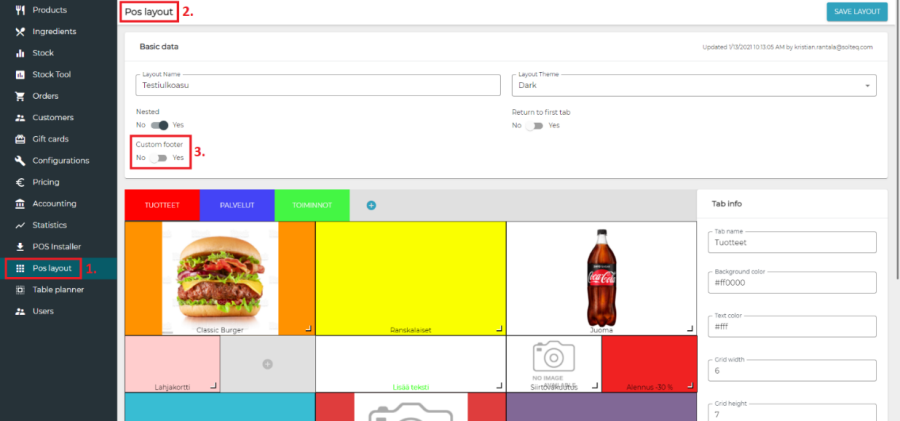
When the feature is enabled, a configurable footer will appear at the bottom of the Layout configurable tool. 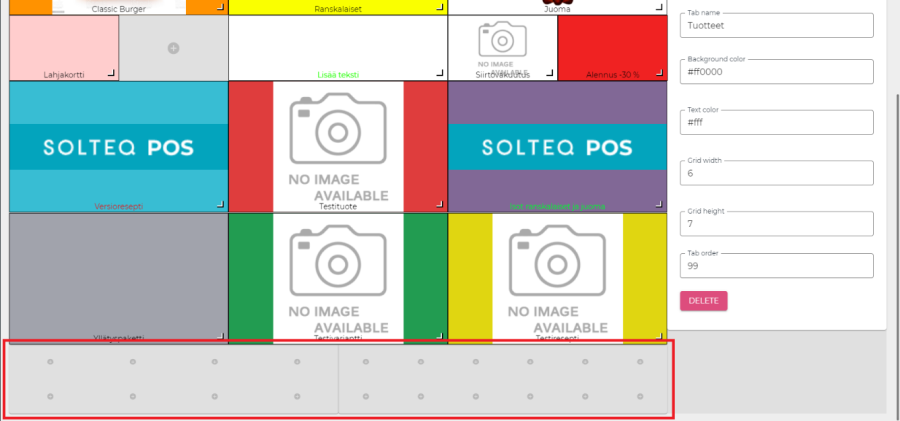
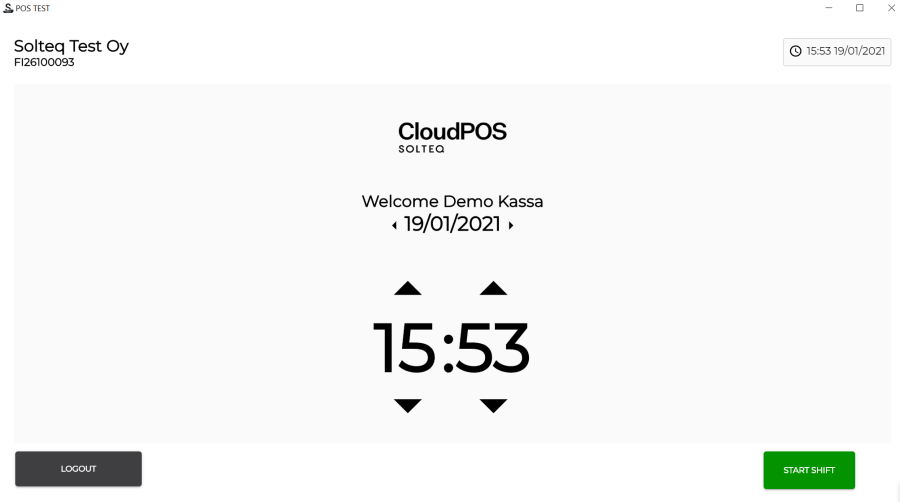
That bar represents the footer, which normally looks somewhat like this on the POS: 
By pressing a plus button you can add a new button to the footer. The button can be configured using the configuration tool on the right side of the page. From the Action-dropdown menu you can select the action you wish to add to the footer. You can set the Item title, configure a shortcut for the button, add icon for the button and select background and text color.
After the configuration is completed, press "SAVE" and login to the POS. The changes have come into effect.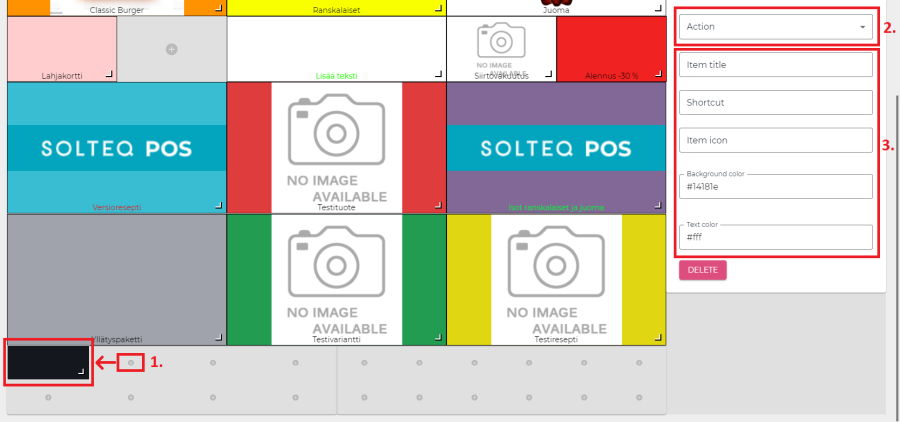
Small improvements and bug fixes
Timezone for backoffice actions can now be setup from Company settings. All time stamps in Backoffice within the company uses the set time zone. If the time zone is not set, default time zone is GMT+2.
When creating a giftcard it is now possible to override the period of validity, which is by default set by the giftcard template.
Giftcard email has been redesigned and made cleaner.
It is now possible to add waste percentage on dosing groups.
It is no longer possible to assign more than one stock per store.
Sweden: Fiscal and Z-report from Kiosk can be scheduled using Task Scheduler in windows
KeepPortFree-switch has been added to VerifoneFi Payment terminal configuration. This option helps if you have the payment terminal attached for example to your laptop's dock. Option will make starting new payment a bit slower.
Fixed a bug that caused allergens from Ingredient Options not to be shown on POS or KIOSK.
Fixed a bug that caused database anomalies when importing inventory with duplicated variants.
Payment ready notification is now cleared if any action is clicked on POS after successfully completing a payment. Also payment notifications have more information about payment.
Finnish Customs' receipts will always have double language, Finnish and Swedish
Validation can now be added to Money in/out description.