
Set up the Device (V3M2 Mobile)
The terminal is equipped with a SIM card which allows the terminal to be used as a Cloud terminal utilizing 3G/4G network. The Cloud terminal function benefits include easier configuration and LAN-independent payments. The terminal can also be connected to a local network (LAN or WLAN).
Unbox the payment terminal. Check that the box contains the device, charging dock and power cable.
Connect the power cable to the input plug in the bottom of the charging dock.
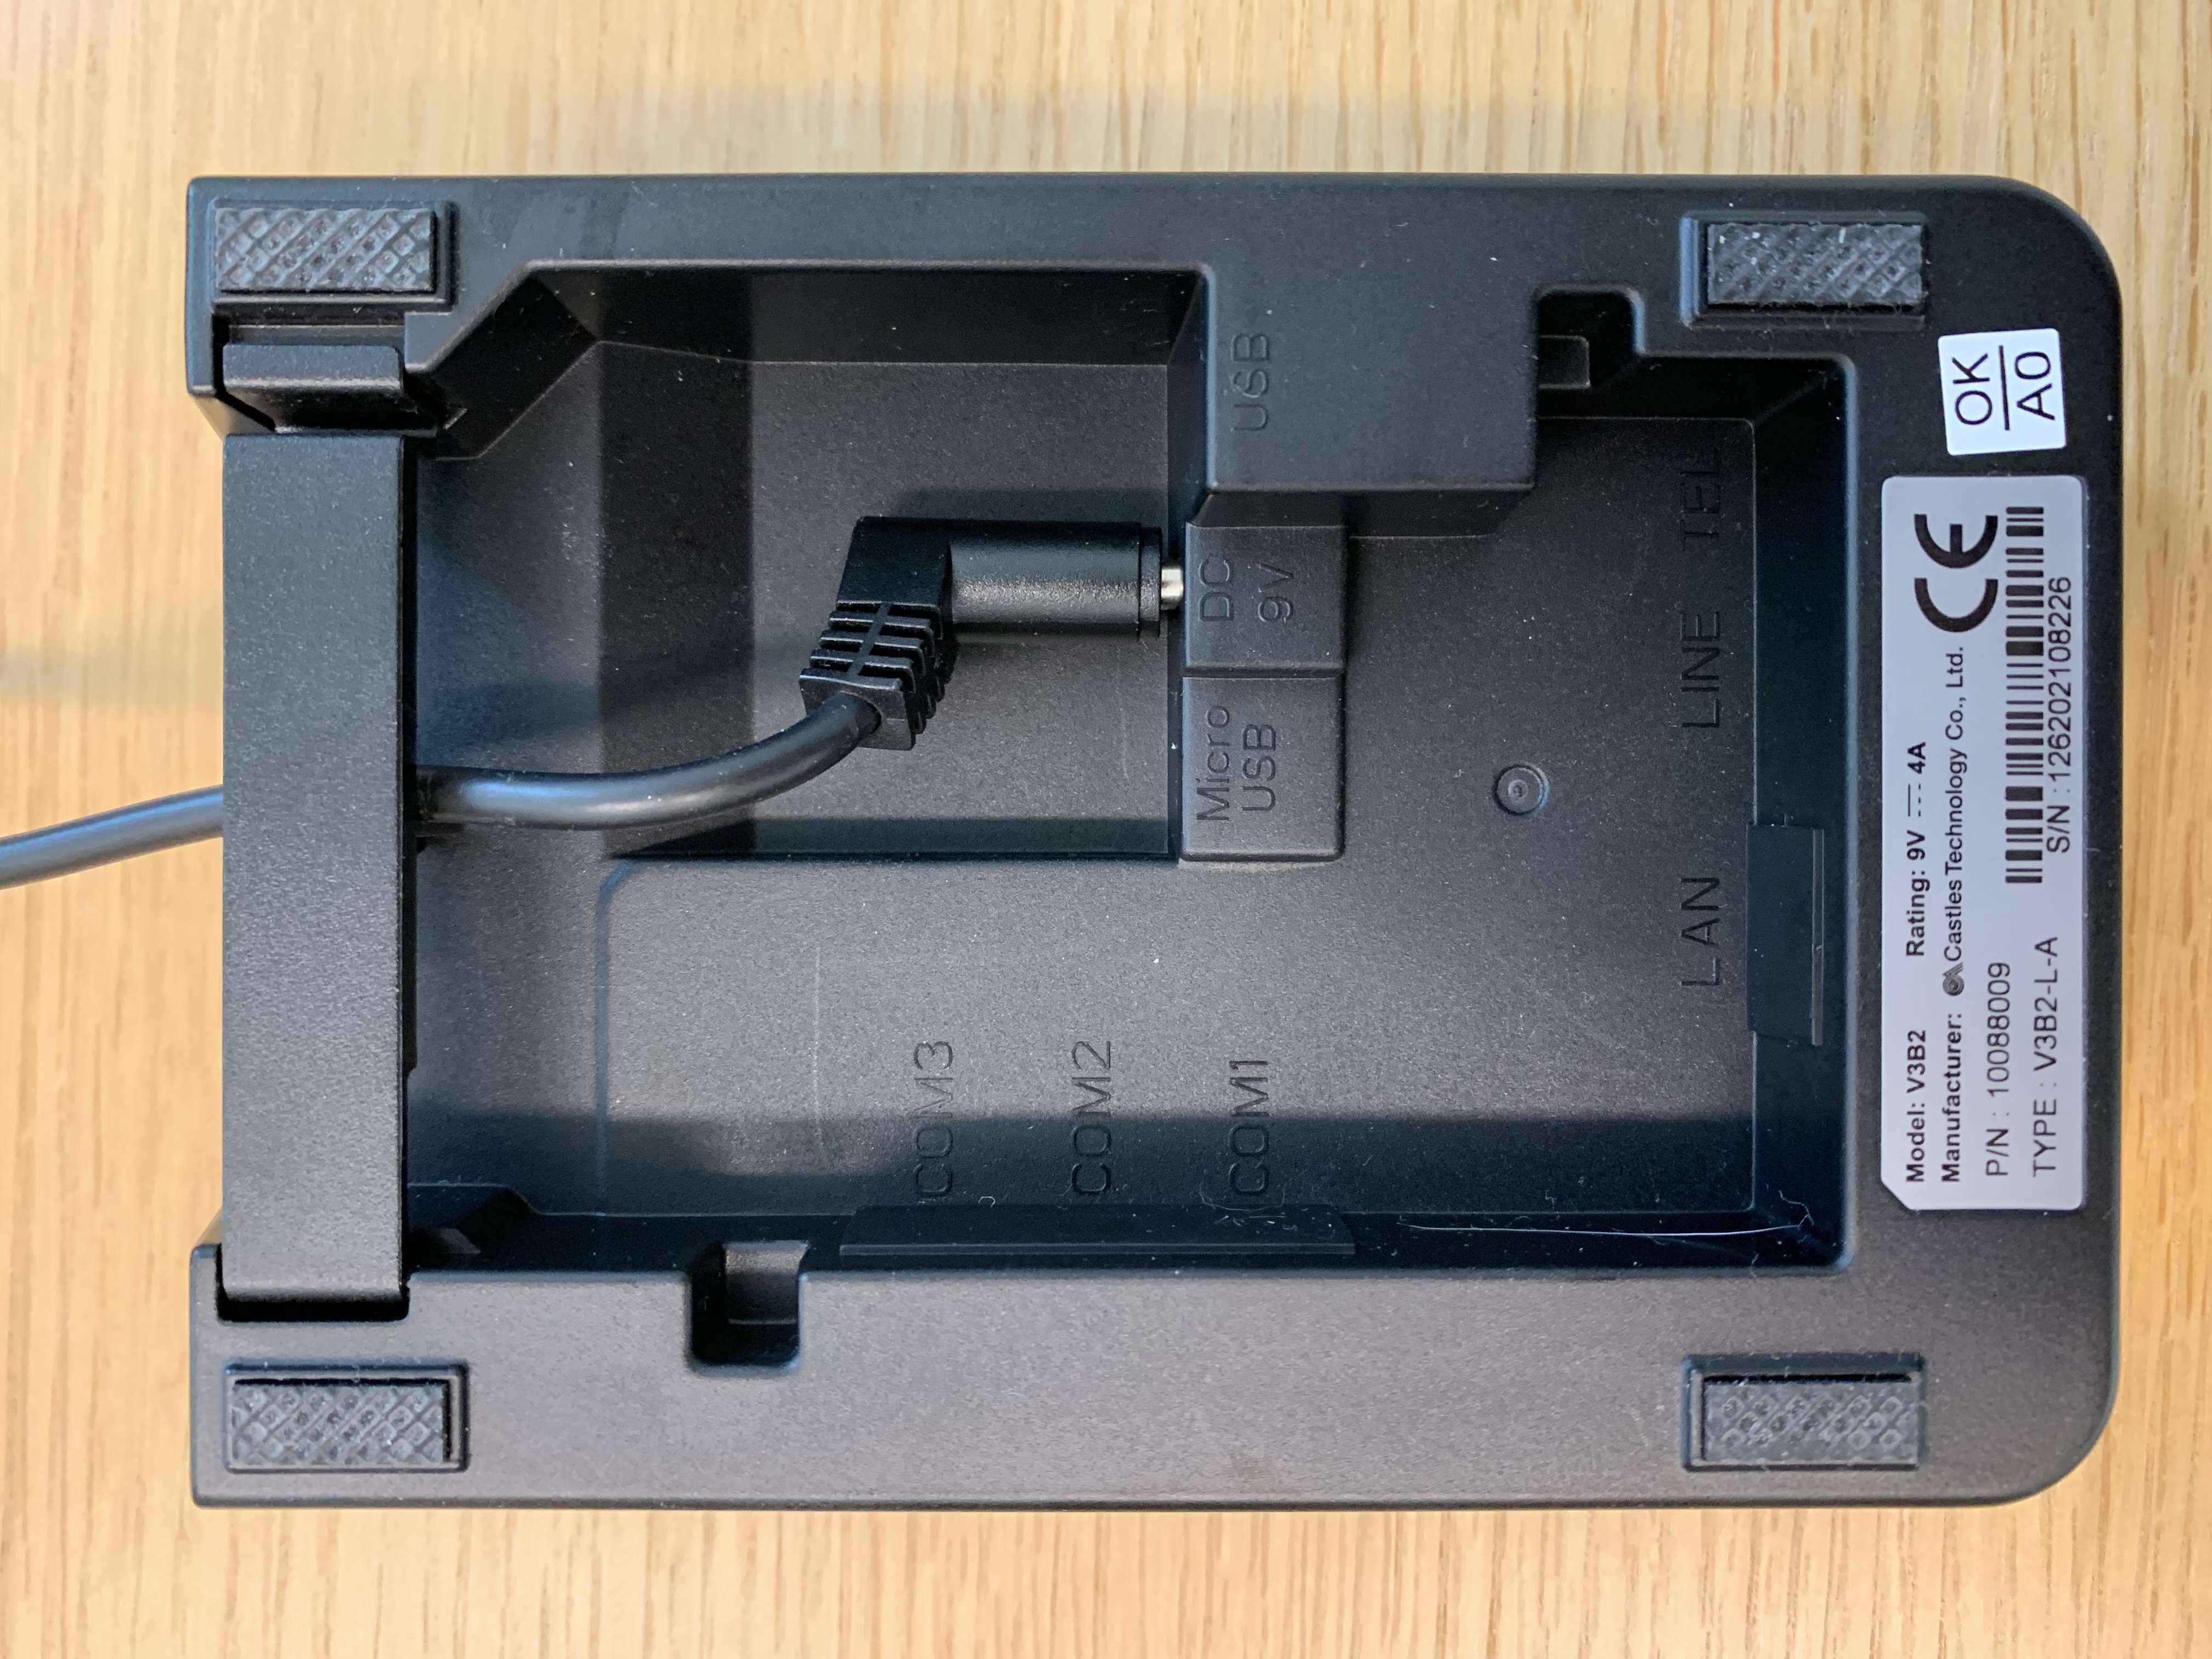
Connecting the power cable to the charging dock
3. Plug the power cable to an electrical outlet. The green power LED in the front of the charging dock lights up.
4. Insert the payment terminal to the charging dock.
The orange LED on the left side of the payment terminal shows that the device is charging.
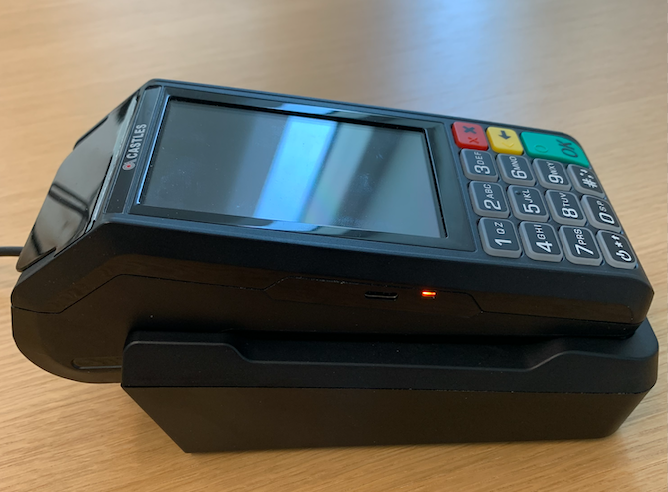
Payment terminal charging
5. Power up the payment terminal by pressing the Power On button for a few seconds. Powering up the device will take approximately one minute.
The device contains a ready-installed SIM card, which will activated when the device is powered up; the device will be connected automatically to the mobile network.
Take note of the Terminal ID of the device; you will need it to complete the setup.
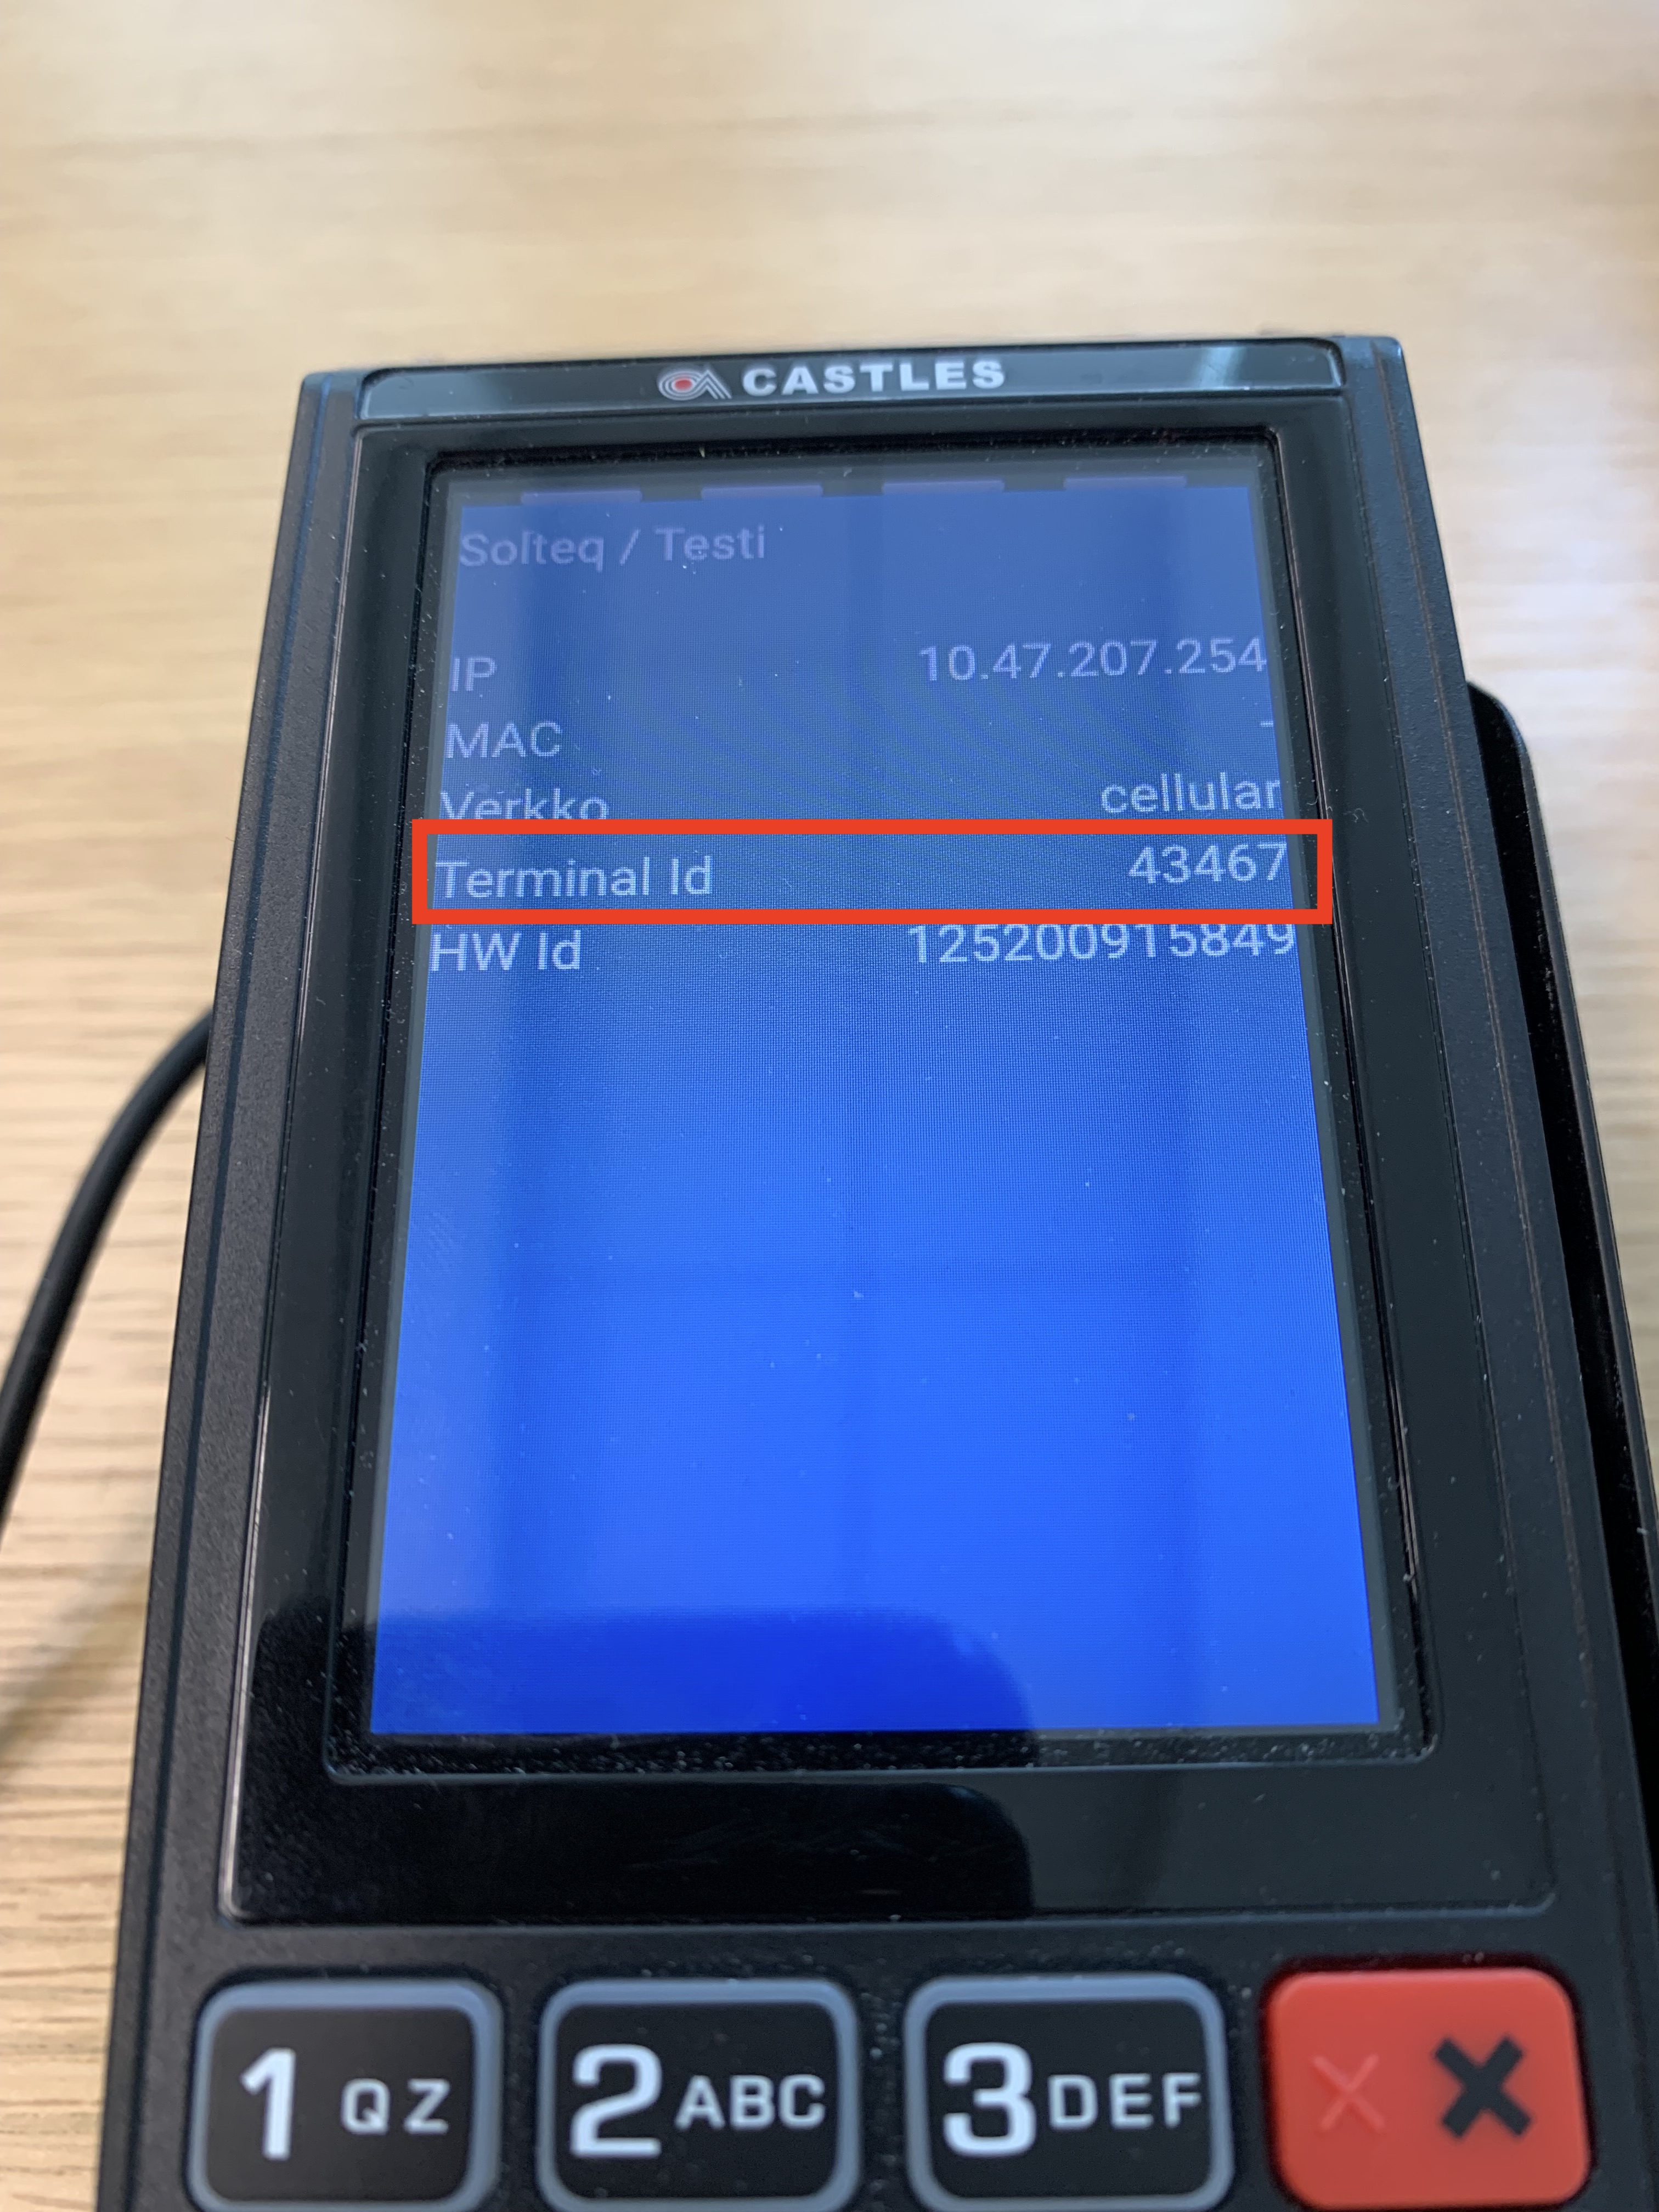
Terminal ID in the device settings
Next, Update (or Create) the Card Payment Settings in the Back Office.
You can check the terminal ID and other settings by pressing on the Power On button for a few seconds.
Device Terminal IDs are also listed in your company’s Poplapay portal:
Login to the portal and select Profile → Terminals.

Popla portal menu
Terminal IDs are listed in the ID column.

Terminal IDs in the Poplapay portal