Setting Up Verifone Payment Terminal
Payment Terminal settings
Go to Network Settings → Network & internet and select Wi-Fi.
Go to Localization Settings → System → Languages & input → Languages; select the language you want to use.
Back Office Configurations
Go to Configurations and select the workstation you want to use with the payment terminal.
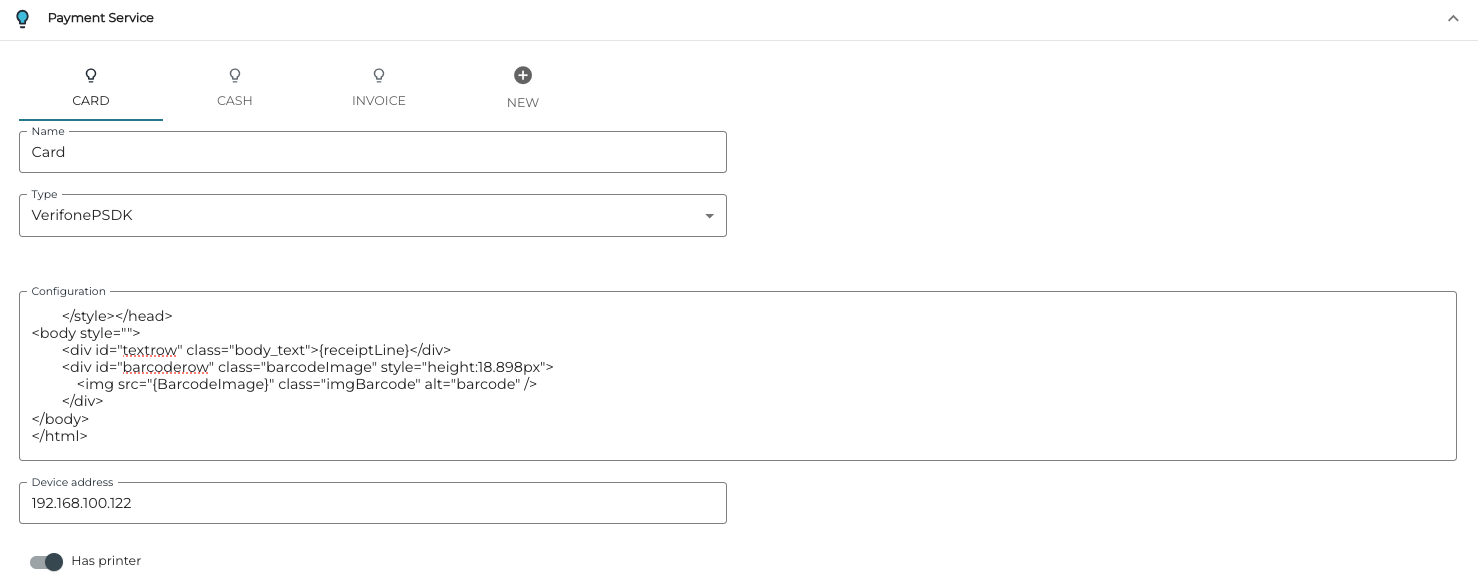
Go to the workstation’s Payment Service Settings and click the +New icon.
Select/enter the following information for the terminal:
Name: Card
Type: VeridonePSDK
Configuration: Enter here the receipt layout in HTML format (see example of a layout below)
Device address: Enter the IP address of the device.
Has printer: Click this switch to ON if the device as a printer.

Payment service settings
Click Save to save your settings.
Example receipt layout:
<!DOCTYPE html><html><head><style>
            * {
                font-family: arial, sans-serif;
            }
            .body_text{
                font-size: 19px;
            }
            .left {
                width: 50%;
                text-align: left;
                white-space: nowrap;
            }
            .right {
                width: 50%;
                text-align: right;
                word-break: break-all;
            }
            .leftNoWidth {
                text-align: left;
                white-space: nowrap;
            }
            .rightNoWidth {
                text-align: right;
                word-break: break-all;
            }
            .center {
                text-align: center;
            }
           .barcodeImage {
               min-width: 75.591px;
           }
           .imgBarcode {
               height: 100%;
               width: 100%;
           }
           .barcode {
               position: absolute;
               bottom: 0;
               right: 3.78px;
           }
        </style></head>
<body style="">
        <div id="textrow" class="body_text">{receiptLine}</div>
        <div id="barcoderow" class="barcodeImage" style="height:18.898px">
            <img src="{BarcodeImage}" class="imgBarcode" alt="barcode" />
        </div>
</body>
</html>