Using the Table Planner in POS
When table planner is enabled and table plan has been created in the Back Office, the POS menu will contain an Open Table tile (in addition, the POS layout may also contain an Open Table action tile, which can be used to open a table). Pressing the tile will open the Table planner view.
Accessing the Table Planner and Parked Orders views requires that the workstation is connected to the network and in online mode.
Table Planner View
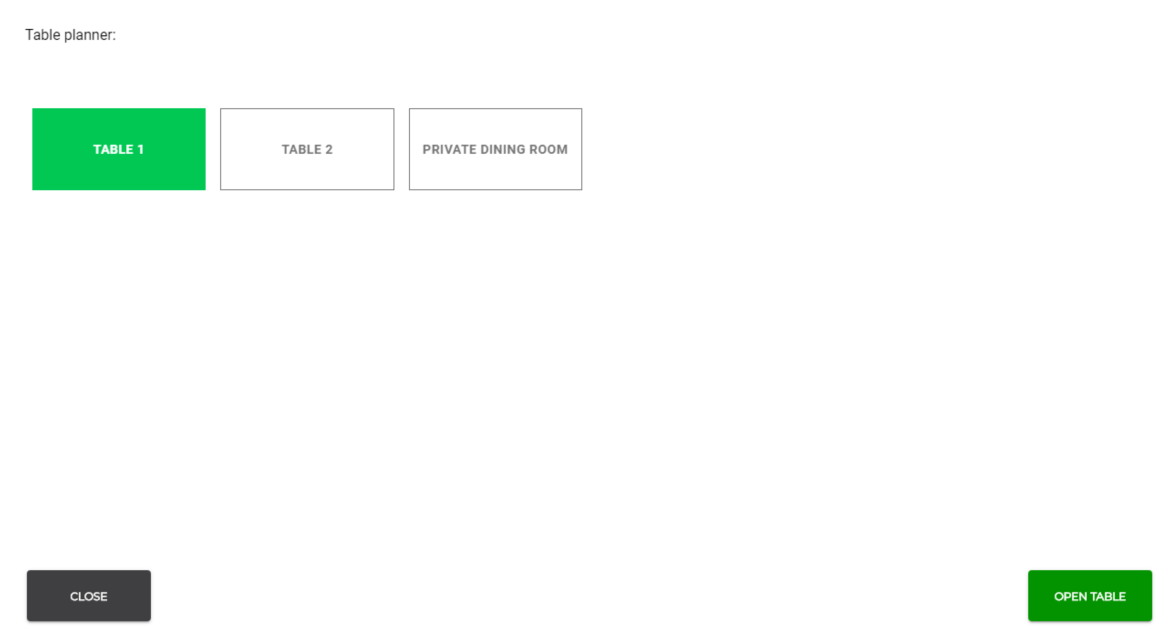
In the Table planner view you can open a table by selecting it and then pressing Open Table.

Table planner view
Table colours indicate the status:
Grey: Table has orders.
White: Table is free.
Green: Table is currently selected.
When you open a table, any products you add to the basket are automatically added to the opened table.
Tables and Parked Orders
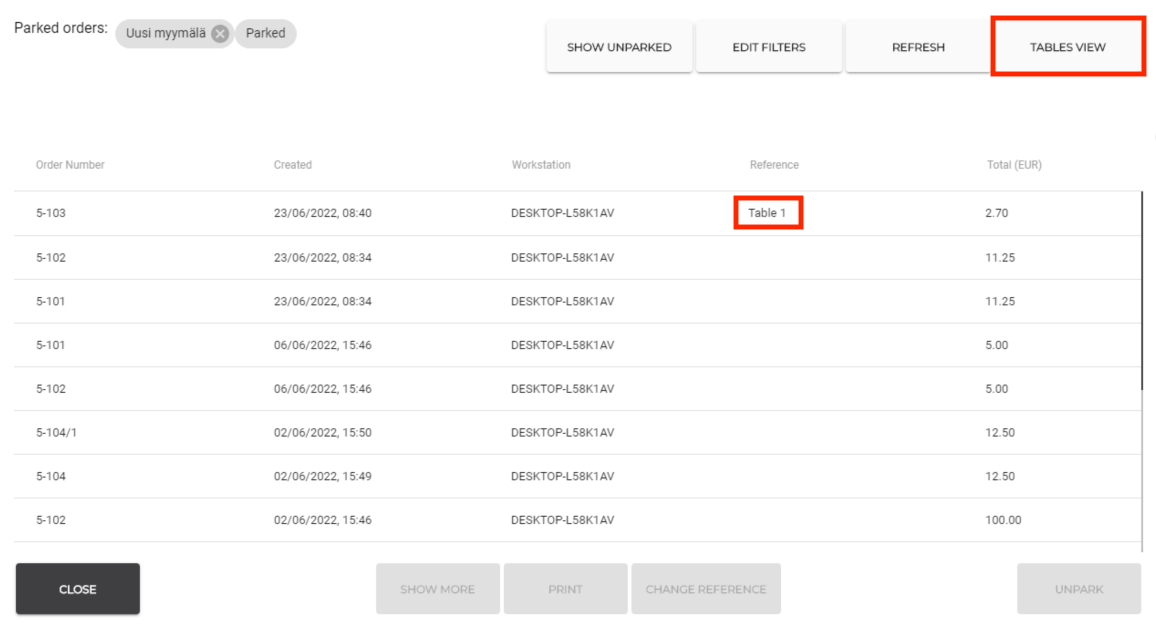
When you park an order associated with a table, the name of the table is displayed in the Reference column of the order.
To switch to Tables view, press Tables View.

Parked orders with table reference and Tables View button
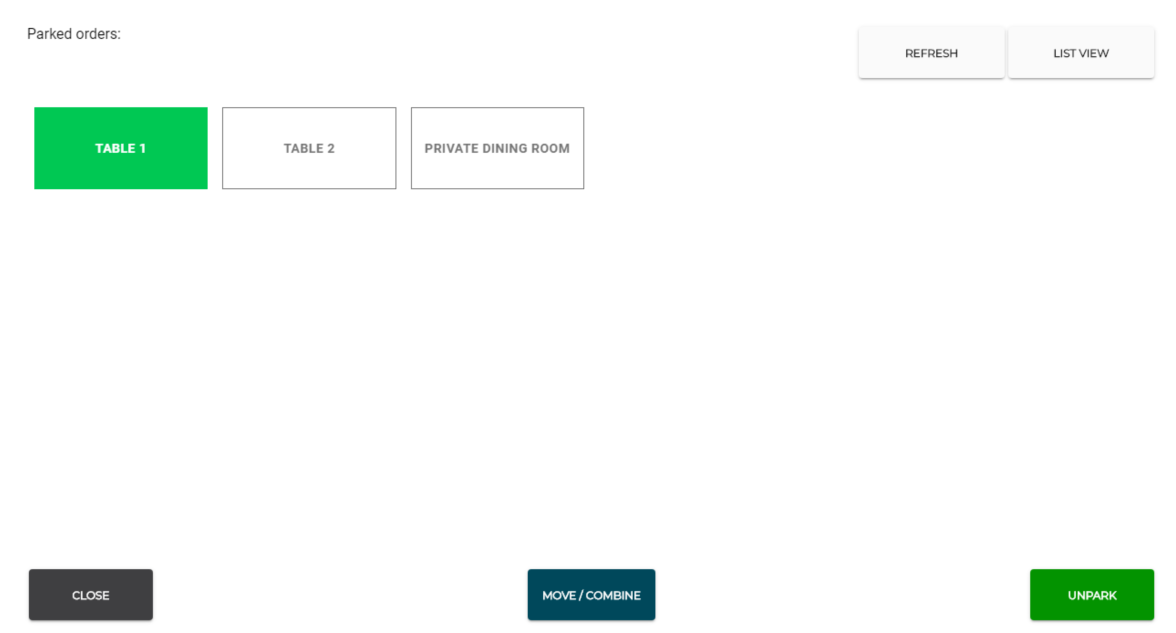
In the Tables view you can unpark a table’s orders by selecting the table and pressing Unpark.

Tables view with a table selected
Moving/Combining Tables' Orders
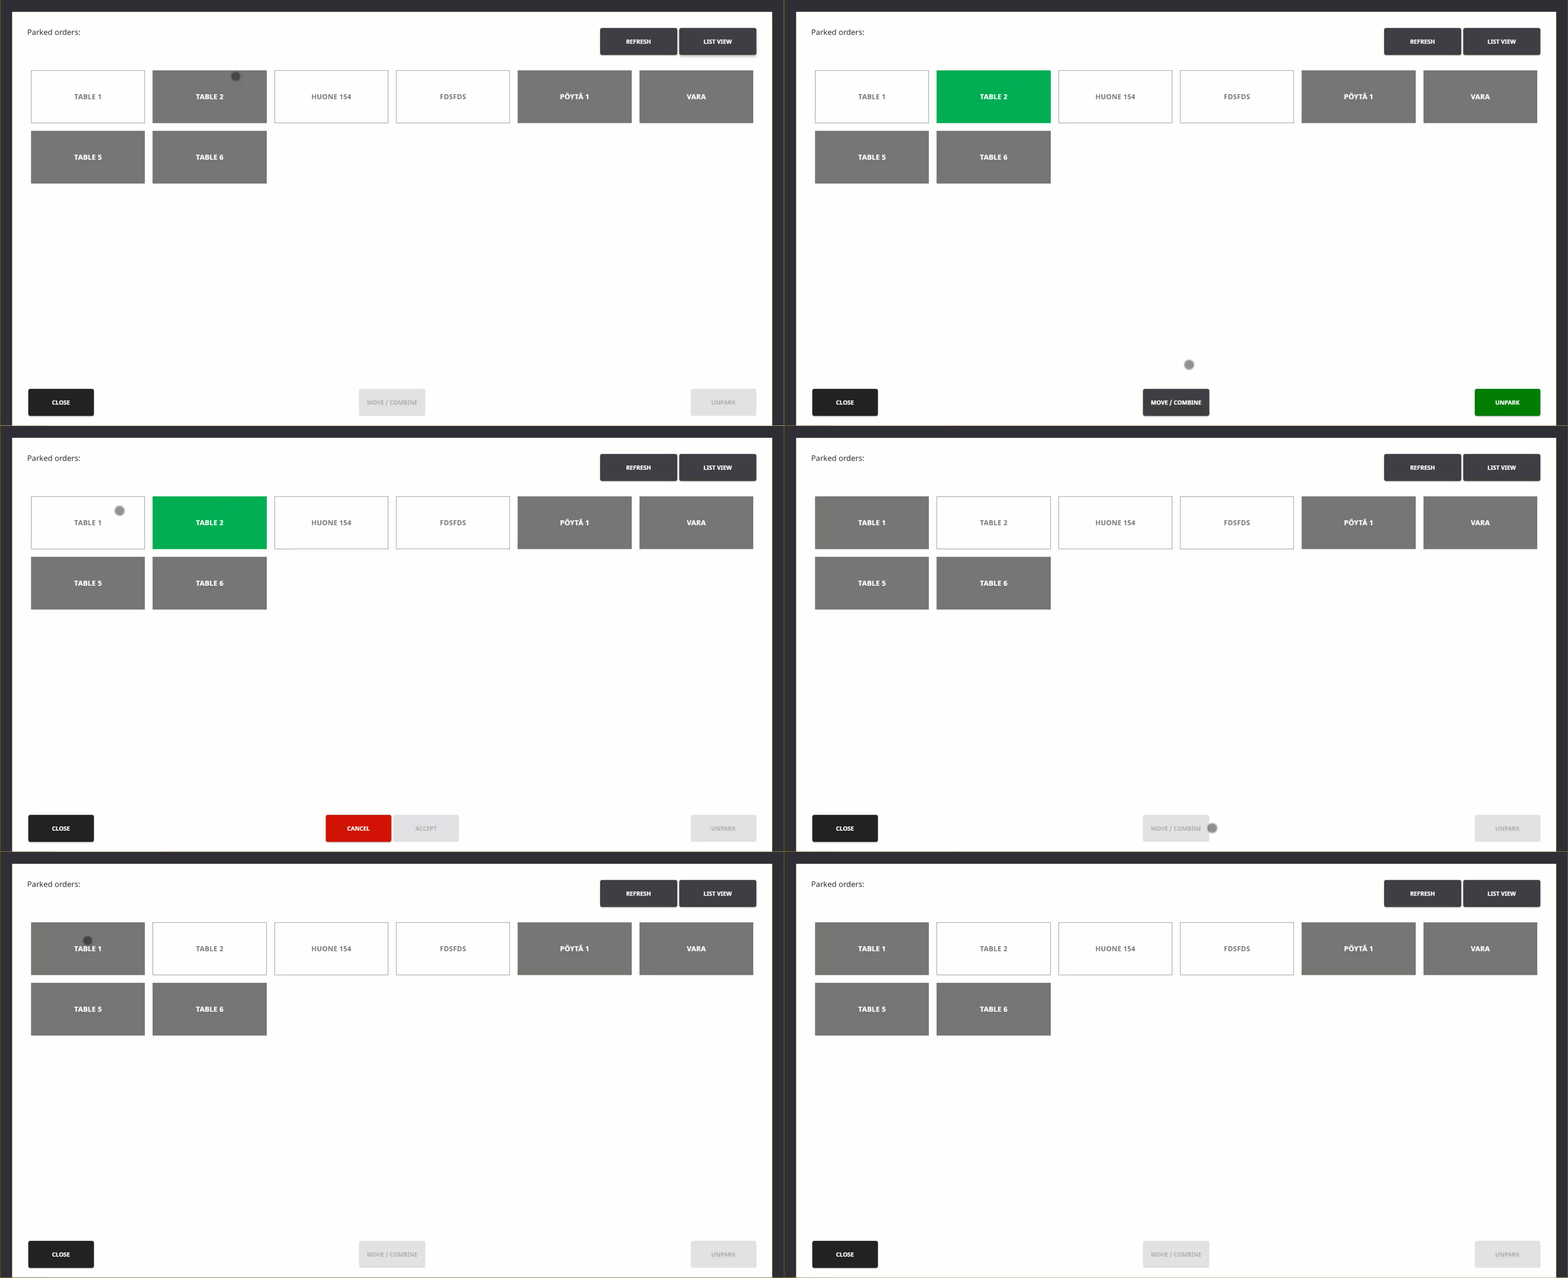
When you move/combine tables' orders, the order of the table you select first will be moved to another table.
Moving/combining orders means simply changing the table reference of the order which is being moved; Parked orders view will then display two separate orders for the same table, and the actual basket contents from the two tables will not be combined.
Press Parked Orders and select Tables view.
Select a table (so it turns green) whose orders you want to move to another table.
Press Move/Combine.
Select the target table (so it turns light green).
Press Accept.
Receipt for the table you selected in step 1 has now been cleared, and its order has been moved to the target table.

Moving/combining tables' orders
