Creating Orders for Variant Products
The following instructions detail how you can use product data Excel files provided by suppliers to
Add new variant products to Solteq Commerce Cloud with the Creating Variant Products with Excel Import feature, and
Create purchase orders based on the information from the supplier.
Phase 1: Create and Import Basic Product Details
Download the product information templates by clicking the Download Templates icon in the Products view. Open the VariantProductsTemplate.xlsx file you downloaded.

Download Templates icon in the Products view toolbar
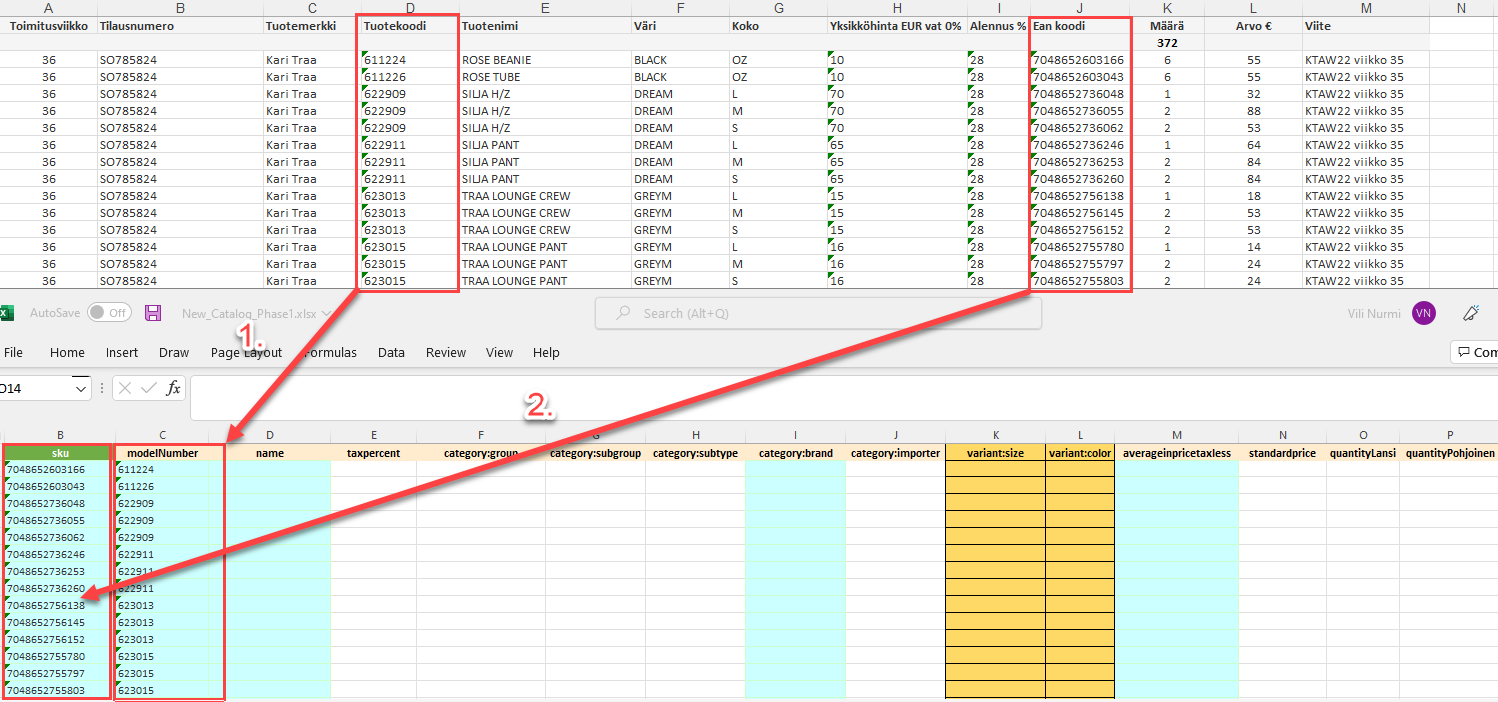
Copy and paste the following information from the supplier’s Excel file into the Variant Products Excel file.
Product codes into the modelNumber column.
EAN codes into the sku column.
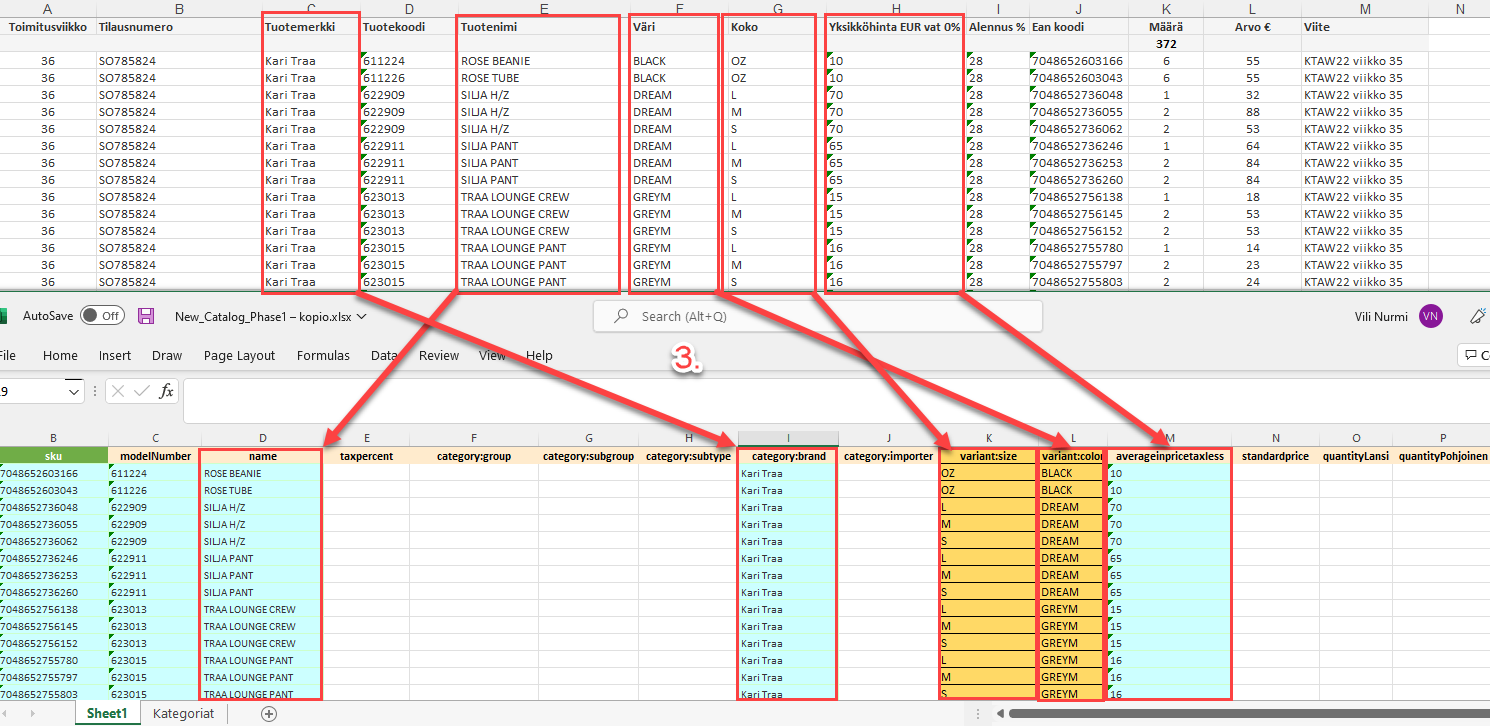
Next, copy and paste the following information from the supplier’s Excel file into the Variant Products Excel file:
Brands into the category:brand column
Product names into the name column
Colours into the variant:color column
Sizes into the variant:size column
Product prices in € (taxless) into the averageinpricetaxless column
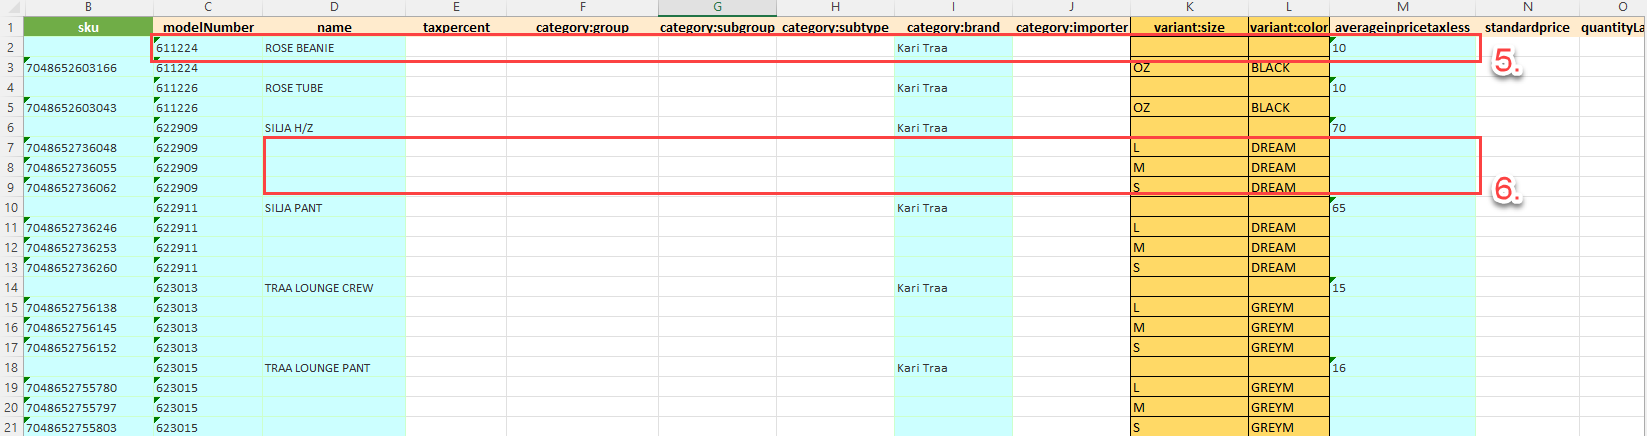
Add one empty row (right-click and select Insert → Entire row ) on top of every model number row.
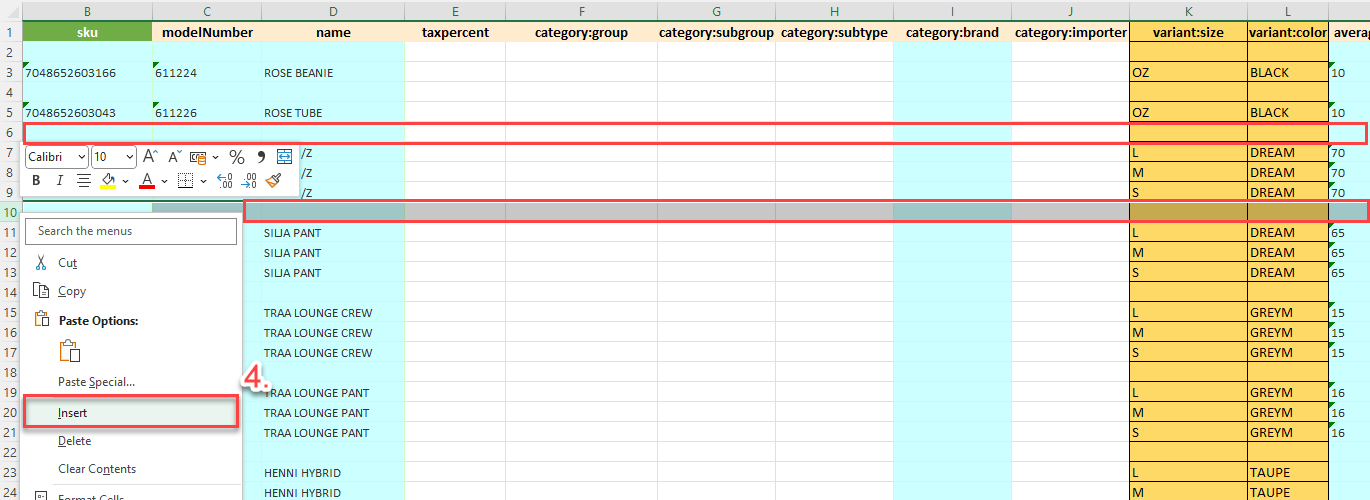
Copy the modelNumber, name, category:brand, averageinpricetaxless from the first variant and paste them to the empty row.
Delete name, category:brand and averageinpricetaxless from the variants.
Add the required information into category:group, category:subgroup, category:subtype and category:brand columns.
Enter the tax percentage of the product into the taxpercent column.
(optional) You can enter the price with tax included (if known) into the standardprice column.

The example above has a simple formula which adds 38% sales margin after taxes:
In the N2 cell, for example:
"=(M2*(1+24/100)*1.38)"
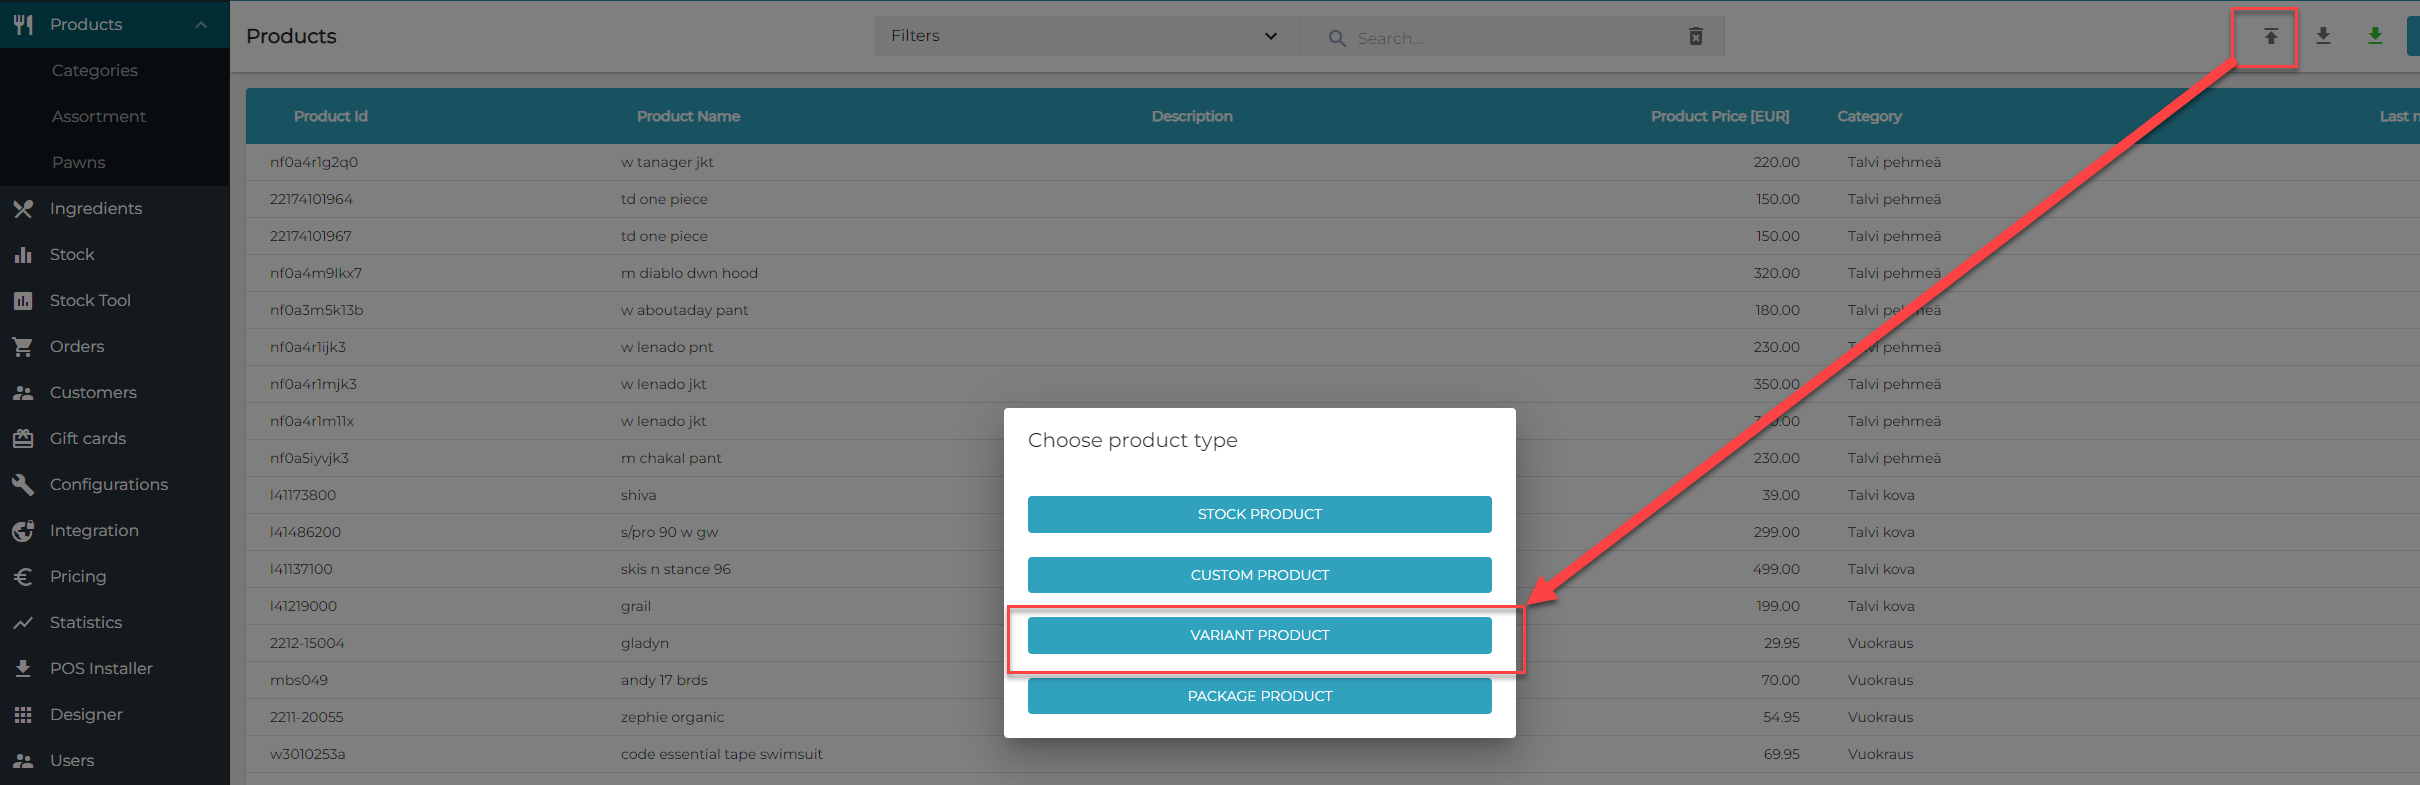
Save your changes to the Excel file and click the Import from file icon from Back Office toolbar.

Import from File icon in the Products view toolbar
Select Variant Product in the Choose product type window.
Select the file you saved and click Open.
The notification File import processing queued, check your email for import results.is displayed in the Back Office.
You will receive a message in your e-mail when the processing is done. If importing the file was unsuccessful, the e-mail also contains information about the reason for the failure.
Phase 2: Create a New Purchase Order Using the Supplier Information
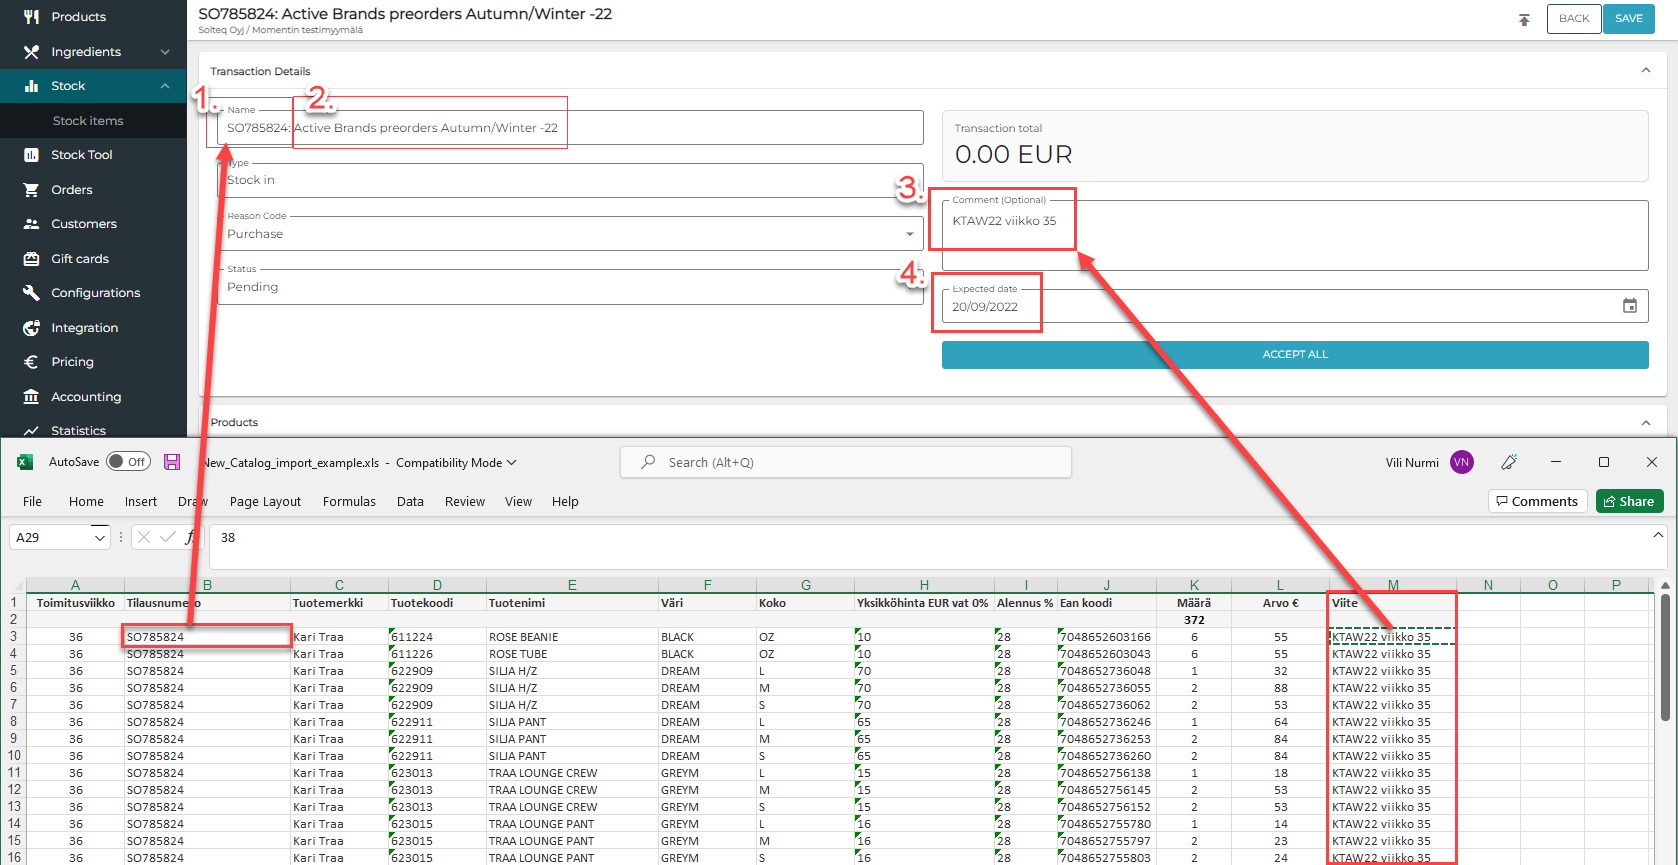
Create a new purchase order; copy-paste or enter the following information from the supplier’s Excel into the purchase order:
Insert the order number in the beginning of the purchase order’s Name.
Add some distinctive (human-readable) reference to the Name.
Add the reference from the Excel into Comment (optional) field.
Enter the Expected date.
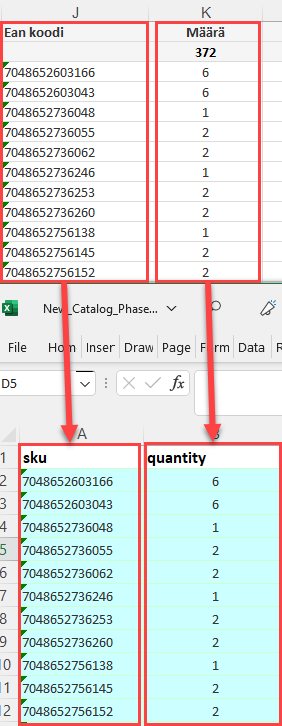
Copy-paste the following information from the supplier’s Excel file into the purchase order Excel file:
EAN Codes into the SKU column.
Quantities into quantity column.
Import the Purchase Order Excel file:
Click the Import from file icon.

Import from File icon
Select the file you want to import and click Open.
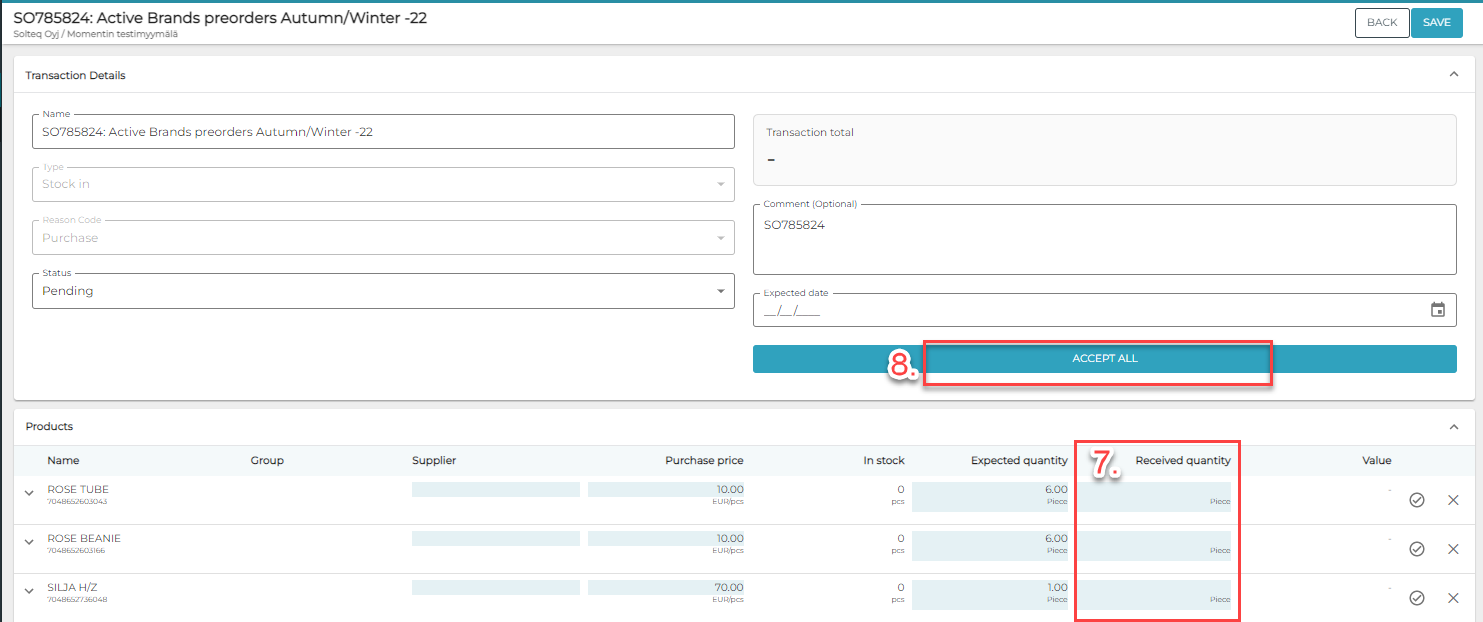
Now the rows from the Excel file have been added to the Pending purchase order.
Click Save to save your changes.
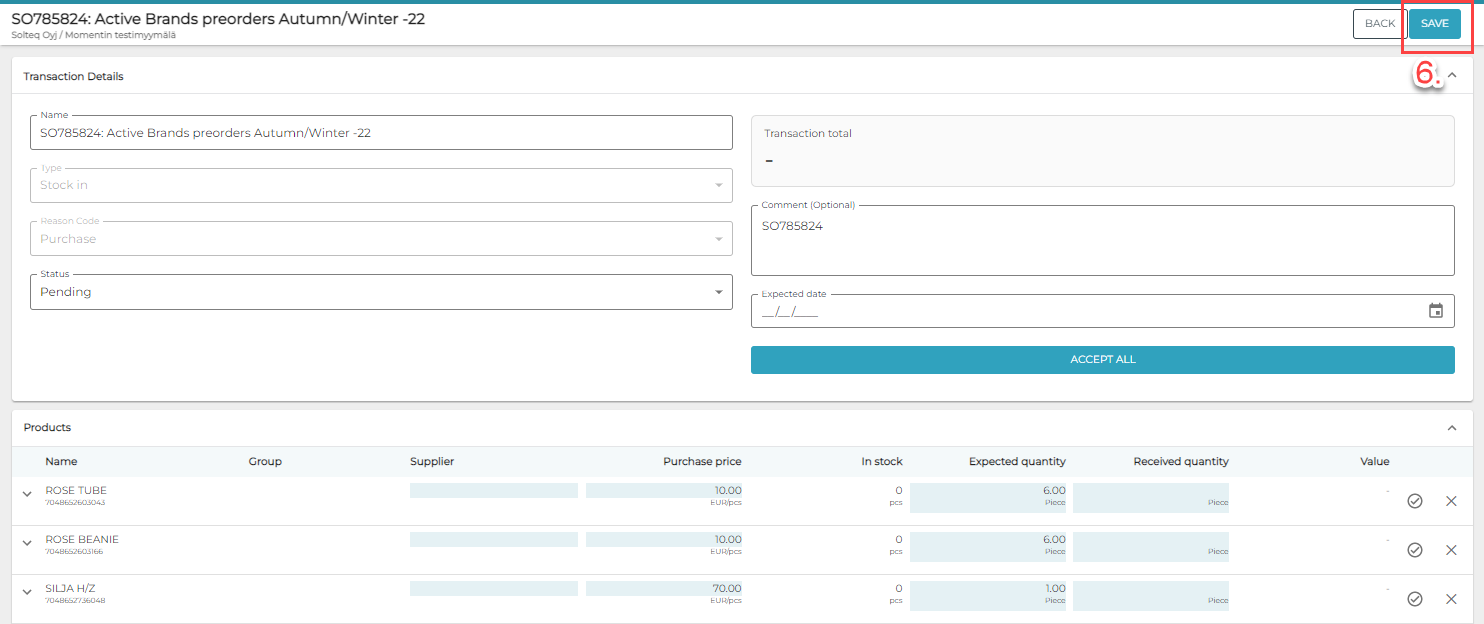
When the order arrives to the Stock, you can check and enter the quantities individually for each row, (7.) or Accept All (8.).