
Eventim
When Eventim integration has been taken into use, orders from Eventim can be sent to Solteq Commerce Cloud, added to the Basket from parked orders in POS, and then sold like other products.
The following order information is transferred from Eventim to Solteq Commerce Cloud:
EventimId: Unique identifier of the order, which can be used to find the order from Parker Orders.
Status: OPEN or CANCELLED.
SiteId: Eventim POS identifier.
Author: Username of the logged-in Eventim user.
The following product information is transferred from Eventim to Solteq Commerce Cloud:
Product ID: External ID in Eventim.
Product name
Quantity
Price
VAT percent
Discount
Data is not transferred from Commerce Cloud to Eventim.
You need to take the Eventim Citrix App into use before the following configurations can be created.
See the example videos of using Eventim Inhouse app with Solteq Commerce Cloud POS below.
https://youtu.be/BBysgF43WgQhttps://youtu.be/4EjEtfVTn6c
Eventim Configurations
Enter authentication and integration URLs in the Eventim GUI (URLs will be provided by Solteq):
URL (Authentication URL)
URL 2:(Integration URL)
Save your settings in the Eventim GUI.
Create Configurations in the Solteq Commerce Cloud Back Office
In the Back Office's Integration view, click +Install a new add-on. The Marketplace window is displayed.
Click Install on Eventim row. Integration details are displayed.
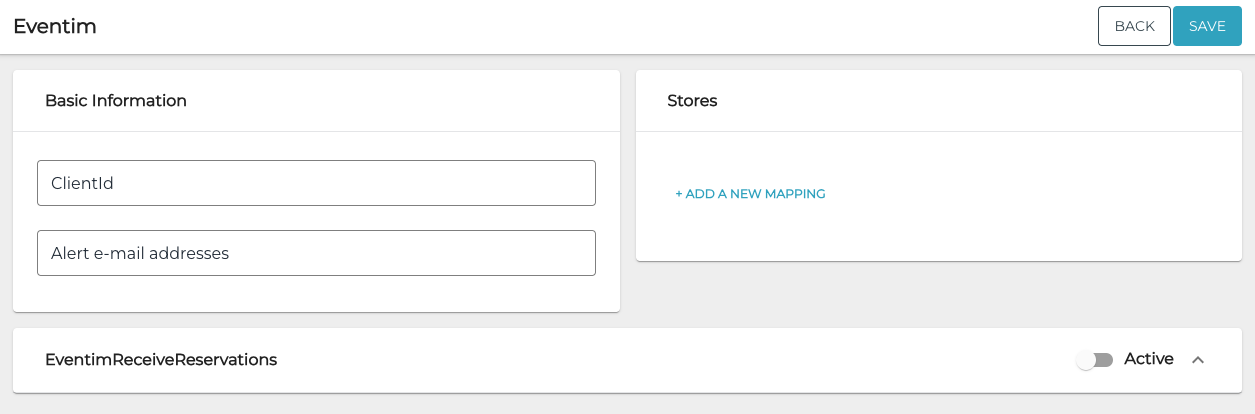
Eventim integration details
Enter the ClientId for the integration.
(optional) Enter the Alert e-mail addresses as a comma-separated list (for example: alice@email.com,bob@email.com). If the integration fails, an alert e-mail is sent to these addresses.
Enter Stores information. This section should contain mapping between Eventim client Ids and Commerce Cloud store Ids. The mapping is used to forward the bookings from Eventim to the correct Commerce Cloud store.
Click the EventimReceiveReservations switch to ON position.
Click Save to save your changes.
Next, add new client credential in the Authentication settings of the Back Office:
API Client ID: Enter the same ClientId as in step 3.
URL Token endpoint (URL will be provided by Solteq).
Permissions: Check all the checkboxes except webhooks-api and webpayments-api
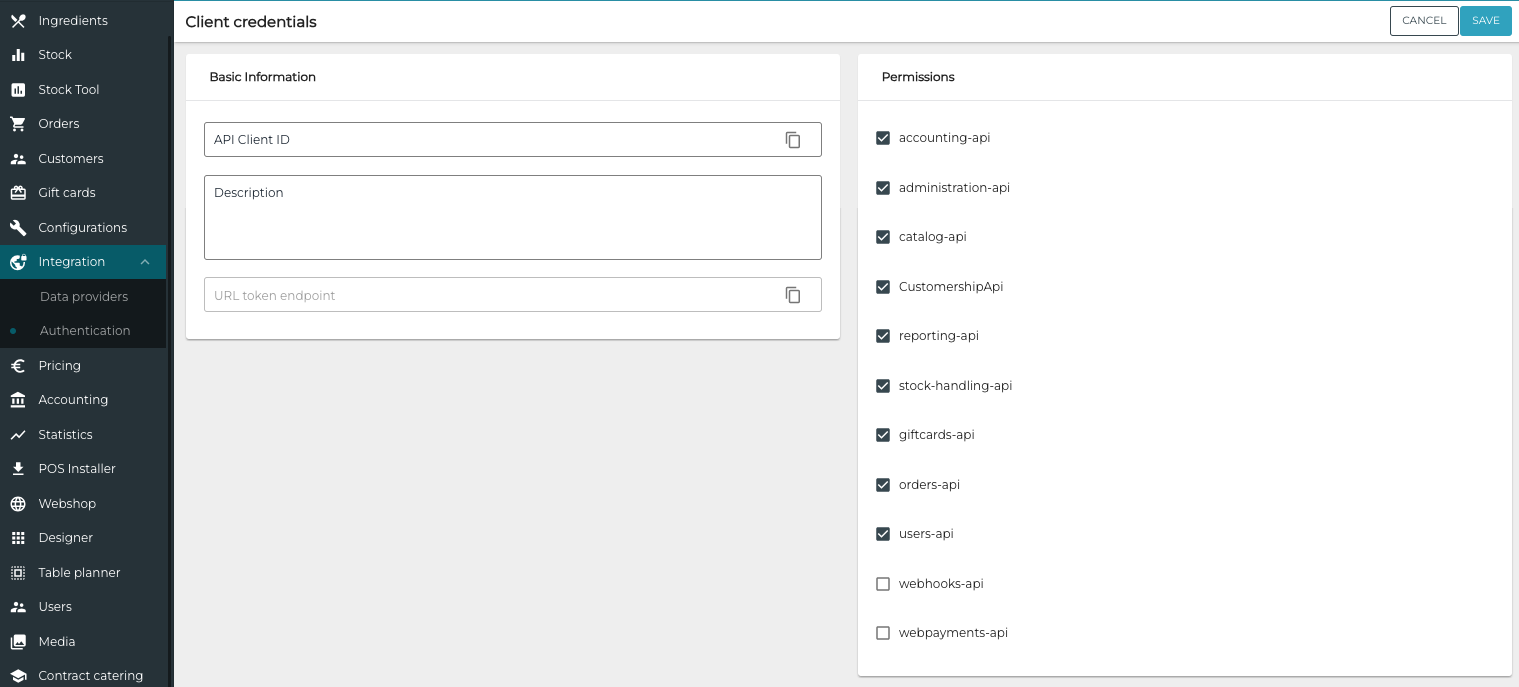
Click Save to save your changes.
Create Product Mapping between Eventim and Solteq Cloud Commerce
Create the required ticket products in Eventim.
Create the corresponding ticket products as Open Products in the Solteq Commerce Cloud Back Office.
VAT: 0.
Filter the product list in the Back Office and export the ticket products you created in Excel format.
Open the Excel file, and replace the Commerce Cloud Product IDs in the id column with Eventim External IDs.
Import the Excel back to the Back Office. This creates new products which use the Eventim External IDs as Product IDs in the Back Office.
Delete the original products you created in step 2.
Eventim Ticket Purchases in Solteq Commerce Cloud POS
In the Eventim GUI, add products to the Basket and select SOLTEQ as the payment method.
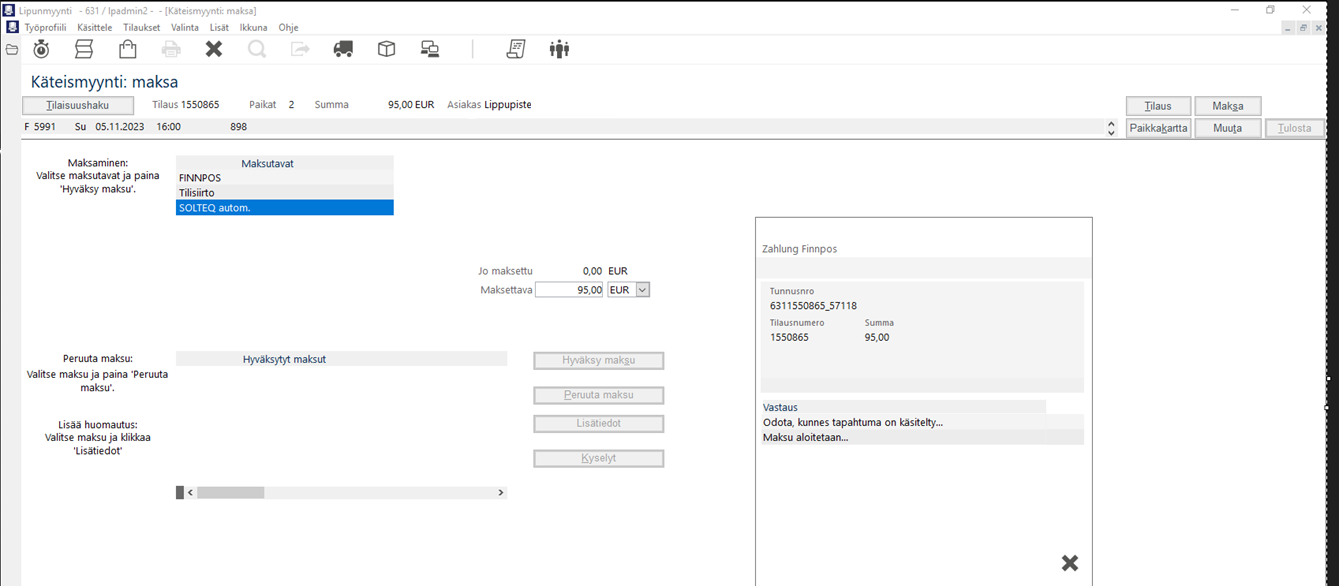
Click Approve Payment.
Go to Parked Orders in Solteq Commerce Cloud POS; select and unpark the Eventim ticket order. The contents of the order are added to the Basket.
Proceed to the payment normally.