
Enabling Pay at Table
Pay at Table feature can be used with Verifone VX690 & V400 payment terminals. A working WLAN connection is required to use the feature.
Cancelling or correcting card transactions is not supported when using Pay at Table; these must be done in a POS with a Verifone payment terminal.
Configure Payment Terminal(s) to use Pay at Table
Contact Verifone customer support to configure your payment terminals.
Set Up WLAN connection in the Payment Terminal
Go to Settings→ Connection method→WIFI
Connect to the desired WLAN network: Settings→WLAN settings→ Find a WLAN net.
Set the POS address and port 5086: Settings→ ECR functions → ECR IP.
Enter here the POS workstation IP address and port separated with comma. Example: 192.168.1.5,5086
Back Office Configurations
In Company Configurations, add a new "dummy" workstation; enter PayAtTable in the Workstation Name field.
The “dummy” workstation needs to be assigned to the same Store where the workstation which will be used with the Pay at Table terminal is assigned to.

Dummy PayAtTable workstation in the workstation list
Go to the Workstation Configurations of the workstation you want to use with the Pay at Table feature, and open the PayAtTable Service settings. Click Service in use switch to ON position.
Enter the workstation ID of the “dummy” workstation in the PayAtTableWorkstationID field.
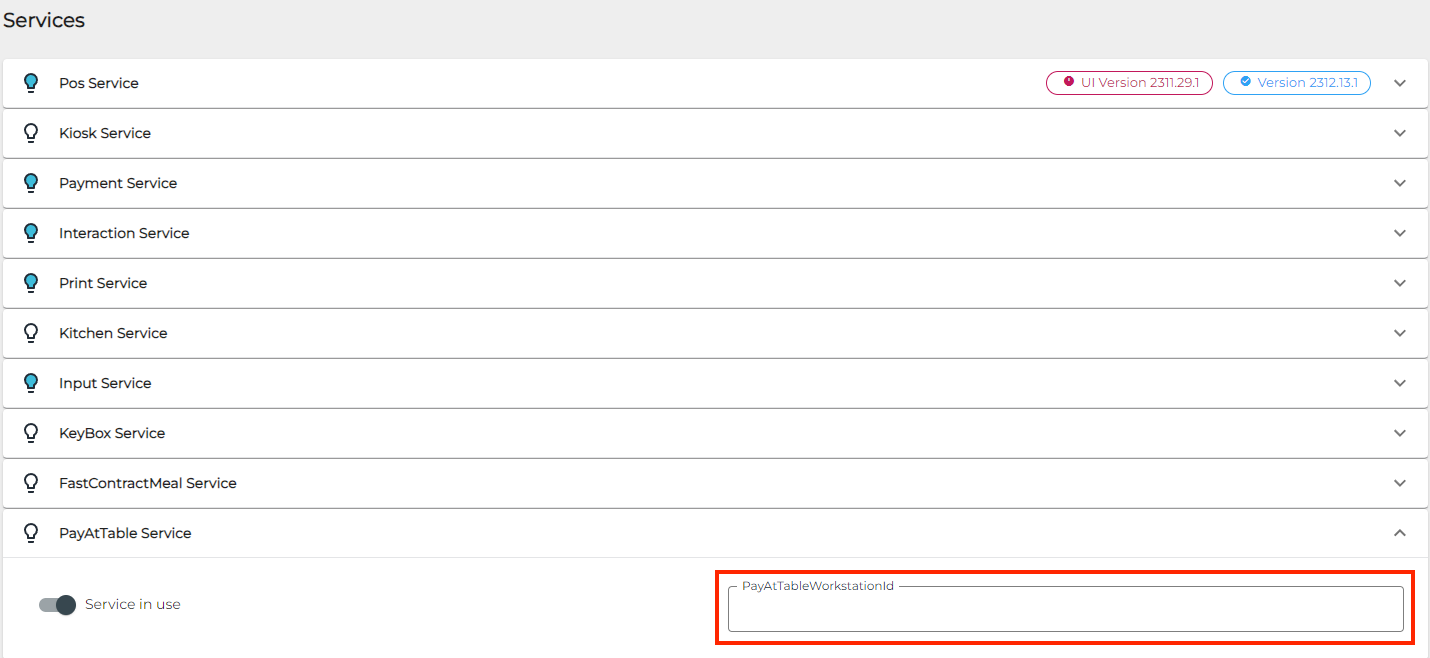
PayAtTableWorkstationId field in PayAtTable Service settings
Click Save to save your changes.
Next, go to the “dummy” workstation’s Payment Service settings, and add the following payment methods:
Card with Type: Dummy.
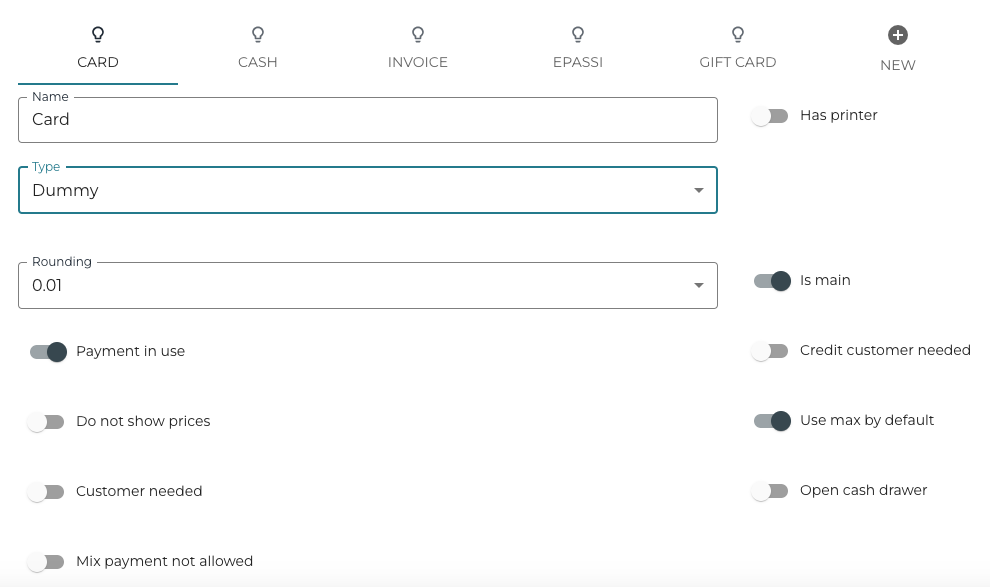
Card payment method with Type: Dummy
Cash payment method.
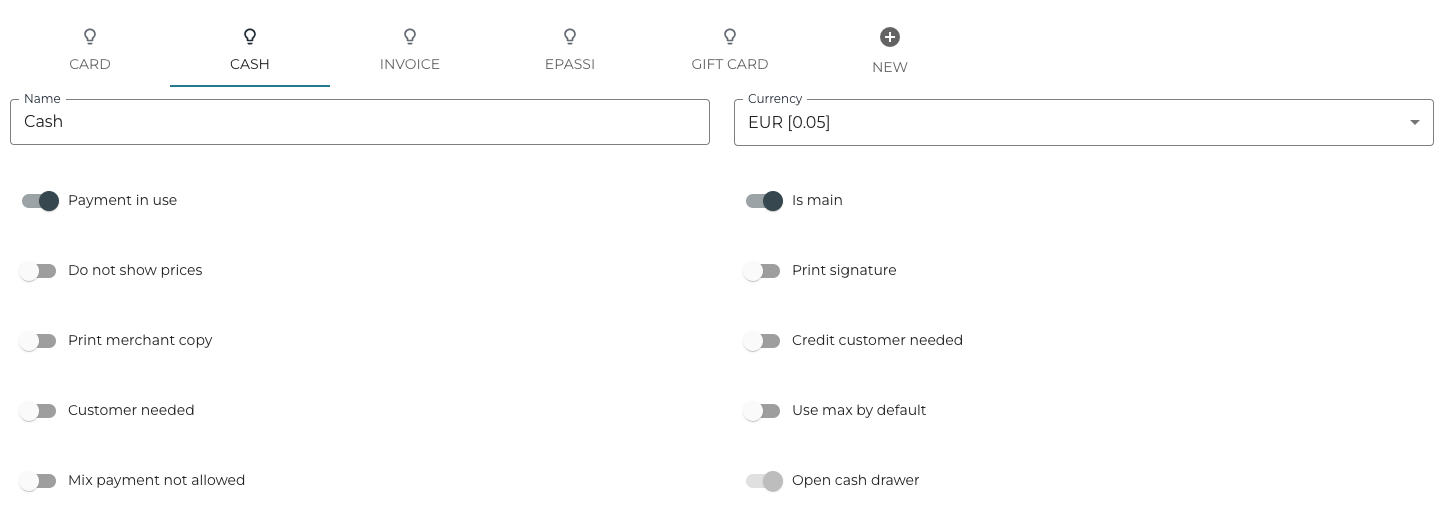
Cash payment method
Click Save to save your changes.
Go to the Payment Service settings of the workstation which will be used with the Pay at Table terminal, and check that it has the same payment methods (Card with Type: VerifoneFi, Poplapay etc. and Cash) that you added for the “dummy” workstation in step 5. If not, add these same payment methods.
Click Save to save your changes.
If you have several workstations which you want to use with a Pay at Table terminal, you need to create a separate “dummy” workstation for each one (step 1), and then proceed to steps 2-8.
POS Setup
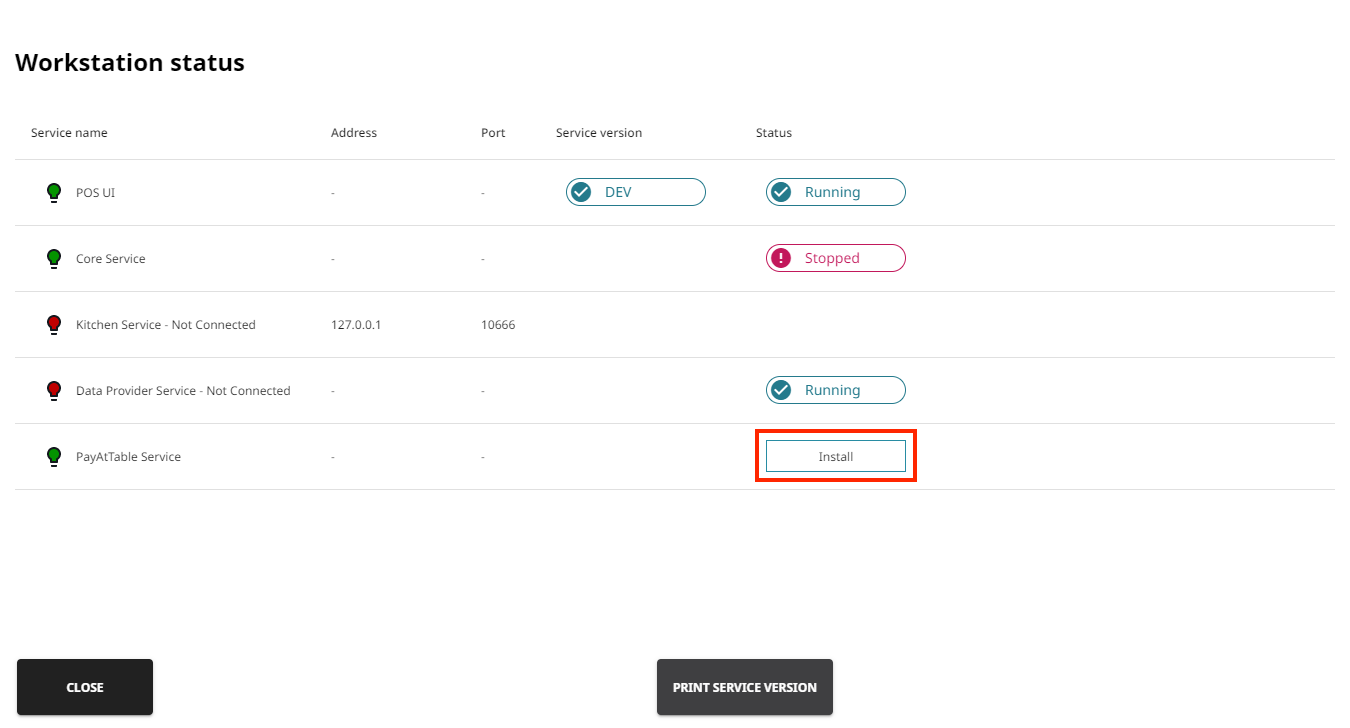
Go to Services
If logged out from the POS, press the Settings icon in the right-hand bottom corner of the login screen, and then select POS Version.
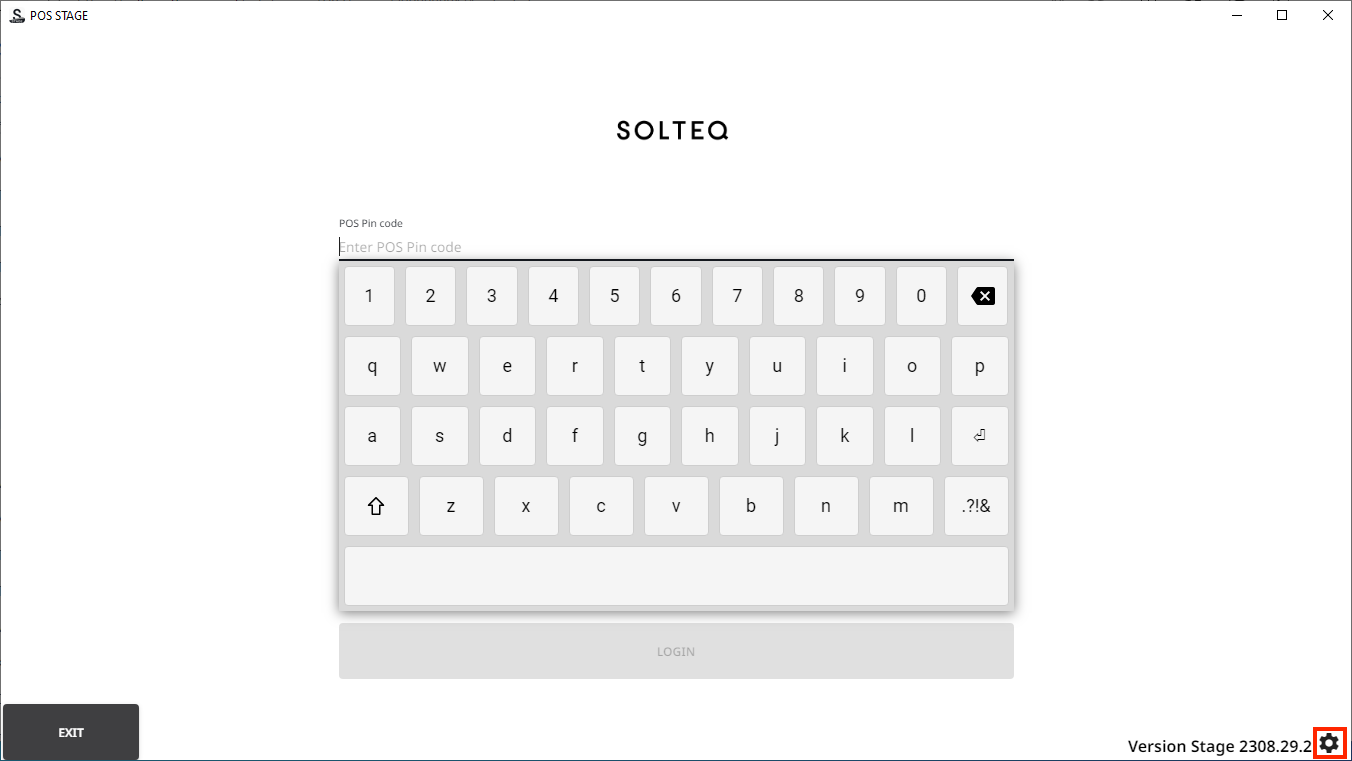
Settings icon in the POS login screen
If logged in to the POS, press Menu, and then Settings followed by POS Version.
Click Install on the PayAtTable service row.
After the installation has been completed, add also exception on Firewall on workstation to accept TCP/IP connections to port 5086.