
Personnel Ledger
Personnel Ledger of Solteq Commerce Cloud enables you to track the working hours of personnel, as well as generate hour reports and view in real-time who is currently working (using cost unit as a filter, for example).
Activate Personnel Ledger
In the Back Office Company Configurations, switch the the Personnel Ledger switch to ON position.
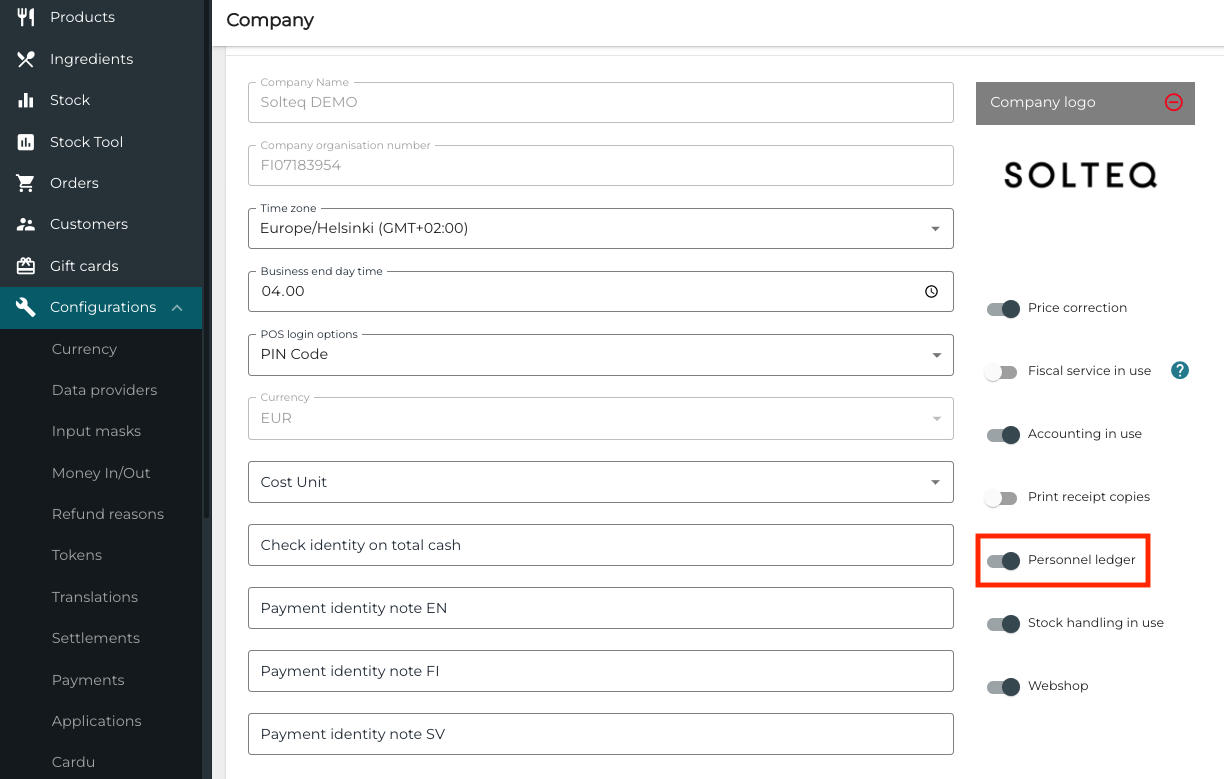
Personnel Ledger switch in Company Configurations
Next, define Read/Modify Personnel Ledger permissions for the needed User Groups in the Back Office.
Note that exporting a report requires Modify permissions.
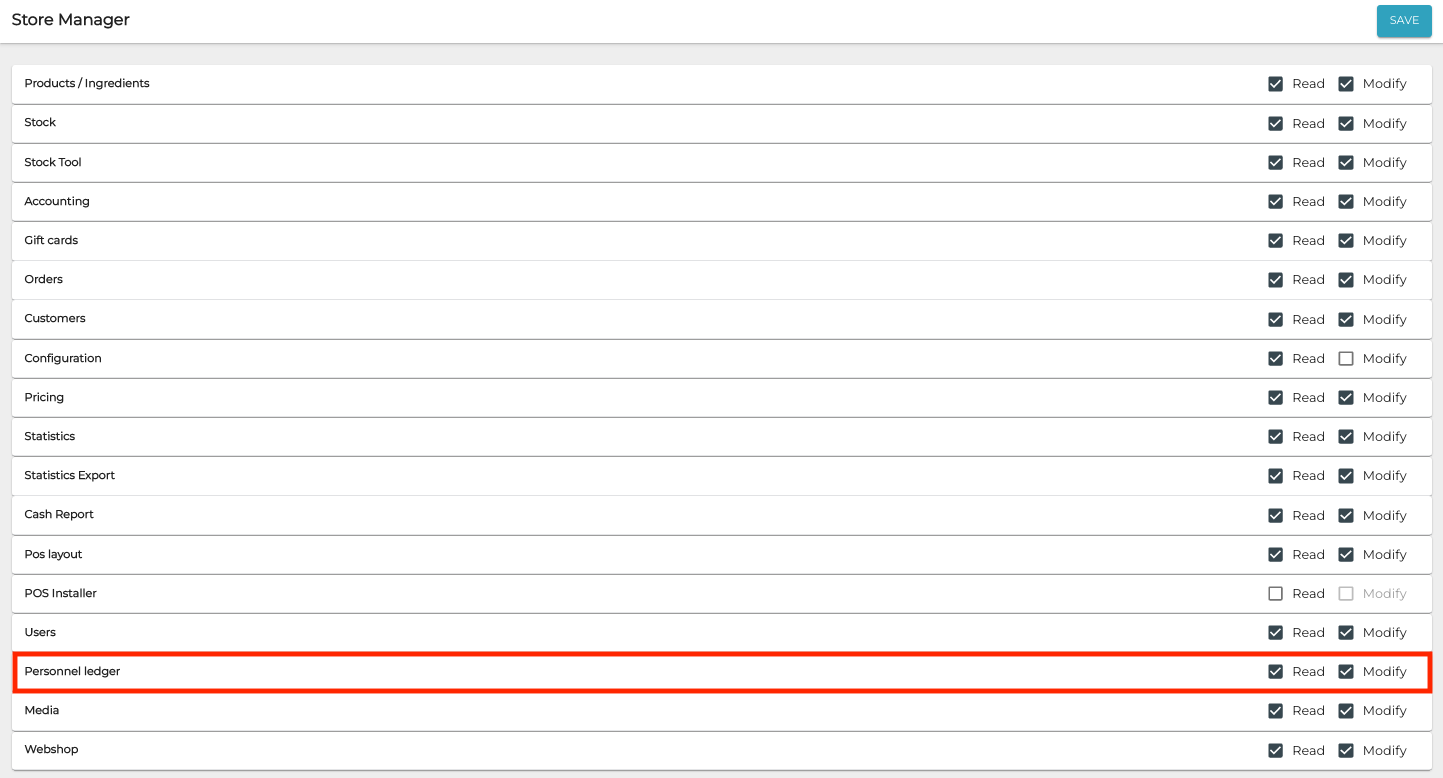
Personnal Ledger permissions
There are also three fields in User settings which have an effect on Personnel Ledger usage:
Social Security Number
Used for reporting needs.
Will be treated as GDPR data, and therefore Audit logs are also generated whenever any user data is accessed.
This field can also be used for personnel numbers in the company’s HR system, for example.
Cost Unit
The cost units the working hours of the person can be logged to.
Person may belong to multiple cost units (working on multiple locations, for instance).
Optional field.
Track shifts
If some persons are not part of the ledger, this settings can be set to OFF position for them.
These persons (such as Administration) are not forced to start shift when logging on to POS.
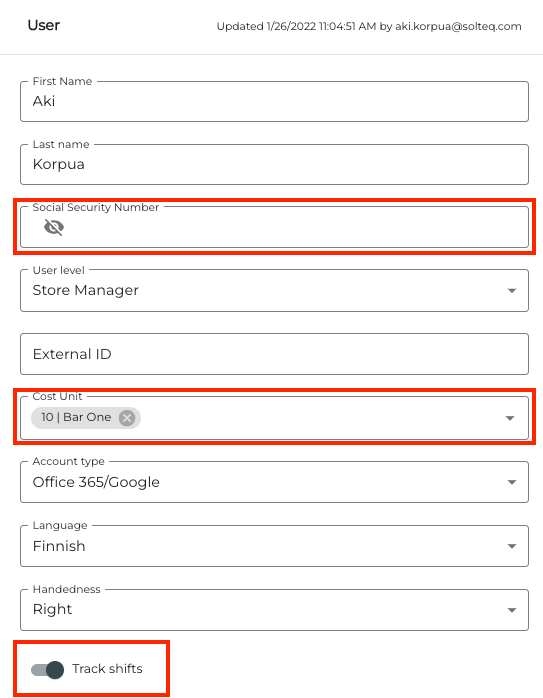
User settings for Personnel Ledger usage
There is an option to have a user group without access to POS. Users belonging to the group can only use POS for logging hours.
To create such user group, set the POS action switch to OFF position for a user group.
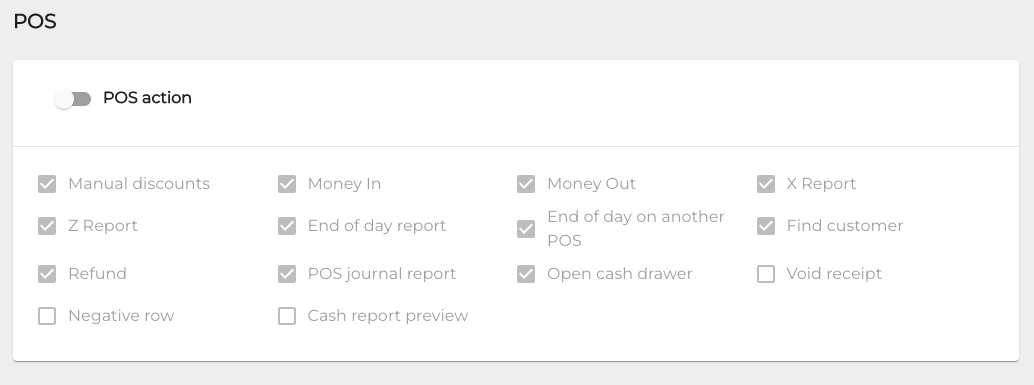
POS action switch in user group settings
Hour Reports
You can view the hour report by clicking Users and selecting Personnel Ledger in the Back Office menu.
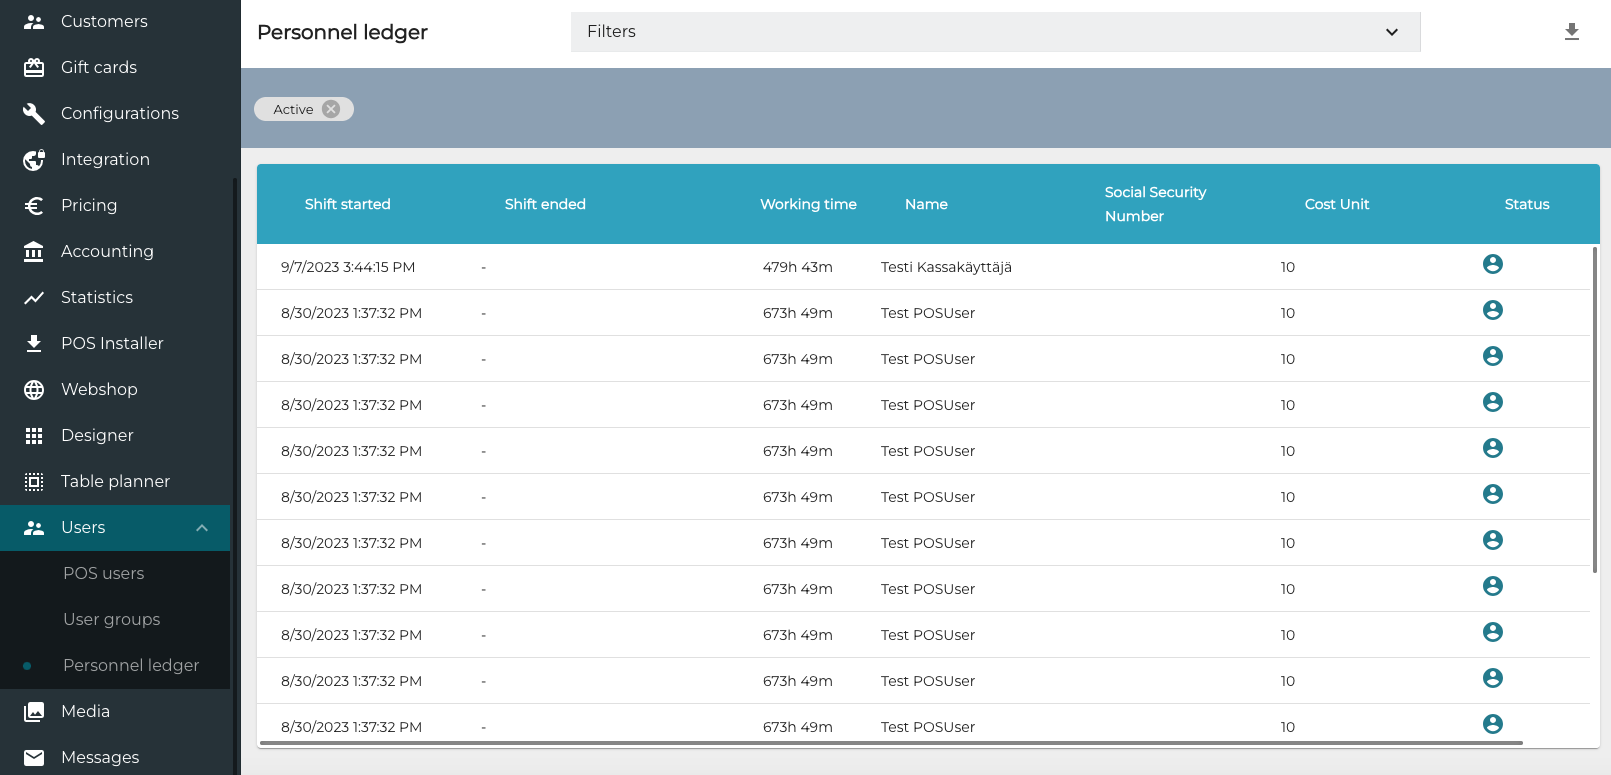
Personnel Ledger view
As a default, the report displays the hours of the personnel who are currently working. You can also use the following filters to narrow down the data:
First name
Last name
Cost Unit
Status (Active or Inactive).
Date
Custom period (select the period)
Full Months (select the months)
Today
Yesterday
This week
Previous week
This month
Previous month
This year
Previous Year
After selecting the filters, click Apply Filters to update the data in the view.
You can export the data (with the selected filters in effect) in Excel format by clicking Export to Excel ; this way it is easy to create reports containing the working hours of a week or a month, and provide it to HR, for example.
It is also possible to use Solteq Connector to integrate Commerce Cloud hour reporting with existing HR systems to automate hour report sending.
The following fields are available for reporting (Excel and API):
First Name
Last Name
Email
Social Security Number / Person Number
Cost Unit
Shift started date and time
Shift ended date and time
System timestamp marking shift start
System timestamp marking shift end