
Fast Contract Meals
The Contract Catering functionality of Commerce Cloud makes it possible to use the Fast Contract Meals feature, which allows customers to get catering service by scanning identification card with barcode scanner. Pre-created rules are used to check if the service is allowed for the customer. If the service is allowed, a receipt is automatically created. Charges from the service can then be deducted from the customer’s salary or invoiced by other means. Customer does not need to use money at the POS.
Instructions for configuring a HP HR2150 POS scanner for FastContractMeals App can be found here.
Requirements
The POS needs the following to be installed:
Fast Contract Meals service
At least a barcode scanner is required.
The application also supports 2x20 customer display that will show status of each scan.
Devices need to support OPOS. Device-specific drivers and device name must be configured during installation.
If POS application is going to be used on same workstation, it will require own physical scanner.
Solteq Commerce Cloud POS
POS needs to be installed on the same workstation even if it is not going to be used; it is required for data replication and creating the receipt.
Back Office Configuration
User Permissions
In User Groups, give Contract Catering Read and Modify permissions for at least one user group to display the Contract Catering in the Back Office Menu.
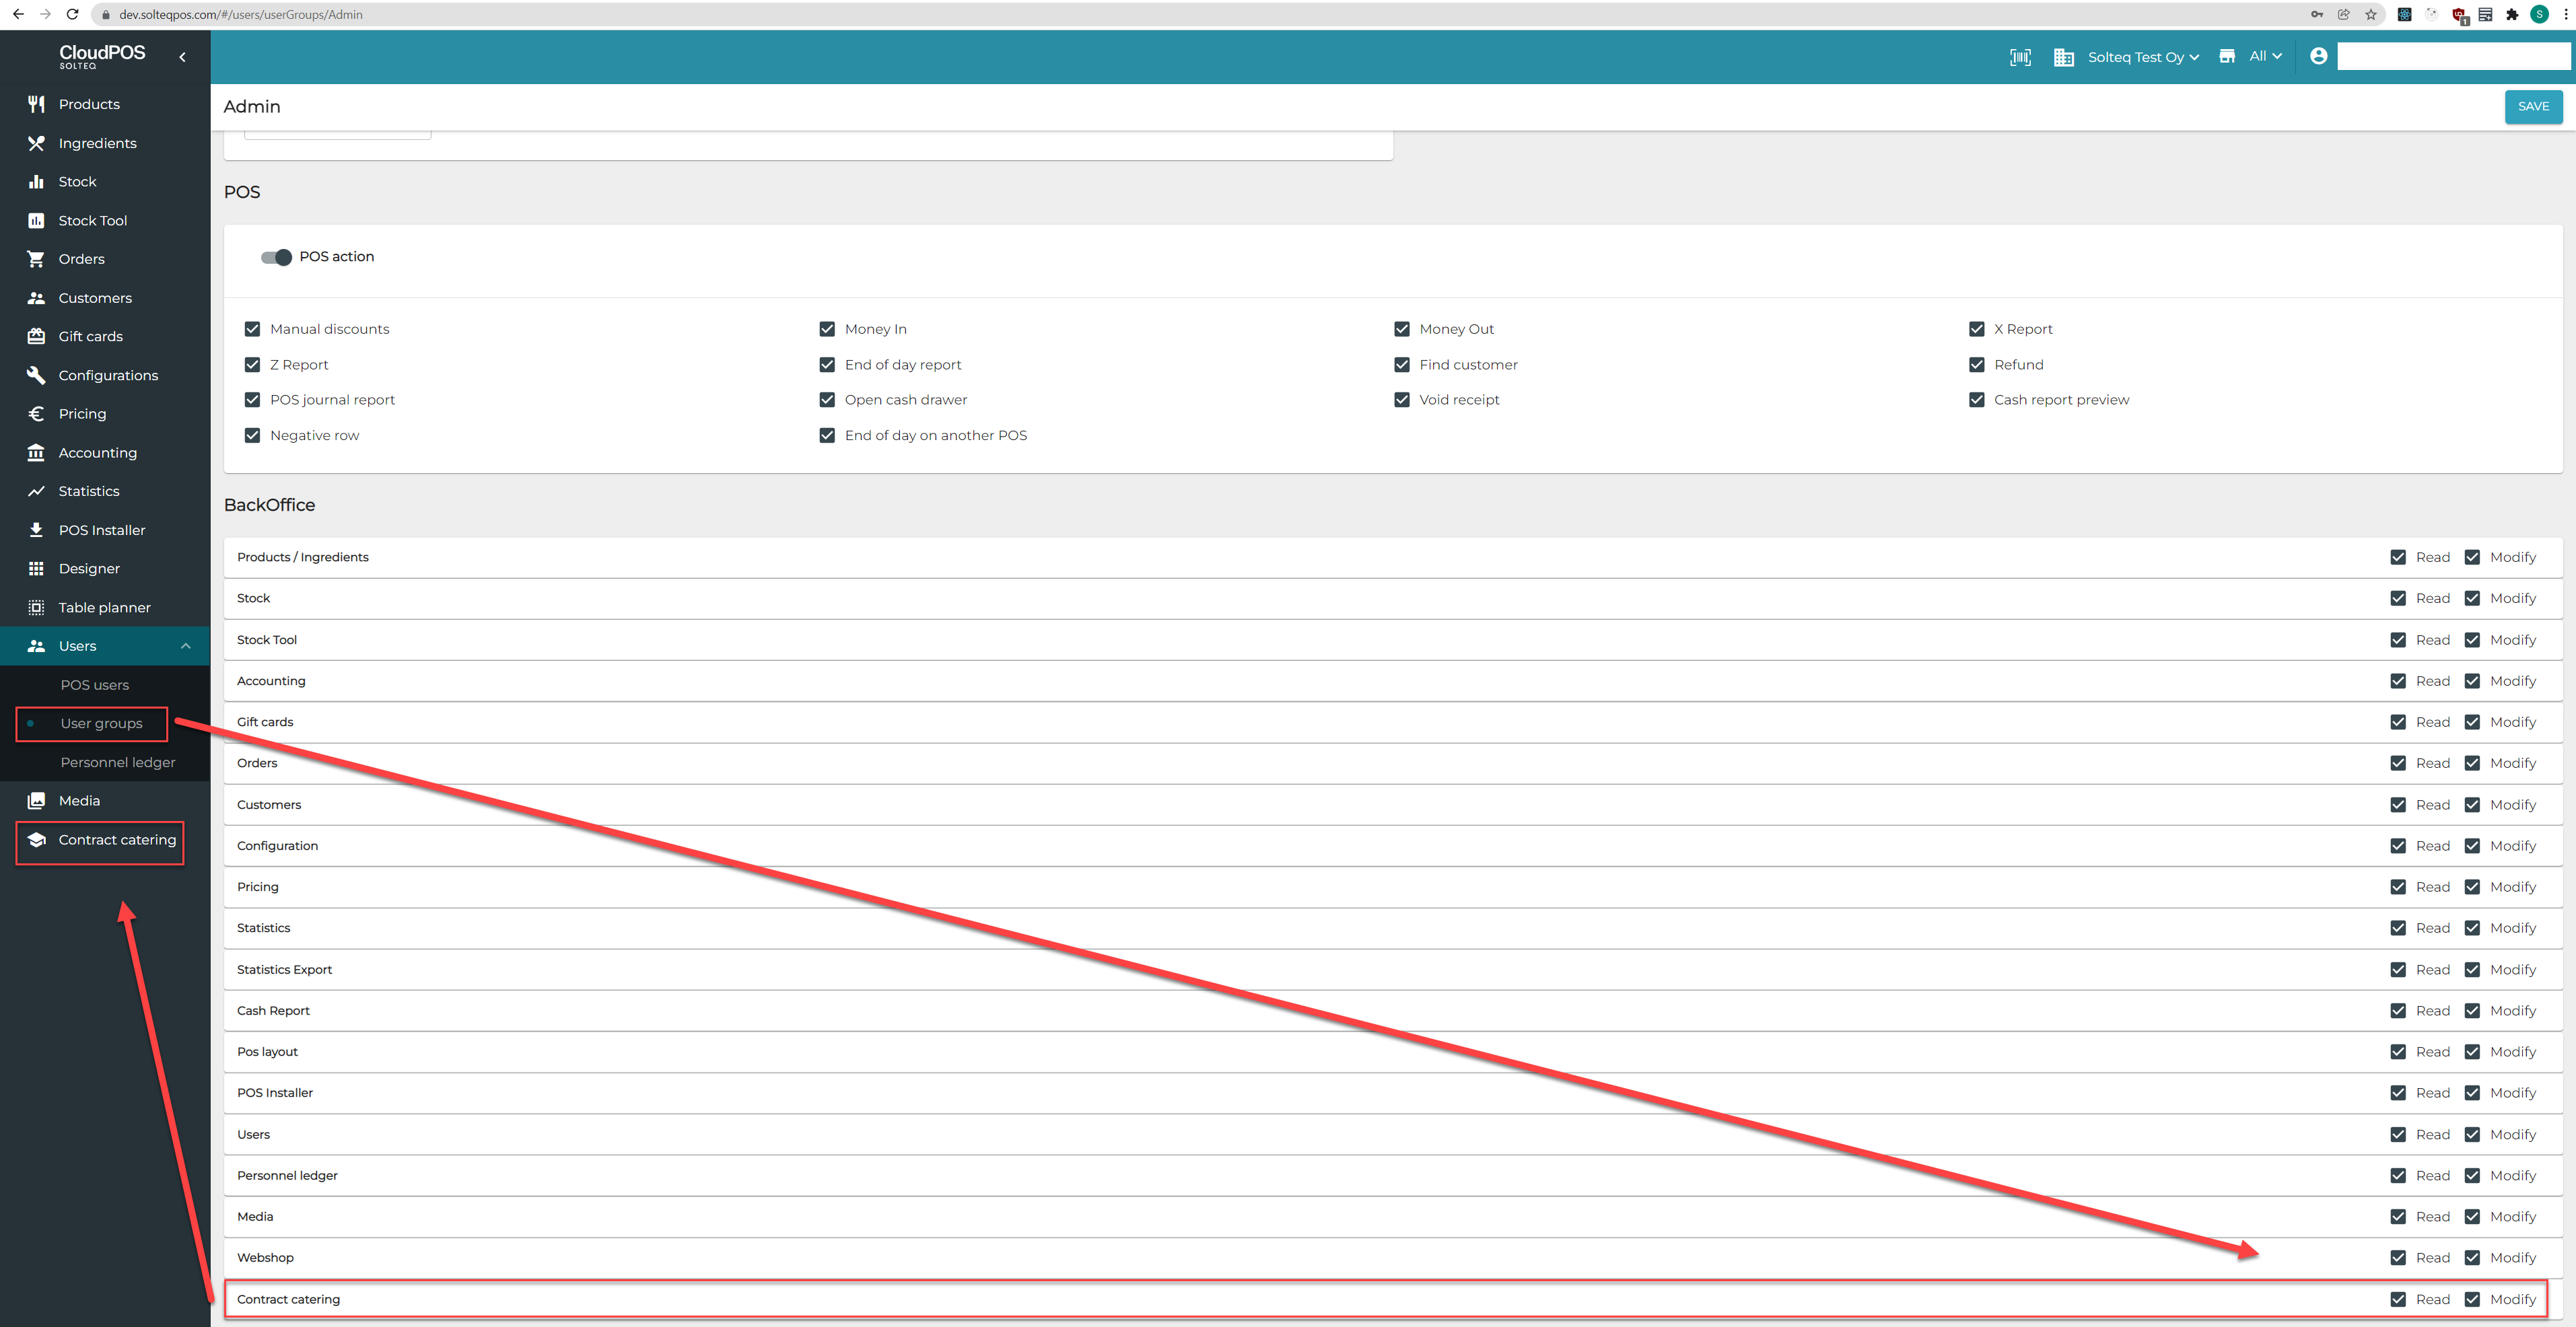
Making Contract Catering visible in the Back Office menu
Store Configurations
In Store Configurations, the Kitchen in use setting must be set to OFF for Contract Catering to work in the store. It is disabled by default.
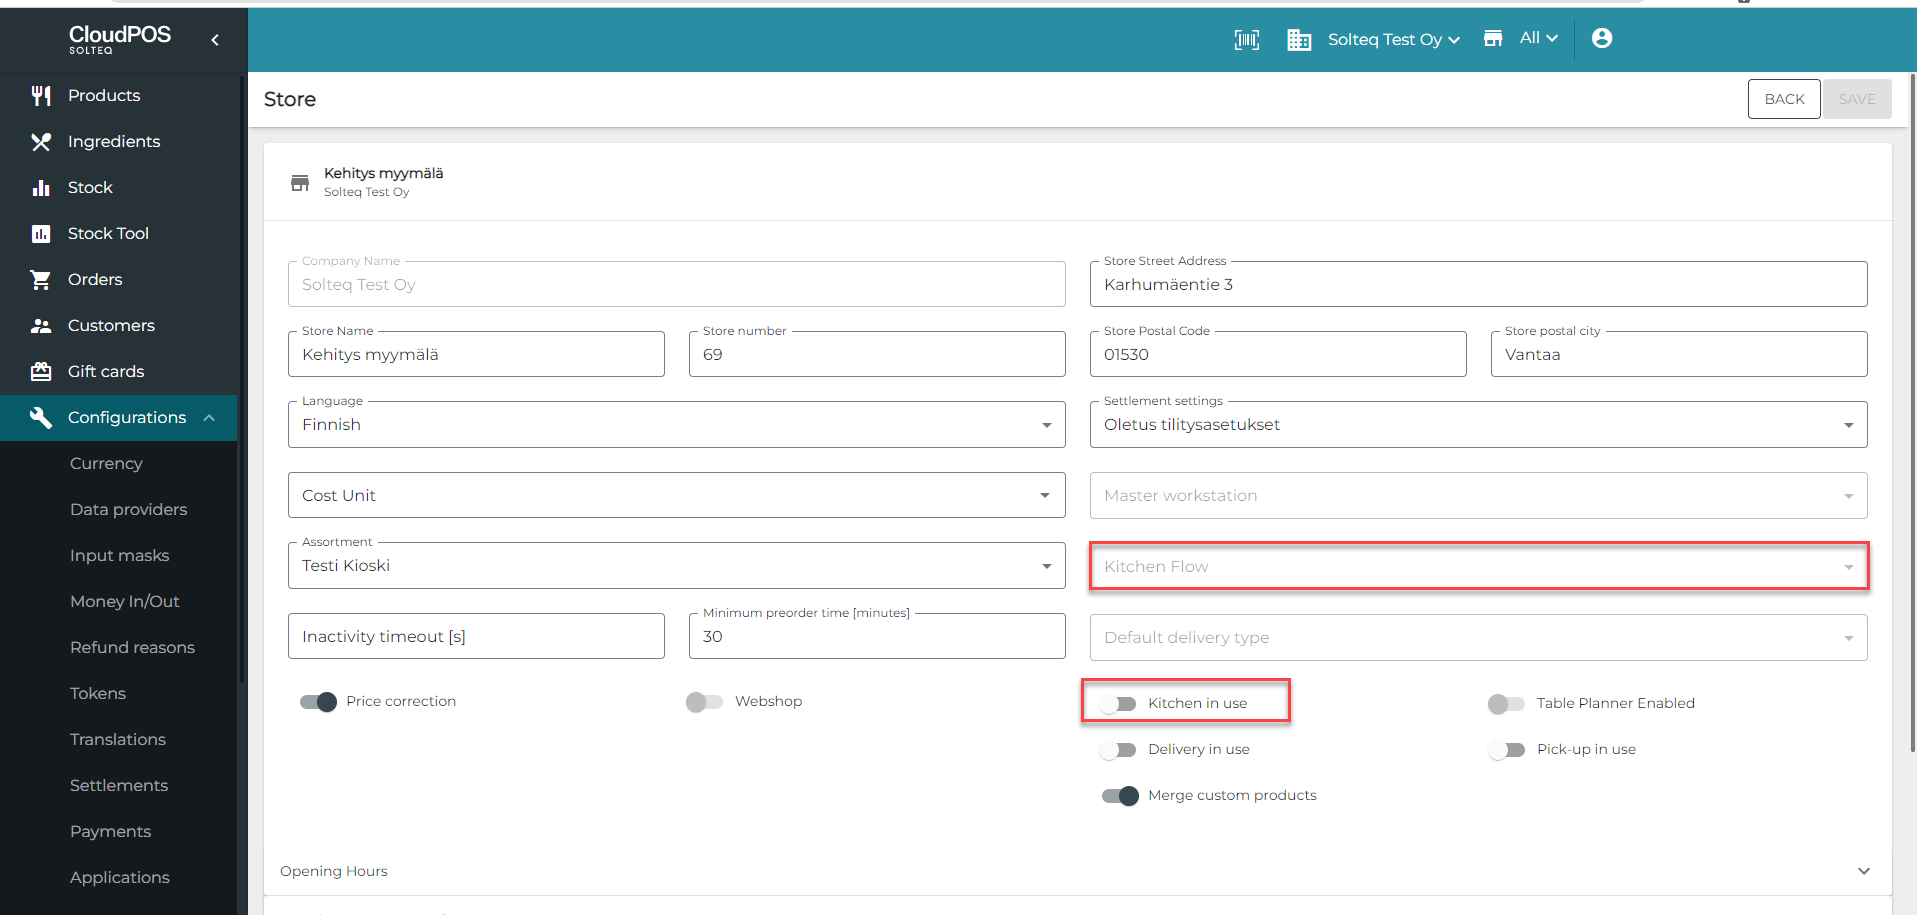
Kitchen in use setting in Store Configurations
Workstation Configurations
Configure a new payment method to the workstation used for contract catering, in the workstation’s Payment Service settings:
Add a new payment method that will be used on automatic receipt creation.
Payment type needs to be Internal.
Name of payment will be shown in receipt at the Back Office.
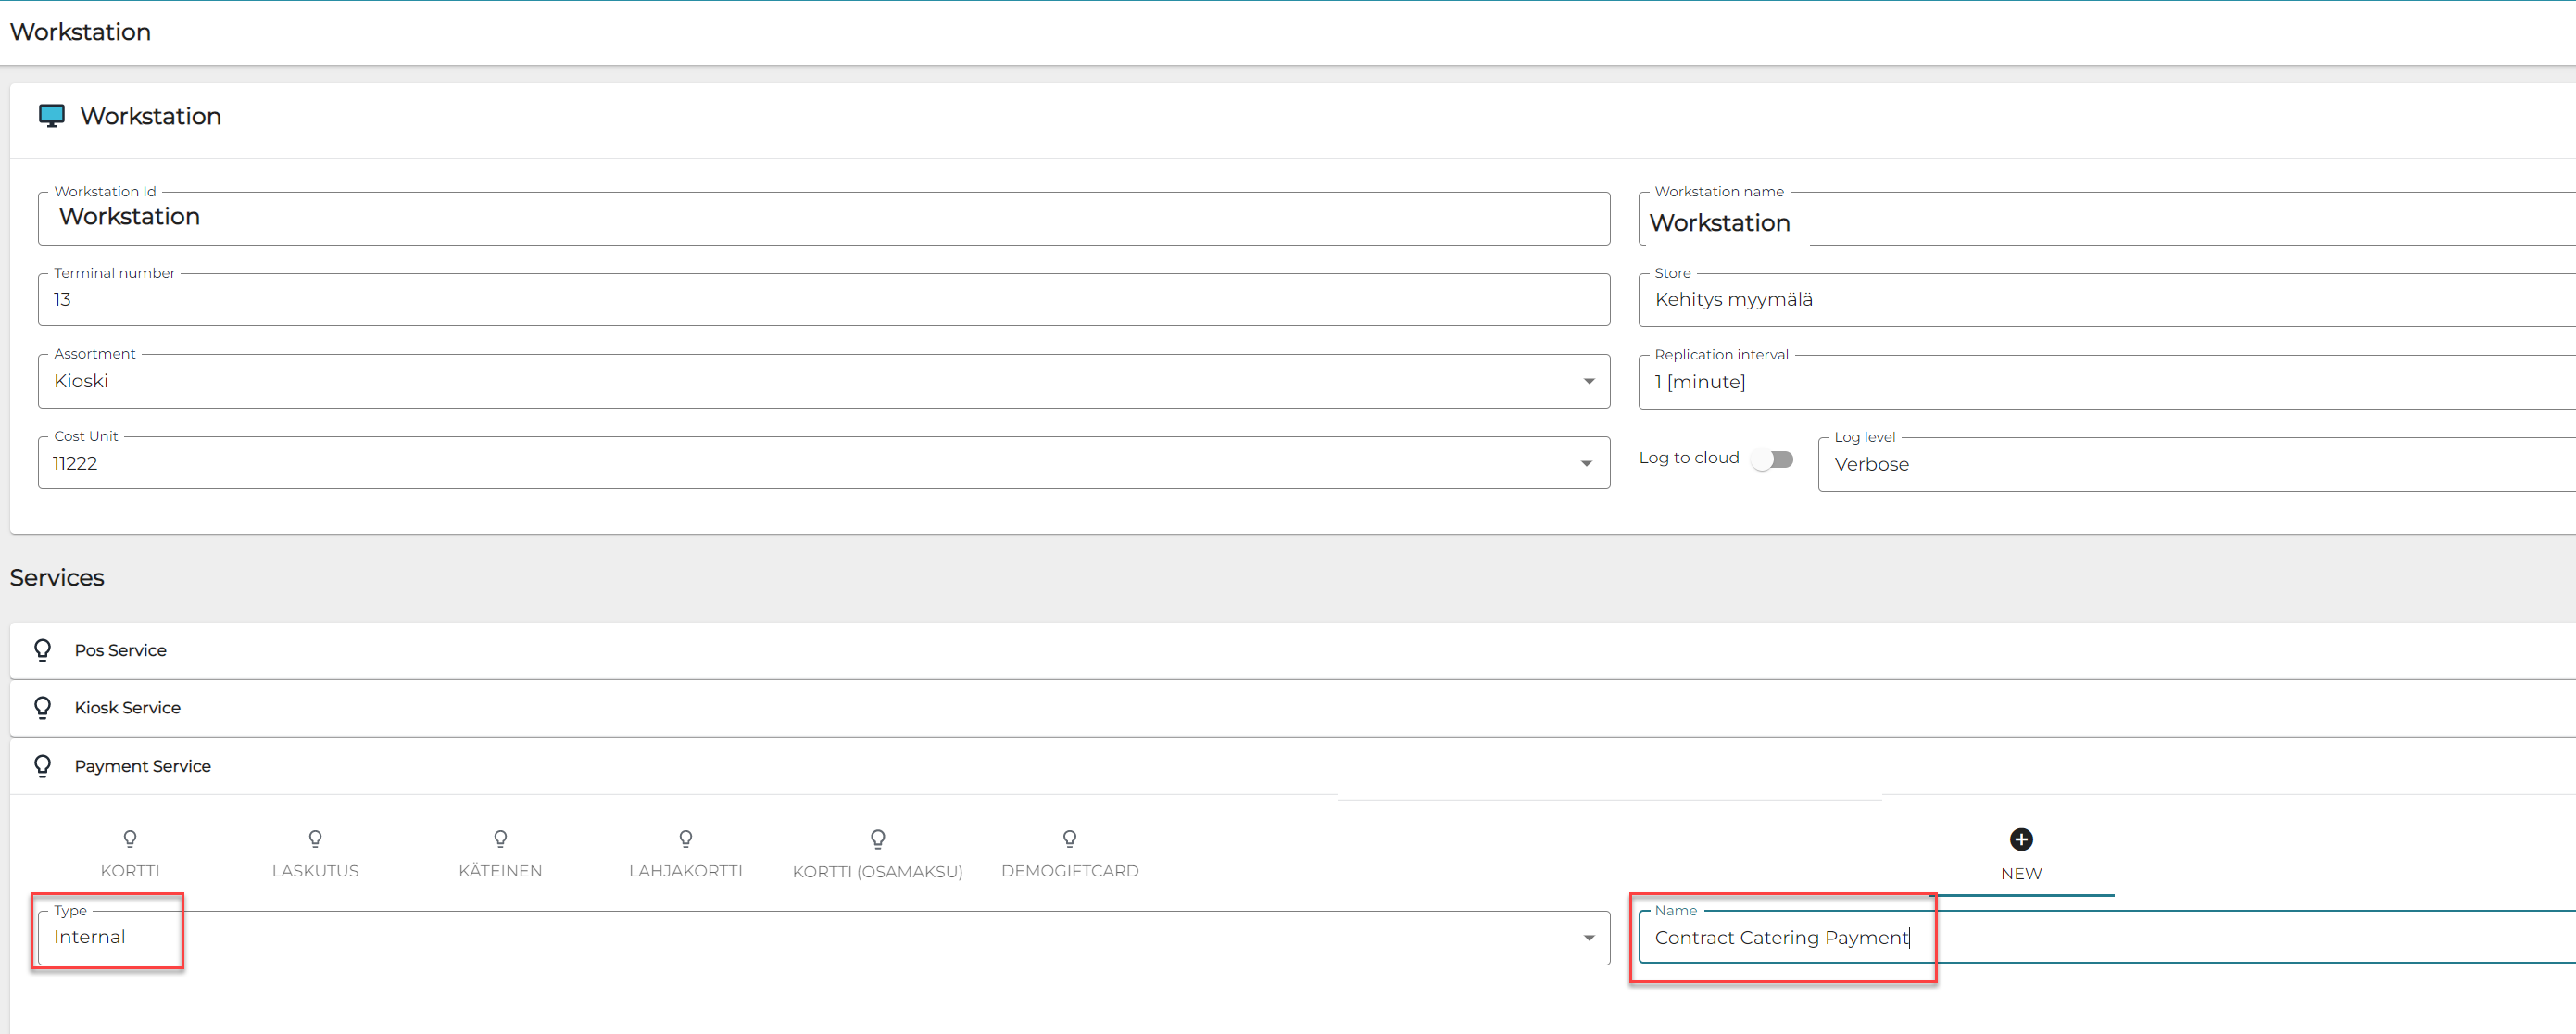
New payment method for contract catering
Enable and configure FastContractMeal service in Workstation Configurations. Note there should be only one FastContractMeal service enabled per Store
Choose the Payment Method that is used for automatic receipt creation.
Enter the names of devices that are going to be used with the application at the workstation. Device names are assigned when drivers are installed at workstation. Barcode scanner is mandatory for application to work.
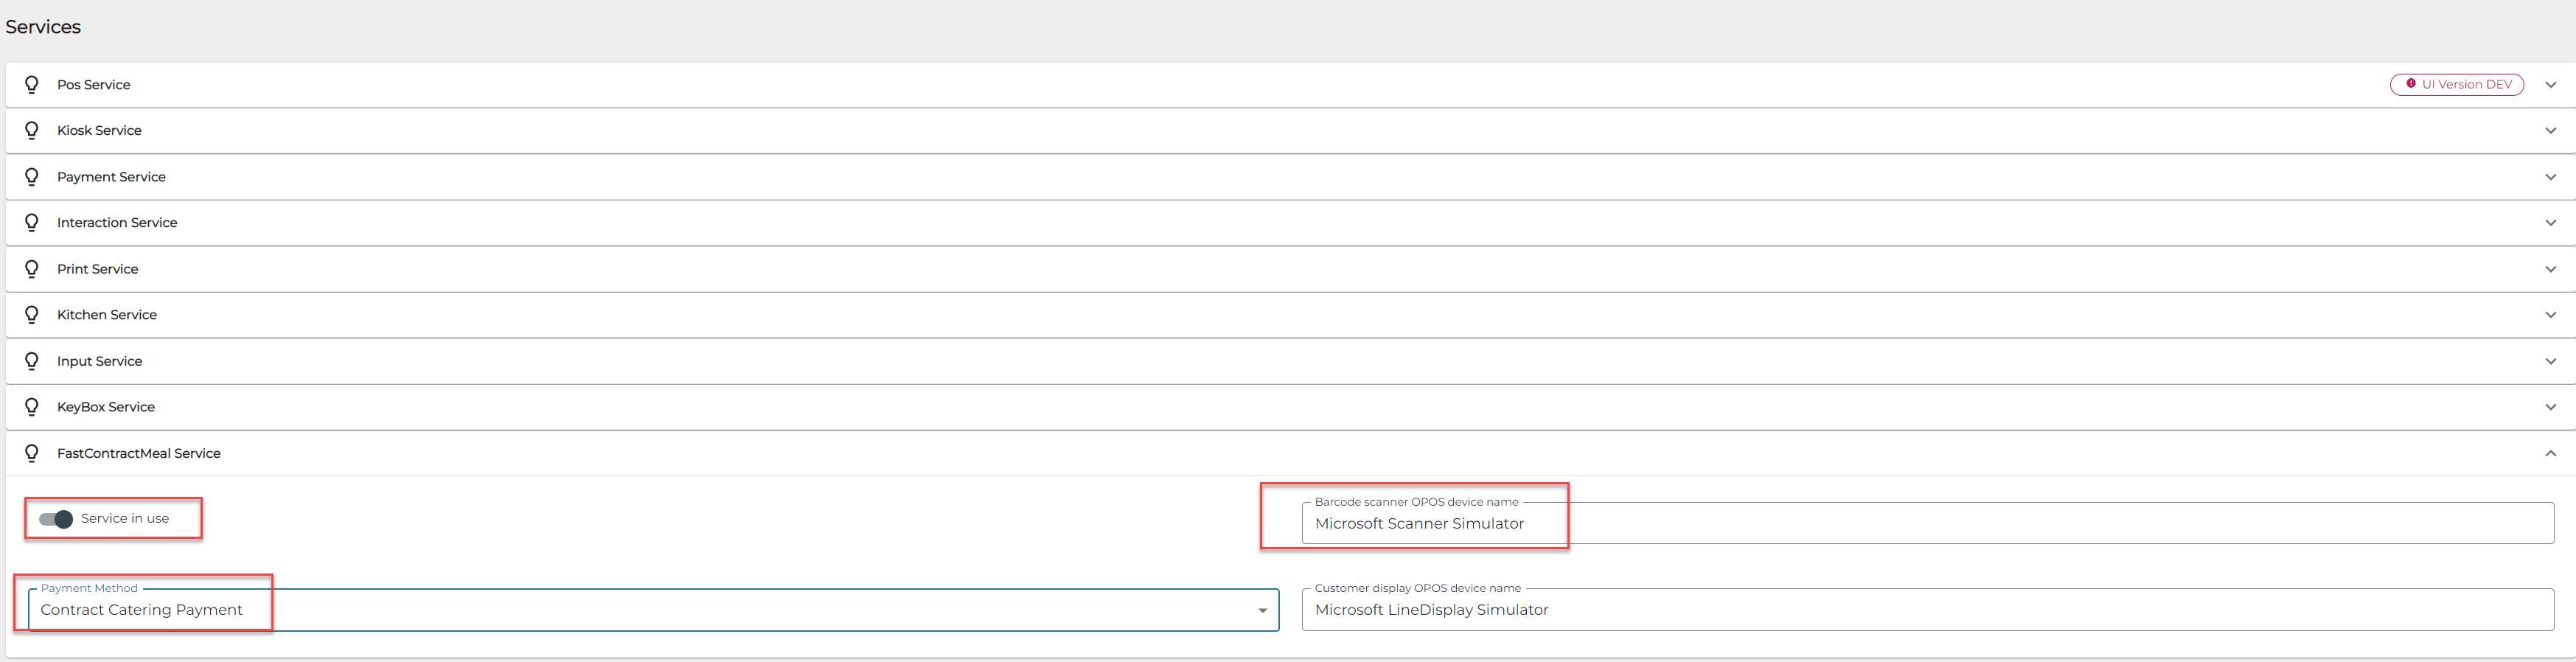
FastContractMeal Service settings
Products
Create a new basic product for each contract that is going to be used, for example breakfast, lunch, dinner. Assign correct prices for the products. This product and price are used on the automatic receipt that is created when the contract is fulfilled at the application
Use separate products for contracts that are valid during same day; for example, do not use general Meal product for Breakfast, Lunch and Dinner contracts that are used during the same day.
Customers
Create or import customers which use contract catering.
Customers need to belong at least one customer group.
Customers need to have Hashed Social Security Numbers. The application will calculate the hash when identifying customer in application and fetch customer from Back Office with the calculated hash.
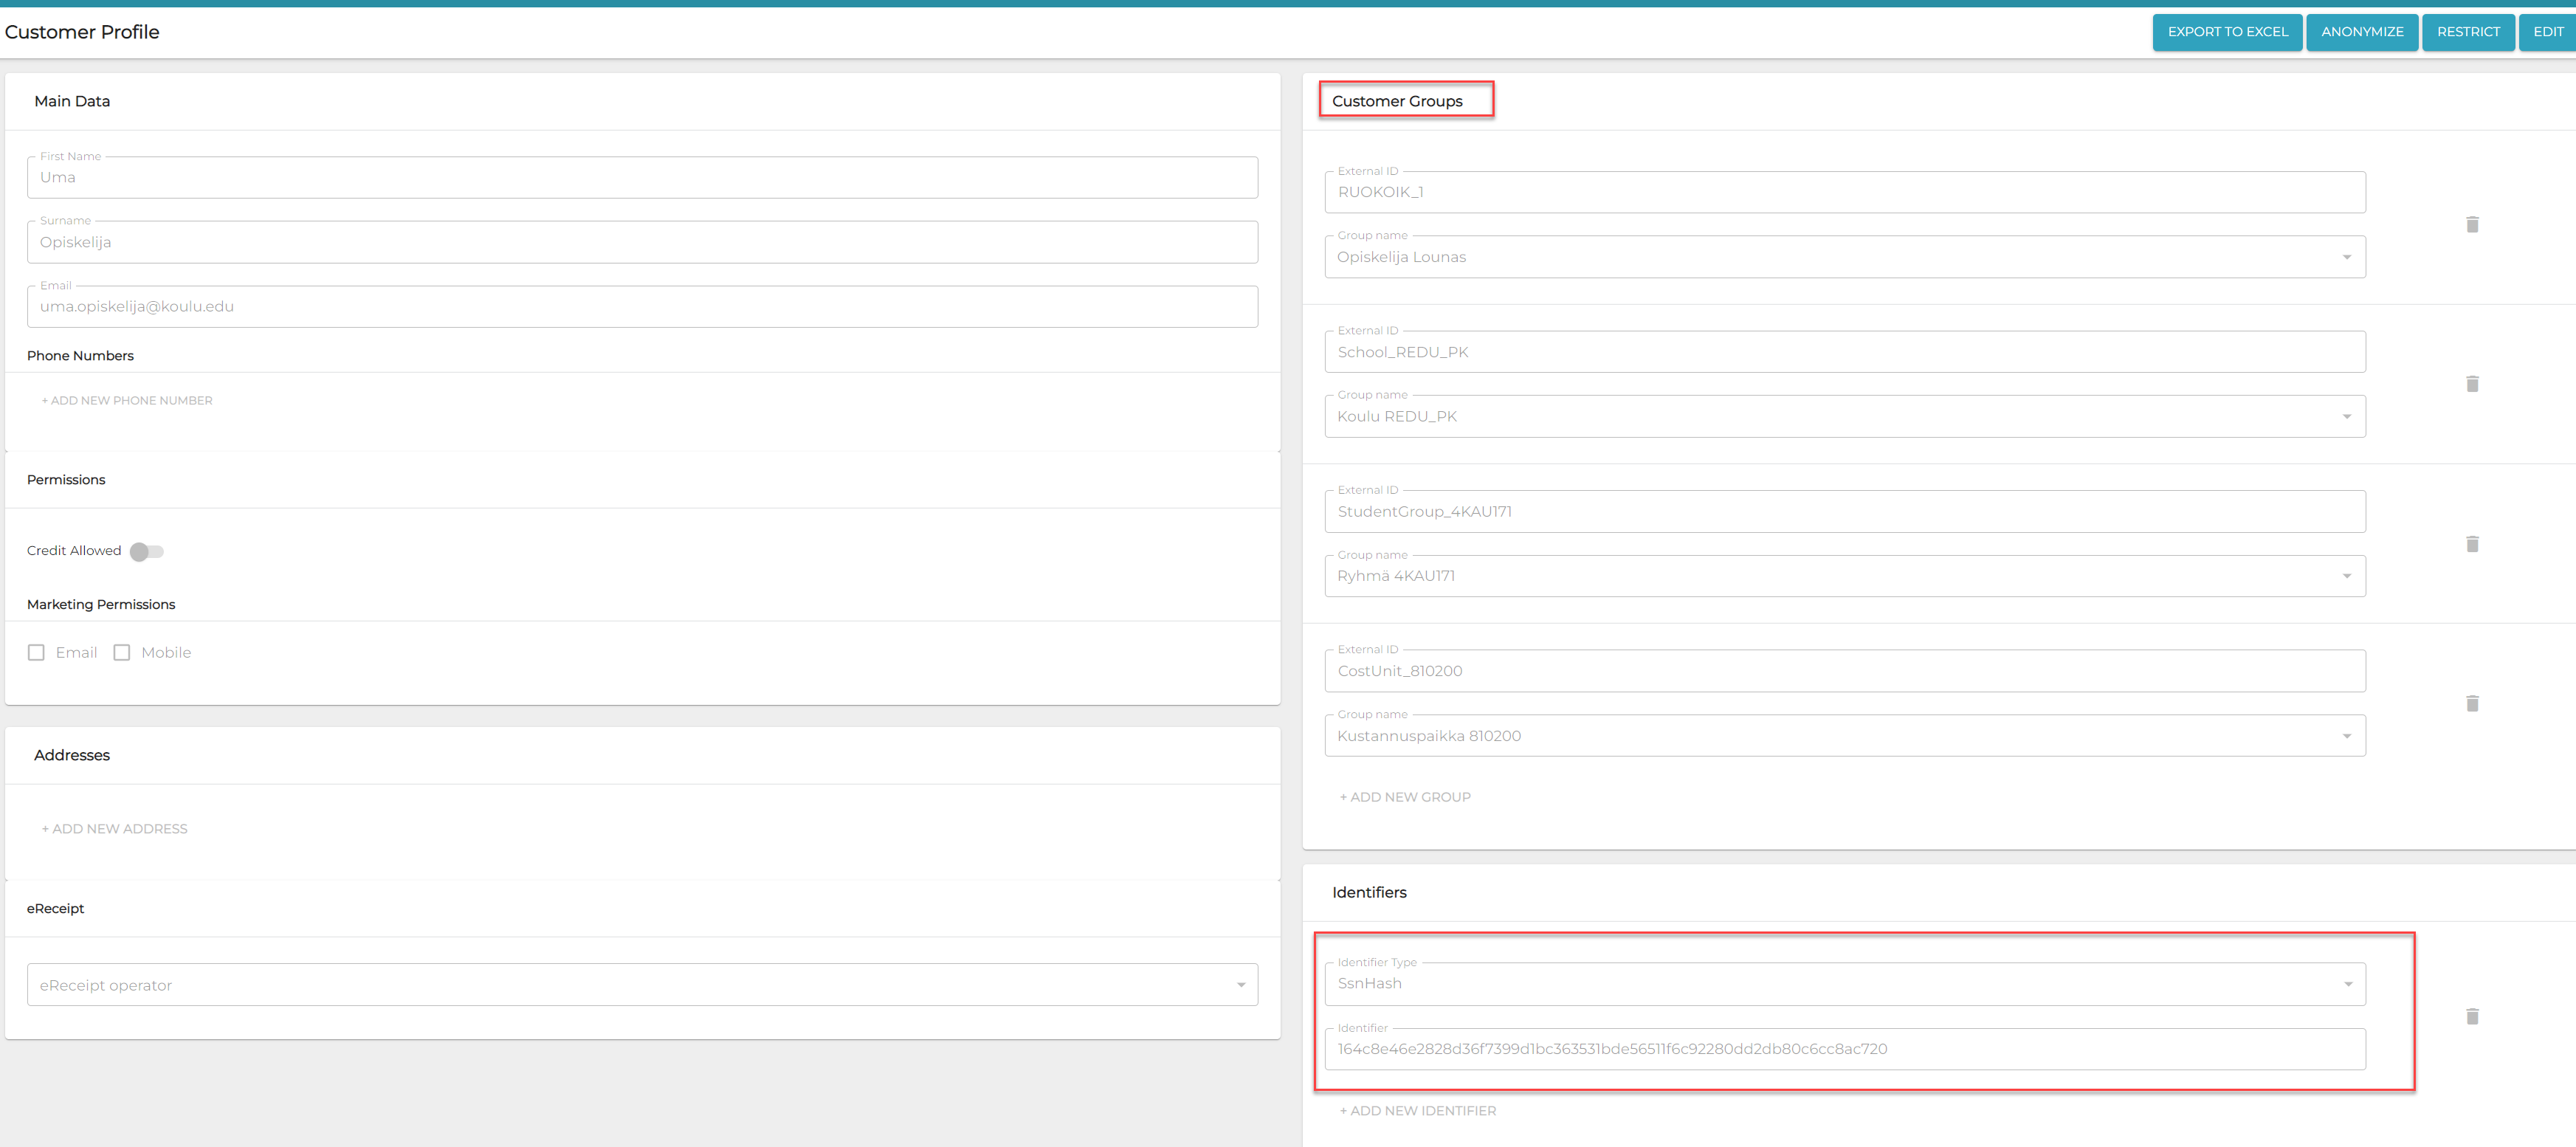
Customer settings
Contract Catering Rules
The Contract Catering view of the Back Office lists all the contract rules that have been created.
Add a new rule by clicking +Add new or modify an existing one by clicking the Edit icon (three dots) on the row of the contract.
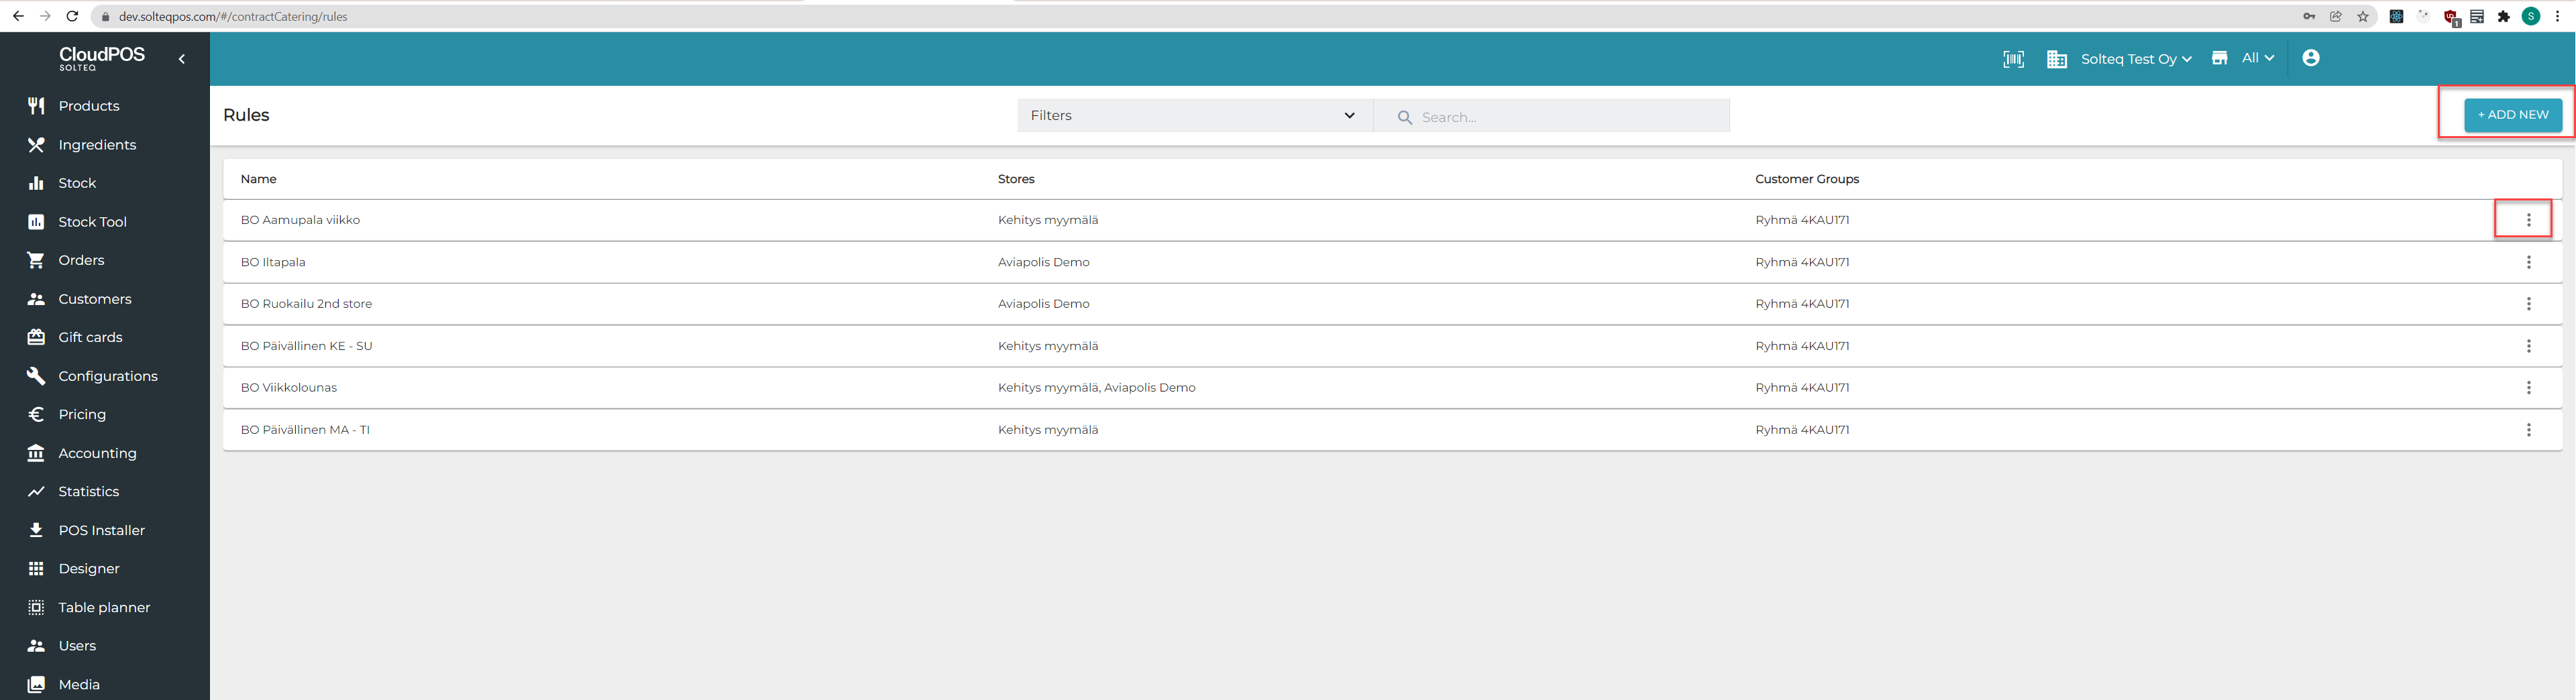
+ Add new button and Edit icon
Create new contract with the following settings:
Name: Enter a name for the rule. The name will be displayed in the application.
Description: Enter a detailed description for the rule (optional).
Stores: Choose on which stores the rule is applicable by selecting stores from the drop-down menu.
Settings
Customer Groups: Select the customer group(s) the rule is applied to.
Product: When the rule is used, a receipt is created with this basic product and its price.
Date And time
Date Between: Select the date from and date to when this rule is applicable.
Weekdays: Select Whole Week or individual days of the week when the rule is applicable. You can create different rule for example for breakfast at weekends.
Select time from and time to when the rule is applicable during day.
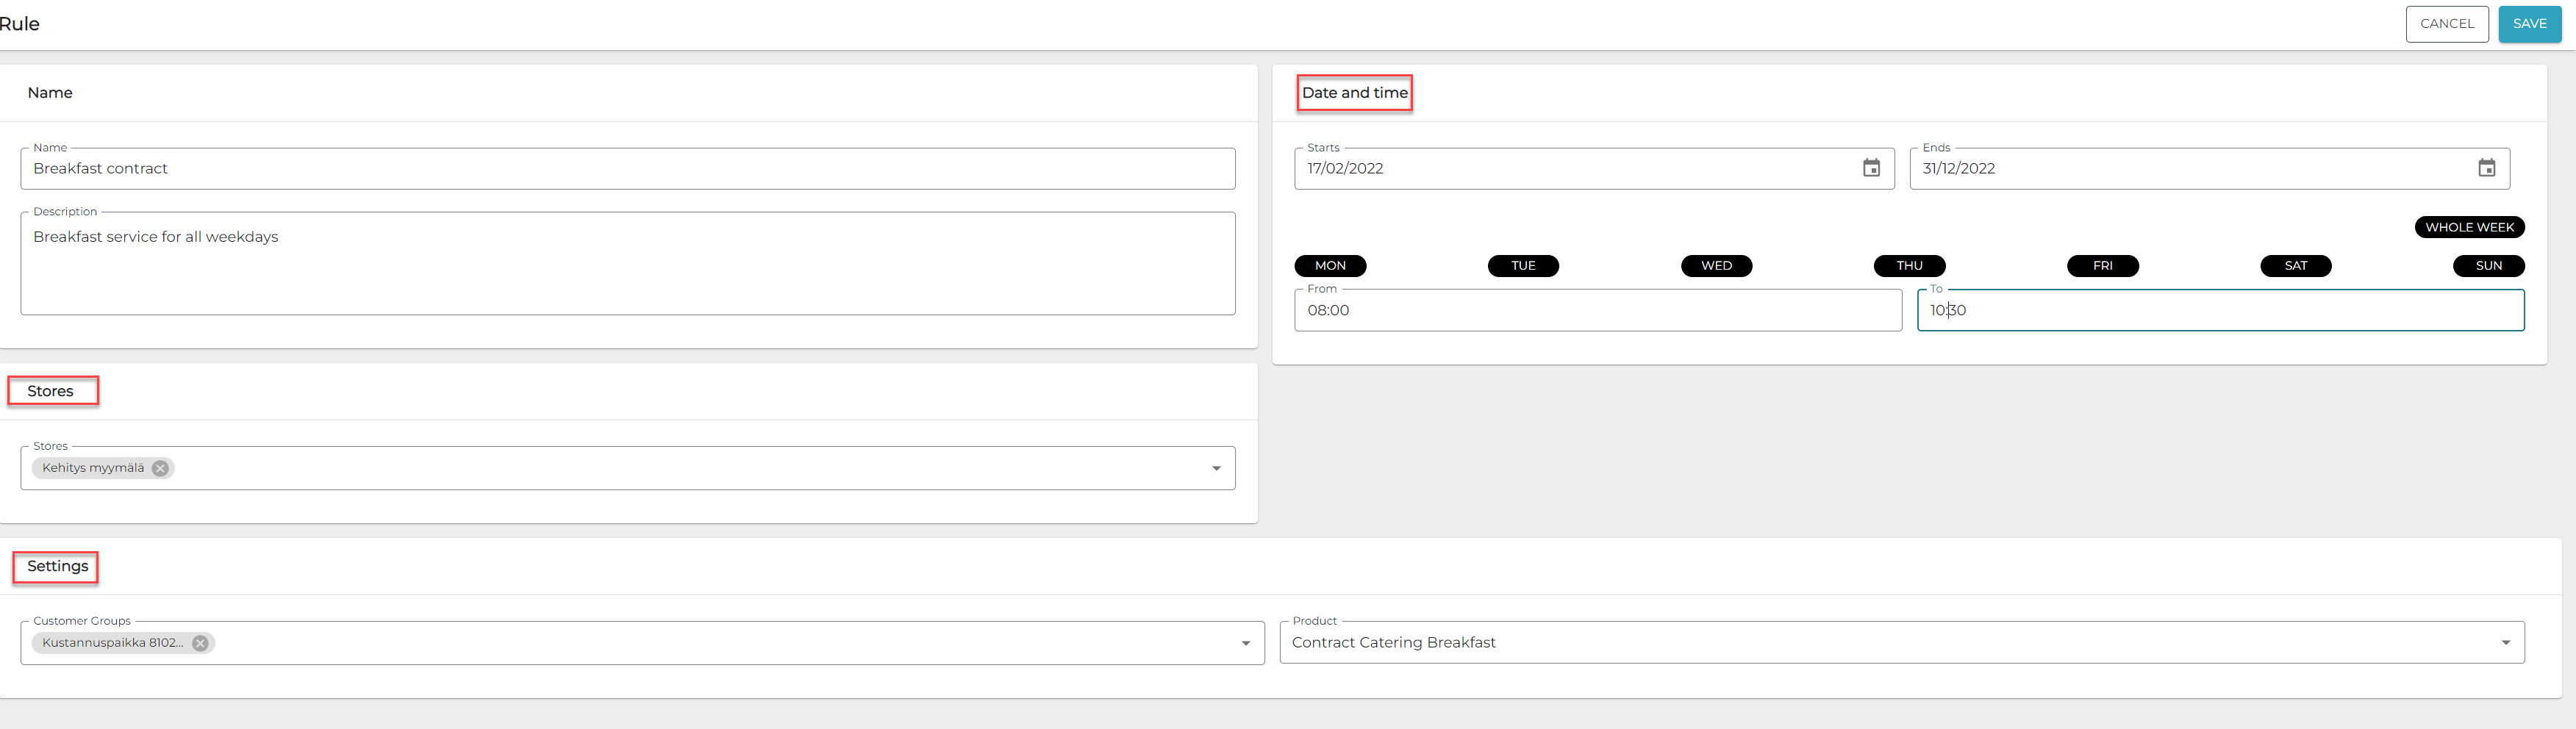
Rule settings
Click Save to save the rule.
Installation
After setting up the workstation configuration and rules, you can install the FastContractMeal service. Download the installer from Back Office:
Select POS Installers from the Back Office menu.
Click Install under FastContactMeal service, and run the installer on the workstation you have POS installed in.
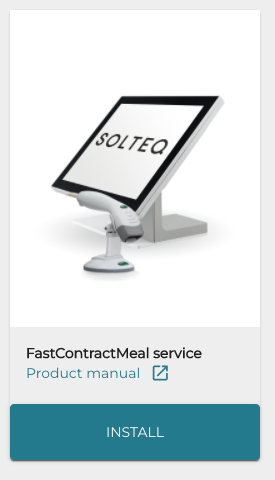
Install FastContractMeal Service in POS Installers view
Usage
After the service has been installed at the workstation, there is a shortcut on desktop of the user who installed application. As a default the application is also set to start when the user logs in if the service is enabled in the Workstation Configurations of the Back Office. The form of application is minimized to a system tray.
POS Service needs to be also running for the application to function.
From the tray, the user can either select to Show the form or shutdown the application.
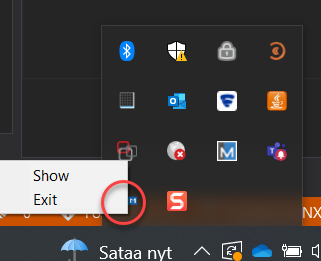
System tray
Statuses of the application are shown in the customer display. If customer display is not configured, there will be no input for the customer.
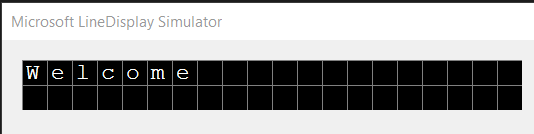
Contract Catering Customer Display
The following statuses can be displayed:
Welcome: There is at least one rule that is valid at the the moment. Comparison is made by date, time and configured weekdays.
Closed: No rules are valid at the moment. Comparison is made by date, time and configured weekdays.
Meal
OK: Customer group of customer matched one of the rules and rule is applied. A receipt is created.
Duplicate use of contract: Customer has already purchased a single contract meal during one day. No receipt is created.
Not Eligible For Meal: None of rules matched with customer group that customer is configured in. No receipt is created.
Customer Not found: No customer was found with the scanned input. No receipt is created.
Error With POSConnection: POSService is probably not running. Customer is allowed to use the rule, but the application was not able to create a receipt. No receipt created.
If the Meal status is other than OK, the workstation will make a beeping sound to inform the salesperson that something is wrong.
If Show is selected from the system tray, an applications form will pop up:
At the top, all valid contracts for day are displayed.
In the middle, all scans are registered with statuses (same as the customer display will show).
Applied contracts are saved for a single day and automatically cleaned from the program’s own database.
Bottom:
Pressing the Hide button will minimize the windows; the application will be working in the background.
Pressing the Search button will open the Manual Search window, where the user can search for customers by name or e-mail, if a scannable card is not available.
Search button is only active when there is at least one active contract.
Manual search only works in online mode.
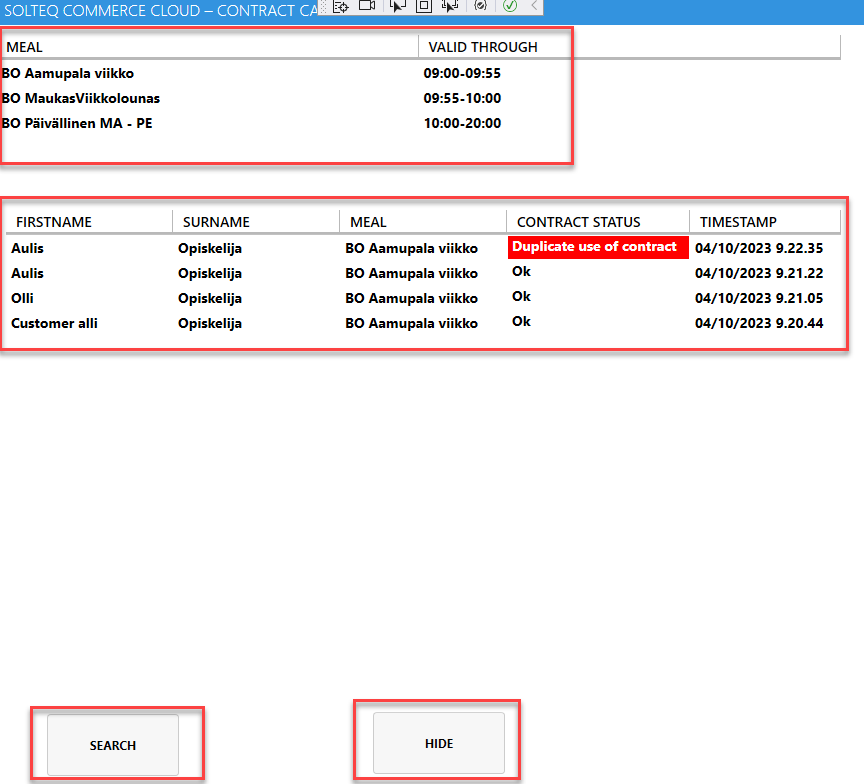
Applications form
In Manual Search:
Enter the search term in the text field on top.
In-app keyboard can be used if no physical keyboard is attached to the workstation.
Ok: Activate search (pressing Enter in the physical keyboard does the same).
Choose customer: Choose the selected customer from the search results. When the customer is chosen, the Search window will then close, and same contract logic as when using a scanner is applied.
Cancel: Close the search window without selecting customer.
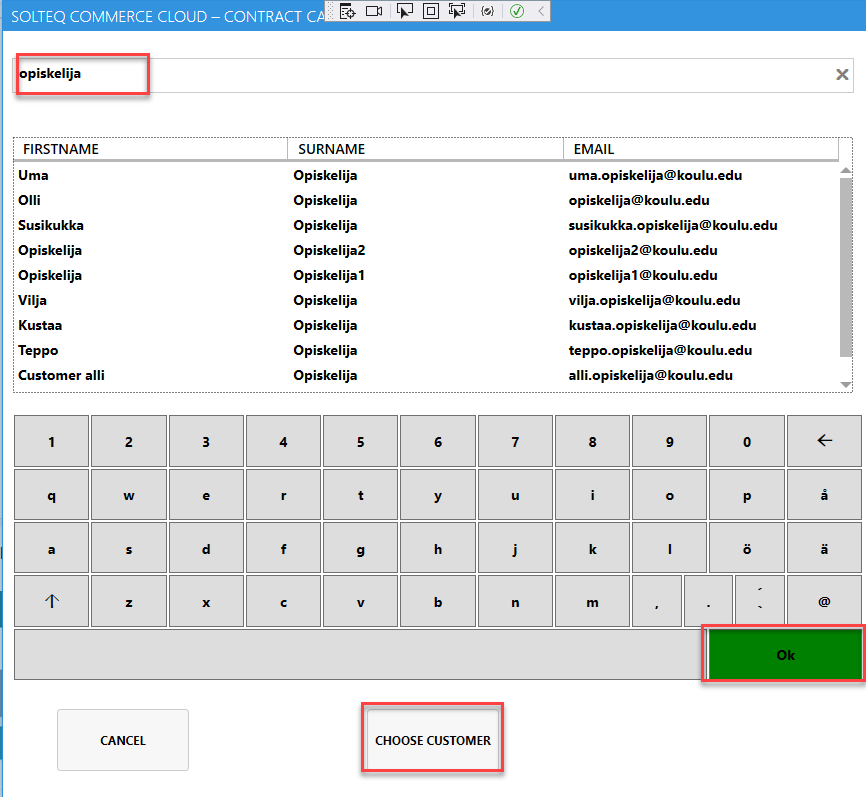
Manual Search
Contracts with OK status are created as receipts and replicated to the Back Office where reporting can take place.

Contract catering payments in Orders view
Offline Mode
The application supports limited offline mode. Offline mode means that there is no Back Office connection available. In offline mode, customers are identified only as general “offline customers”. If there is any available contract active at the date and time of the purchase, the customer is allowed to use it. Receipts generated in the offline mode are replicated to the Back Office when the offline status is resolved.
Testing instructions
To test without real physical devices, you can install Pos for DotNet installer with SDK to get virtual devices. The Package can be fetched from https://www.microsoft.com/en-us/download/details.aspx?id=55758
During the installation, select also SDK to be installed.
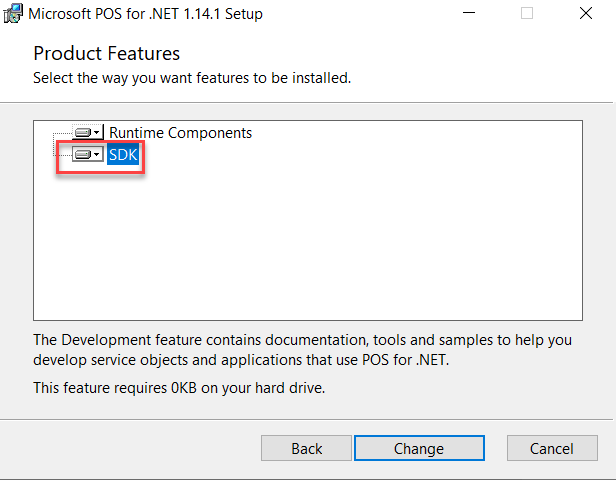
SDK selected
After the installation, configure the service with Microsoft Scanner Simulator and Microsoft LineDisplay Simulator virtual devices. Devices will pop up when the application is started

FastContractMeal Service configurations