
-
In the Back Office menu, click Pricing.
-
In the Regular Prices view, click+Add new
-
In the Regular price view, enter the Name for the the new price list, and add a Description (optional).
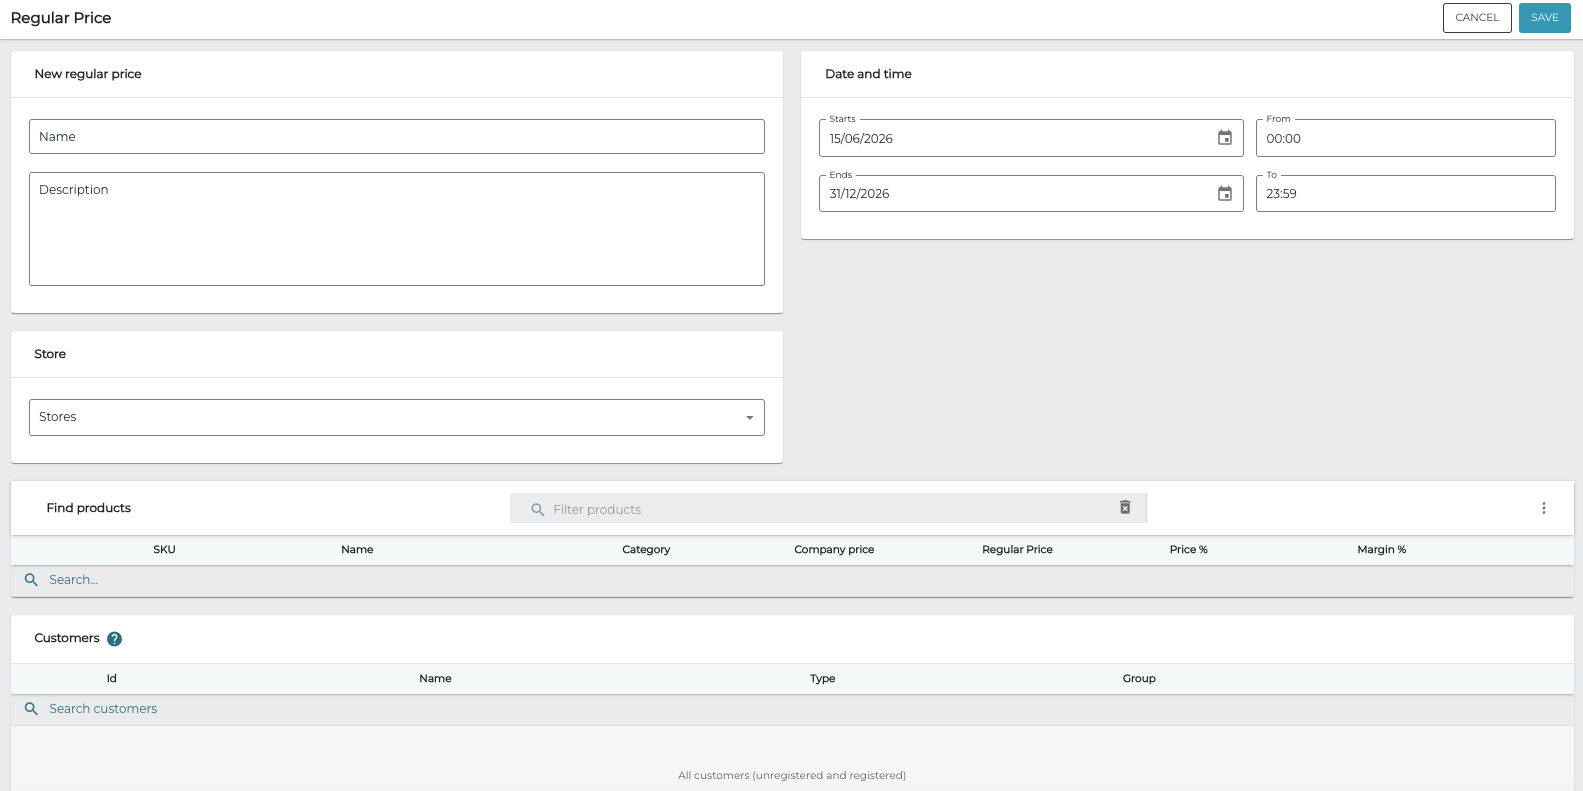
New regular price settings
-
Select the start date & time and end date & time for the price list.
-
Select the Stores where the price list will be used.
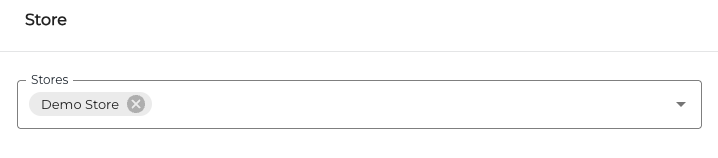
Store selected -
Select the products for which the new prices will be implemented.
-
Select a single product
-
Enter a search term for a product in the Search field.
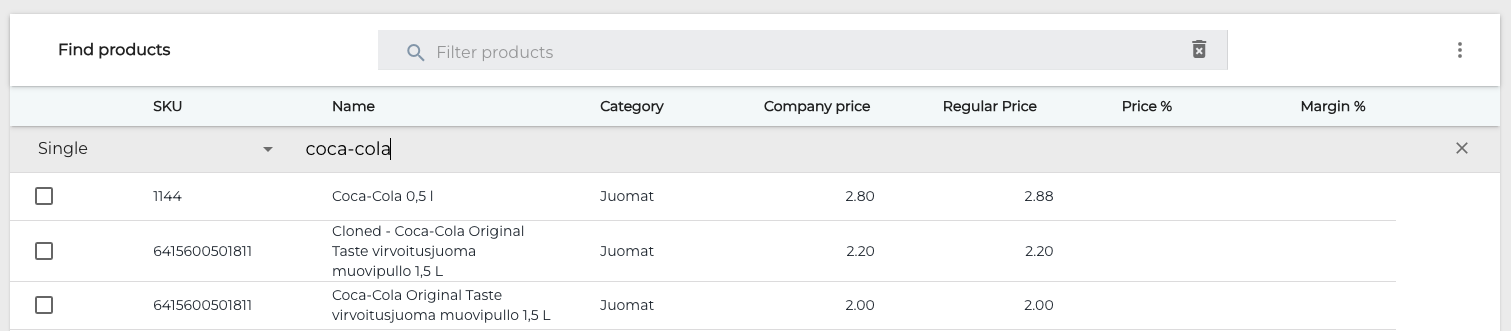
Single product search
-
Click the checkbox on the row of the product which you want to add to the price list.

Entering a new regular price
-
-
Select a product category
-
Click Single and then choose Category from the menu.
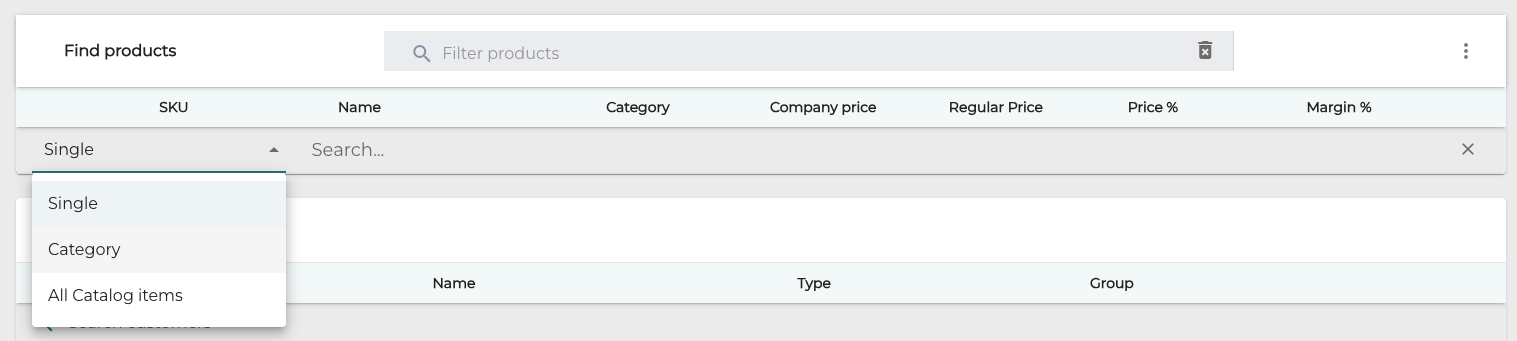
Single/Category/All Catalog items selection
-
Choose the category type.
-
Enter the category name; the system will display the search results.
-
Click the checkbox in the Category column to add all the products belonging to the category to the price list.

Product category found
-
-
Select all catalog items:
Click Single and select All Catalog Items from the menu.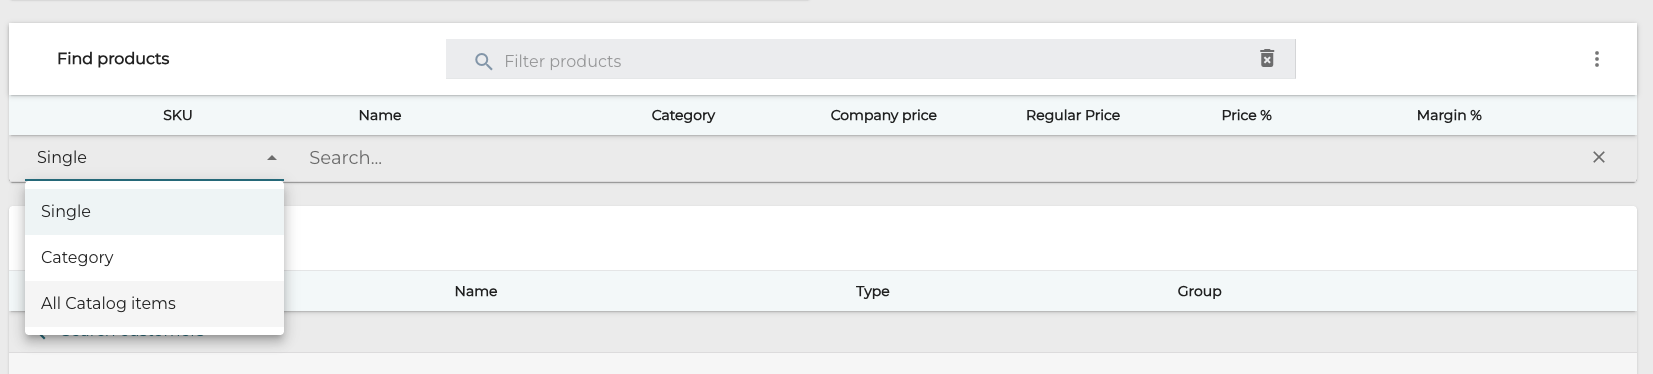
Single/Category/All Catalog items selection
-
-
Enter new Regular Price(s) for the product(s) you have selected for the new price list:
-
The original price of the product is displayed in the Company Price column.
-
You can enter the price in either currency (Regular Price column) or percentage of the Company Price (Price % column).
-
To enter a price increase in percentage, use the format 110 (for example, for 10 percent increase).
-
-
Margin % is recalculated automatically when the new Regular Price is applied.
Entering a new regular price
-
-
If needed, add new products/product categories and enter new regular prices for them.
-
(optional) If you want the price list to be specific for a customer or a customer group, select Single or Group in the Customers section, and then select the customer(s) or customer group(s) you want to define the price list for.
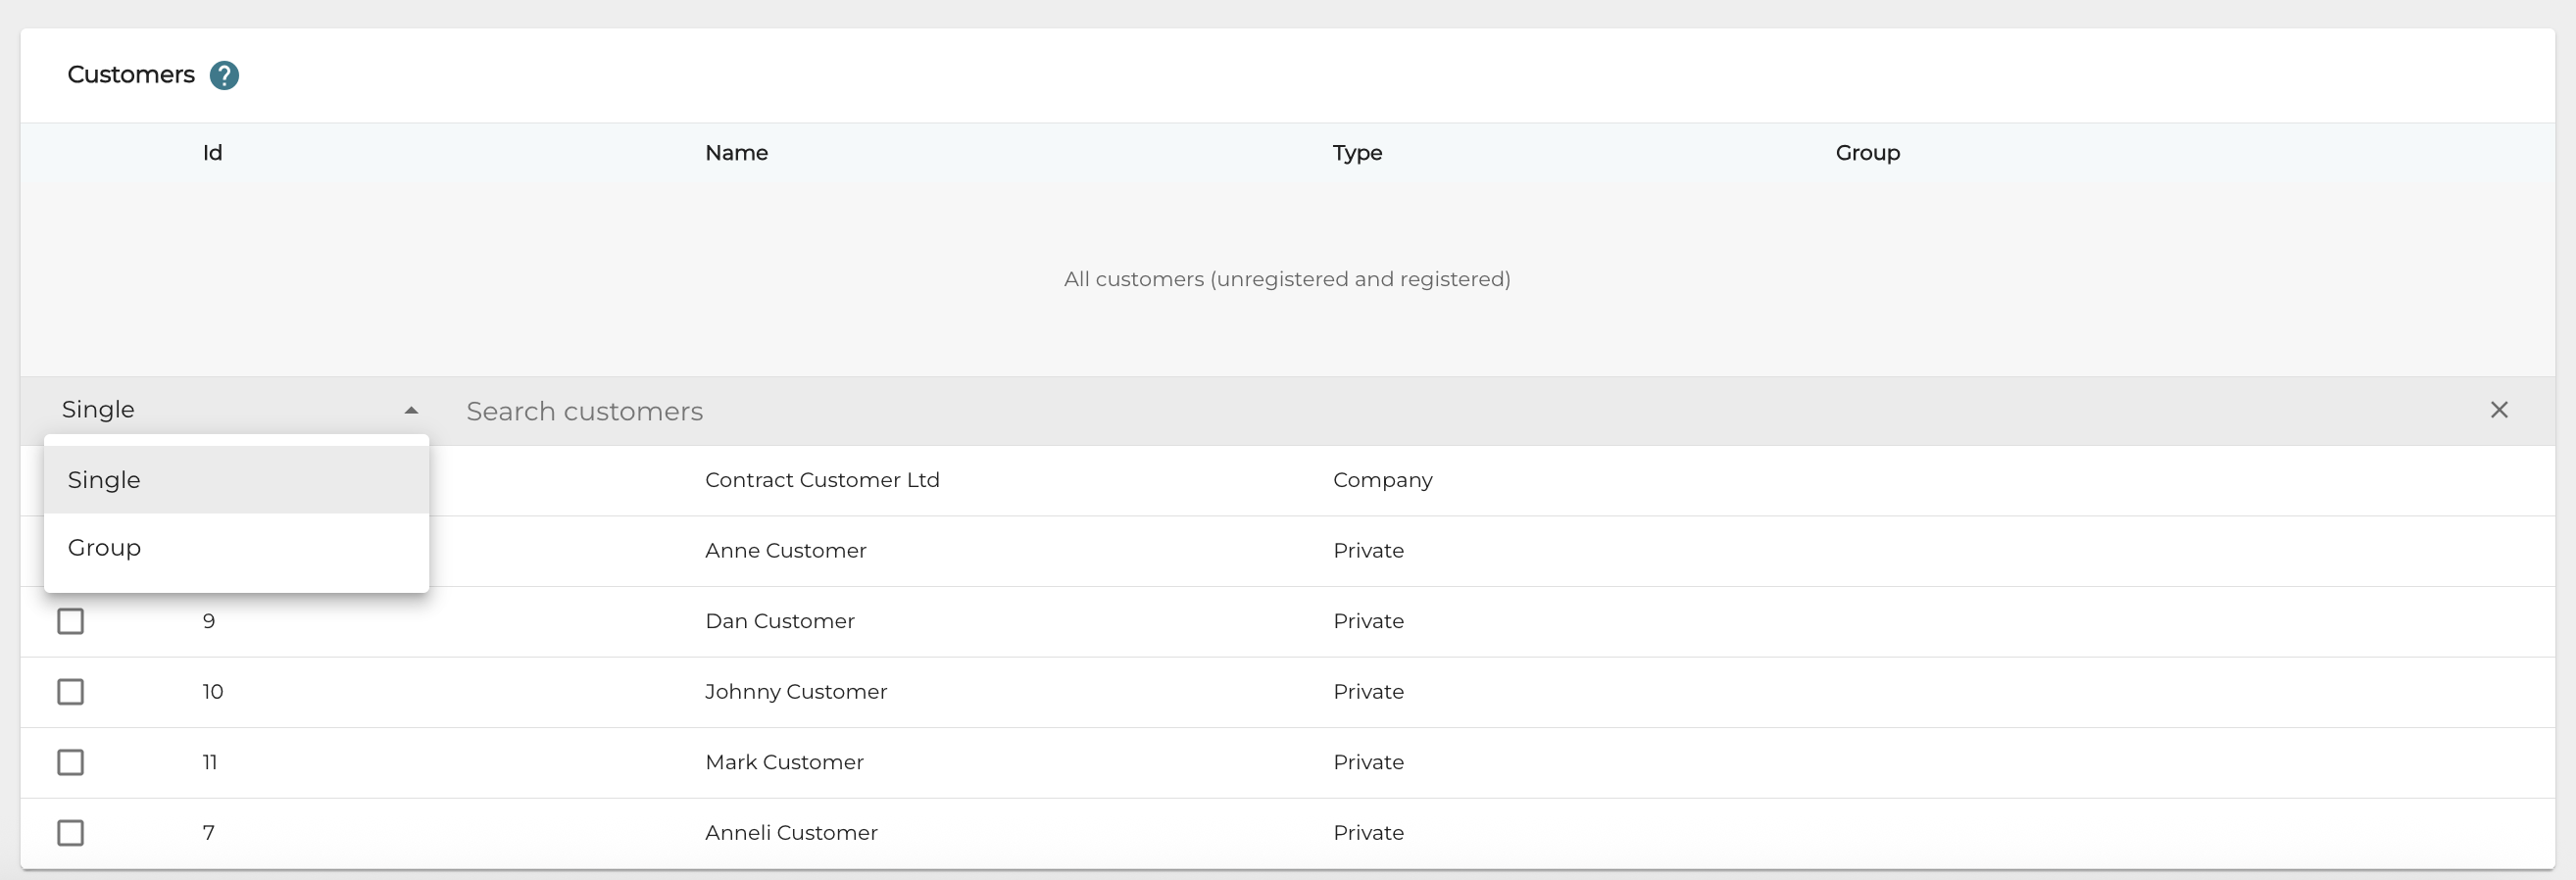
Selecting customers/customer groups for a regular price -
To save your new price list, click Save.