
Creating Tiles for POS Layout
You can create Product, Ingredient, URL and Action tiles by clicking the Add new tile icons in the POS Layout Designer.
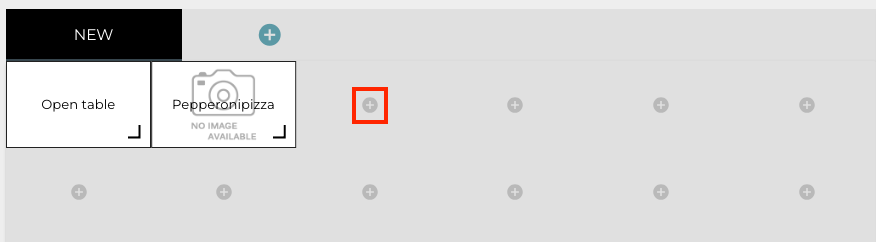
Add New Tile icon in the POS Designer
Tiles need to be created separately for all tabs (unless you are using a custom footer; its tiles will be visible in all tabs).
You can freely change the size and position of tiles by dragging and dropping them into the grid. You can also define the name as well as background and text colour for the tiles.
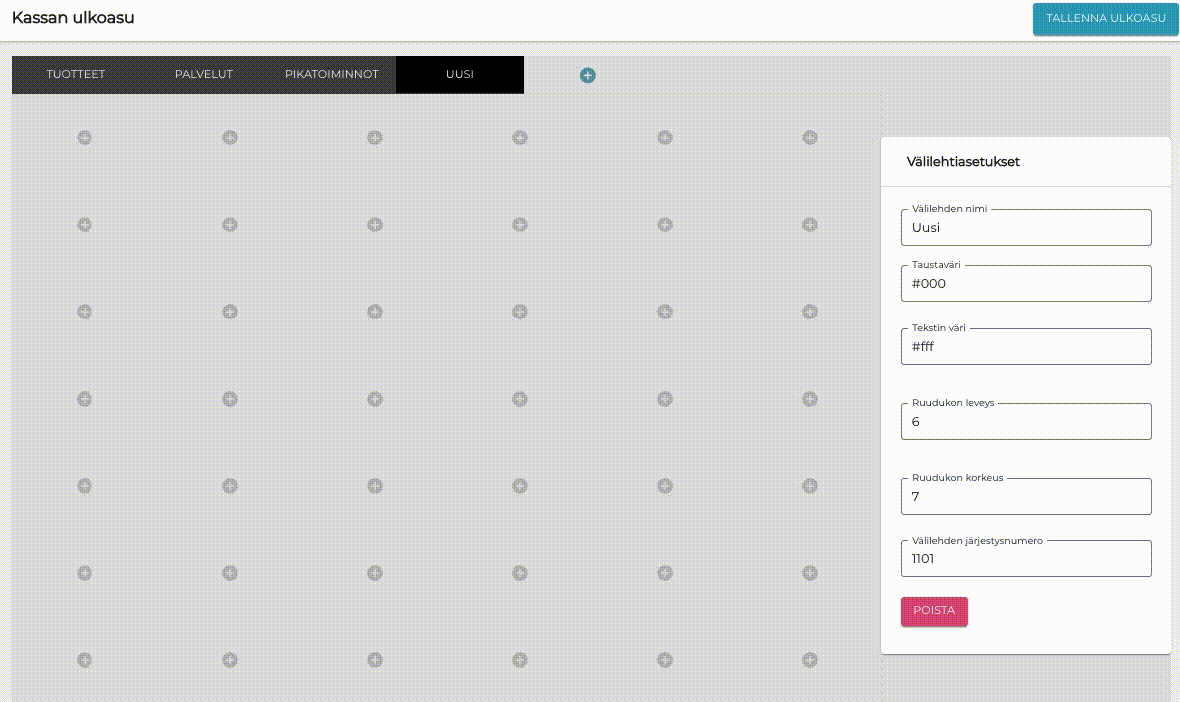
Adding tiles to the POS layout
To delete a button, select the button and click Delete.
Tile Info
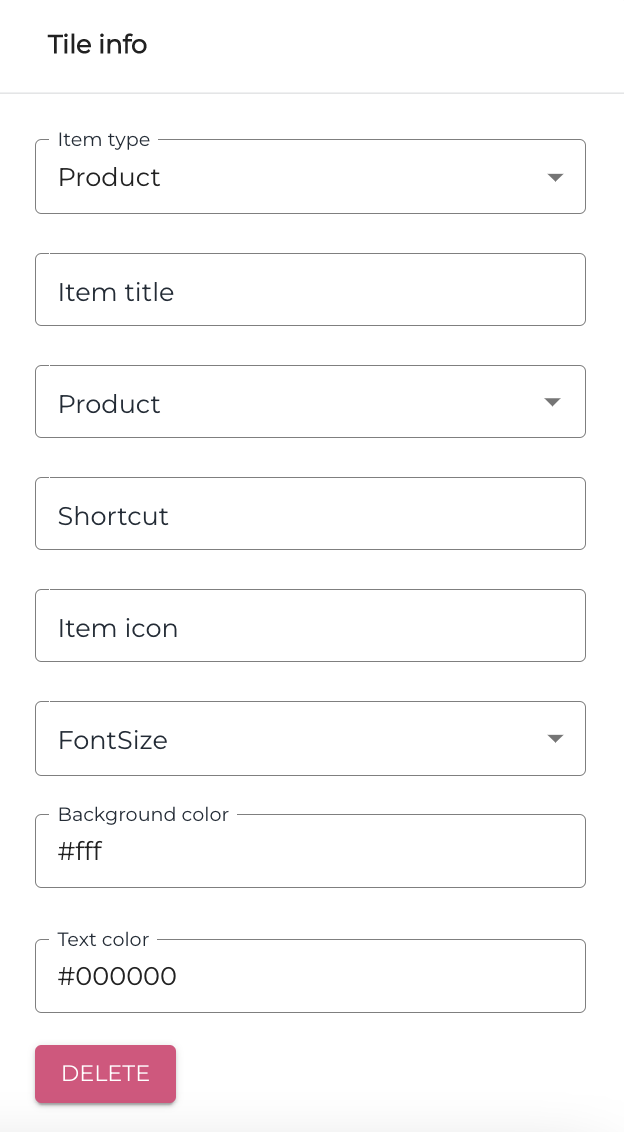
Tile info
You can define various settings for the tiles, described below.
Item Type
Select the type of the tile from the drop-down menu.
Product
If the selected item type is Product, pressing the tile will add the product in question to the basket. Select the product in the Product field, by using the drop-down menu or searching for the product by entering its name or part of its name in the field.
Ingredient
If the selected item type is Ingredient, pressing the tile will add the ingredient in question to the basket. Select the ingredient in the Ingredient field, by using the drop-down menu or searching for the ingredient by entering its name or part of its name in the field.
Url
If the selected item type is Url, pressing the tile will open a link (to Back Office main view or POS Layout Designer, for example). Enter the link in the Item Url field.
Action
If the selected item type is Action, pressing the tile triggers an action. Select the action by clicking the drop-down menu in the Action field.
Saving the POS Layout every time you have created a new tile is recommended.
Action | Description |
|---|---|
Add free text | Adds a pre-defined text to the receipt, or displays a field where the text can be entered and added to the receipt. Pre-defined text will be added to the receipt if the Default content field has text content. In addition, there are two optional fields:
|
Apply discount | Applies a discount. Required fields are:
|
Change amount | Enables changing the amount of the last product that has been added to the Basket. |
Change price | Enables changing the price of the last product that has been added to the Basket. |
Clear receipt | |
Custom cash report preview | Generates a custom end-of-day report. |
Delivery | Displays the Delivery window. |
End-of-Day | Starts the Daily Cash Settlement. |
End-of-Day for another POS | Starts the Daily Cash Settlement for another workstation. |
Find Z-reports | Opens Z-report search. |
Find customers | If customer has not been selected, opens customer search. If customer has been already selected, adds the customer in the basket information. |
Find products | Opens product search. |
Find receipts | Opens receipt search. |
Find web payments | Opens web payment search. |
Journal Report | Opens a view for sending a journal report to an e-mail address. |
Kiosk | Enables manual opening and closing of self-service kiosk. Normally the open hours of self-service kiosk are dependent on kitchen open hours; this functionality enables overriding those settings. |
Logout | Enables logging out from the POS. Functions in a similar manner as the Log Out button in the bottom lefthand corner of the POS screen. |
Menu | Opens the POS menu. Functions in a similar manner as the Menu button in the bottom lefthand corner of the POS screen. |
Merge basket with parked order | Enables selecting a parked order and merging the Basket contents with it. |
Money In | Opens the Money In functionality. |
Money In for another POS | Opens the Money In functionality for another workstation. |
Money Out | Opens the Money Out functionality. |
Money Out for another POS | Opens the Money Out functionality for another workstation. |
Negative row | Use the in the Product drop-down menu in the tile settings to select a product; the product will be added to the Basket with a negative price when the tile is pressed. If no product is selected in the tile settings, the POS switches into Refund Mode when the tile is pressed. |
Open cash drawer | Opens the cash drawer. |
Open tab | Opens a new tab. Select the tab from the Tab dropdown menu. |
Open table | Opens the table planner. |
Orders unsent to kitchen | Opens the list of orders that have not been sent to the kitchen. |
Park order | Enables parking the order and resuming it. |
Print last receipt | Prints the last receipt generated in the POS. |
Refresh | Checks whether there are updates to the configurations. |
Refund mode | Activates Refund Mode, if not active; if Refund Mode is active, deactivates it. |
Refund product | Select a product in the tile settings; when the tile is pressed in the POS, it will add the product to the Basket in Refund Mode. |
Sales report | Generates the sales report in the POS, according to the configurations. The report can be configured when the tile is created or afterwards:
|
Seats | Opens a separate window for adding the required number of seats to the table |
Scan | Simulates barcode scanning. With this action you can directly input the product barcode (SKU) manually; this is useful in situations where the barcode on the product has been damaged, for example. The action can also be used to create new products in the POS; enter a simple SKU (for example: 205554) at the start of the product creation. |
Search External Customers | Opens external customer search. |
Search External Products | Opens external product search. |
Search External Referral | Opens external referral search. |
Sell gift card | Enables selling gift cards. |
Send to Kitchen | Sends order to kitchen. |
Set price | Changes the price of the last product row in the Basket to the price defined in the tile settings. |
Settings | Displays the POS settings. |
Split check | Enables splitting the check. |
Split payments | Opens the Split Payments functionality. |
Start payment | Starts payment for the contents of the Basket; salesperson can select between the available payment methods. |
Start/End Shift | |
Stock out | Activates Stock Out Mode. |
Terminal administration | Opens the Terminal Administration view in POS. |
X-report | Opens the X-report preview. |
Z-report | Opens the Z-report preview |
Item title
Text which is visible in the POS tile.
Font Size
Font size of text visible on the tile. Select size from the dropdown menu:
Small
Medium
Large
Extra Large
Shortcut
You can use the Shortcut functionality to define a keyboard shortcut for the tile. When the defined key (or combination of keys such as Alt+J) is pressed in the POS keyboard, this will then activate the same function as pressing the corresponding tile in the POS.
Item Icon
Default icons are available for most functions.
Examples of item icons
The following table contains a list of default Commerce Cloud item icons. To use one of the icons, insert its URL in the Item icon field of a tile. You can also use your own icons/URLs, if needed.


Background Color
Defines the background color of the tile.
Text color
Defines the text color in the tile.