
In the following example you are shown how to set up HP LM920 Pole Display as the customer display.
HP LM920 Pole Display Configuration for OPOS
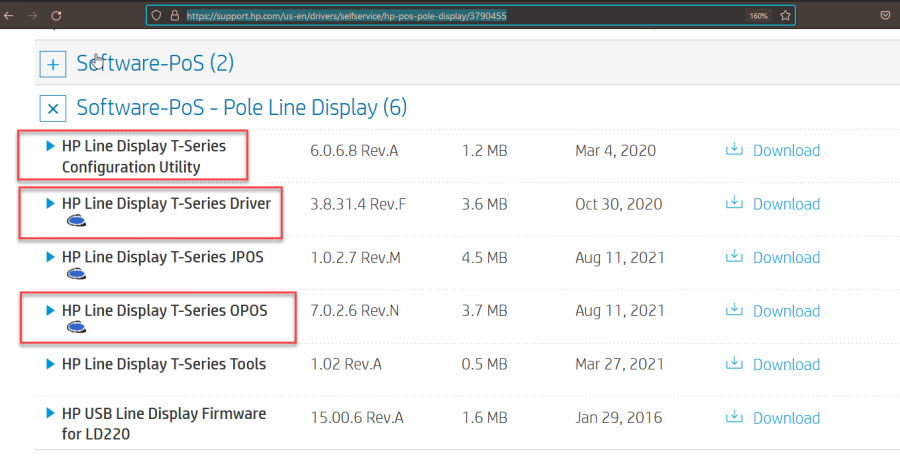
Configuration utility for PoleDisplay: sp113058.exe.
Downloads
https://support.hp.com/us-en/drivers/selfservice/hp-pos-pole-display/3790455
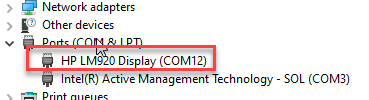
Install HP PoleDisplay Driver (SP110509)
After successful installation, the device is visible in Device Manager → Ports as HP LM920 Display.
Install OPOS Driver (SP132848)
-
In installer, uncheck the unwanted USB devices.
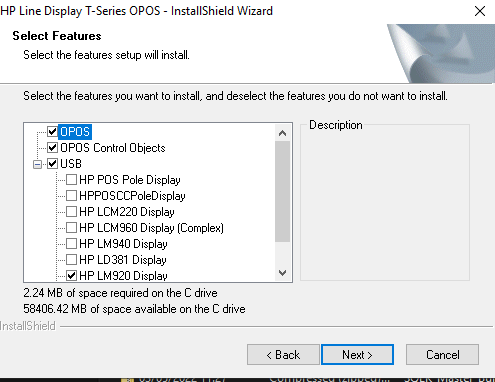
Features to select in installer
-
After successful installation, the installed OPOS devices are visible in Windows registry.
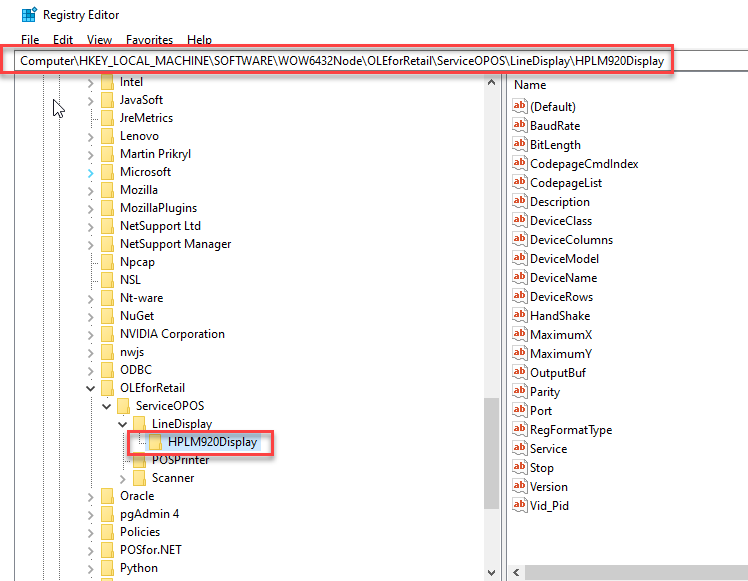
Installed OPOS device in Windows registry
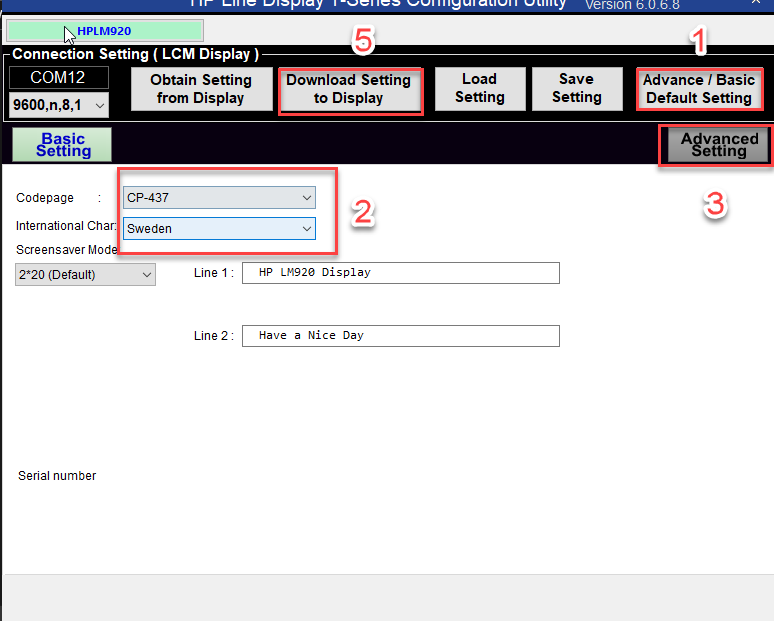
Install and Run Configuration Utility (SP101457)
-
Reset display to default settings.
-
Set Codepage to 437 and International Char to Sweden.
-
Go to Advanced Settings.
-
Check that the Command setting is ULTIMATE.
-
Download setting to display.
-
Display will restart, and will display the settings during restart.
-
Close the Configuration utility before starting FastContractMeals app.
-
Back Office Configurations
Interaction Service
-
In the Back Office menu, click Configurations and select the workstation you want to use with the customer display.
-
In the Workstation Configurations, go to Interaction Service and click New.
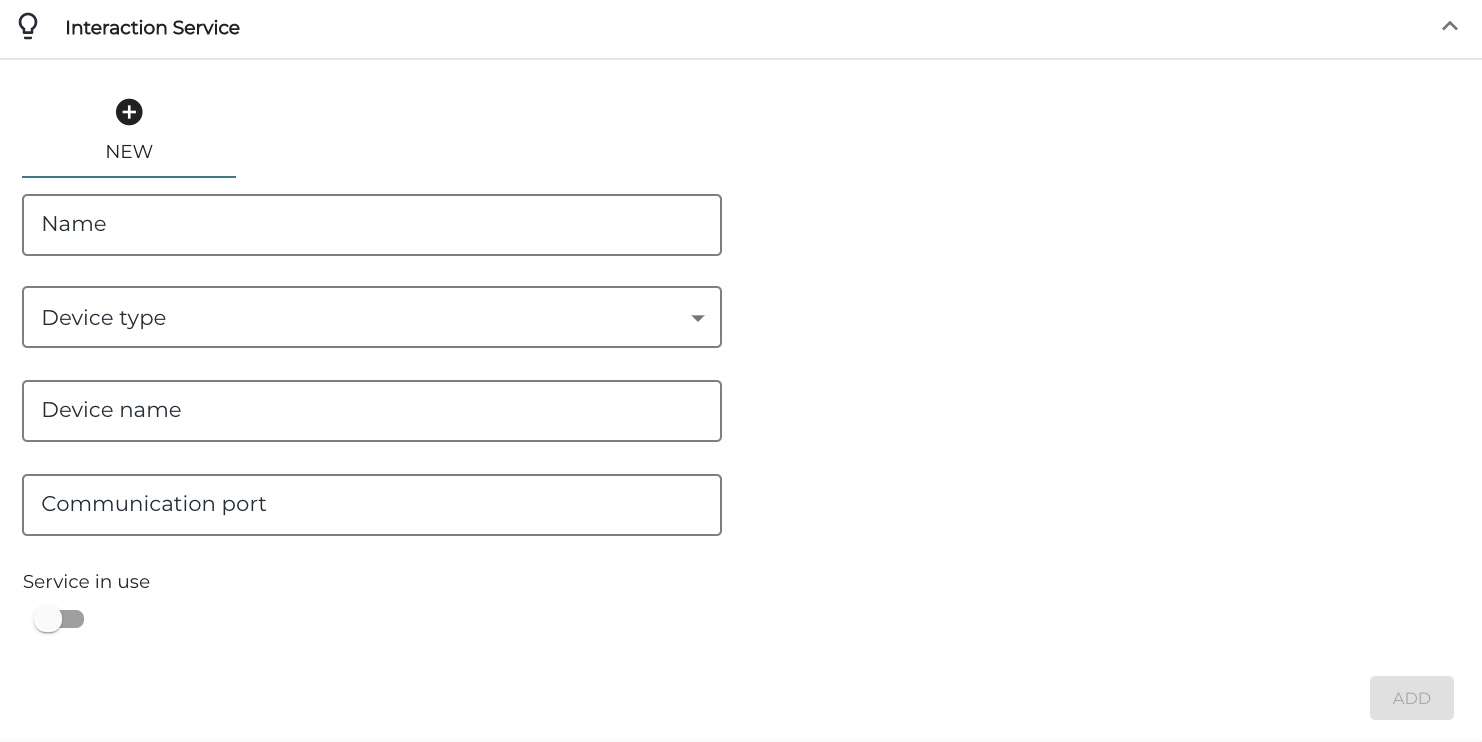
New interaction service -
Enter the following information:
-
Name: Name of the display (for example, Customer Display)
-
Device type: OPOSdotNETLineDisplay
-
Device name: HPLM290Display
-
Communication Port: You can leave this empty.
-
-
Click the Service in use switch to ON position.
-
Click Add to add the new configuration to the workstation
-
Click Save to save your changes.
FastContractMeal Service
-
In the Back Office menu, click Configurations and select the workstation that is running the FastContractMeal application.
-
Go to the workstation’s Services list, select FastContractMeal service, and enter the value HPLM920Display to Customer Display OPOS Device Name field.

FastContractMeal Service settings -
Click Save to save your changes.
-
FastContractMeal application needs to be restarted after OPOS device name is changed in the Back Office. It takes a few of minutes to replicate the new information to POS, unless Refresh is manually used on the POS.